
Elfin Forest Hike: To Lake Hodges Overlook
Lake Hodges Overlook Trail
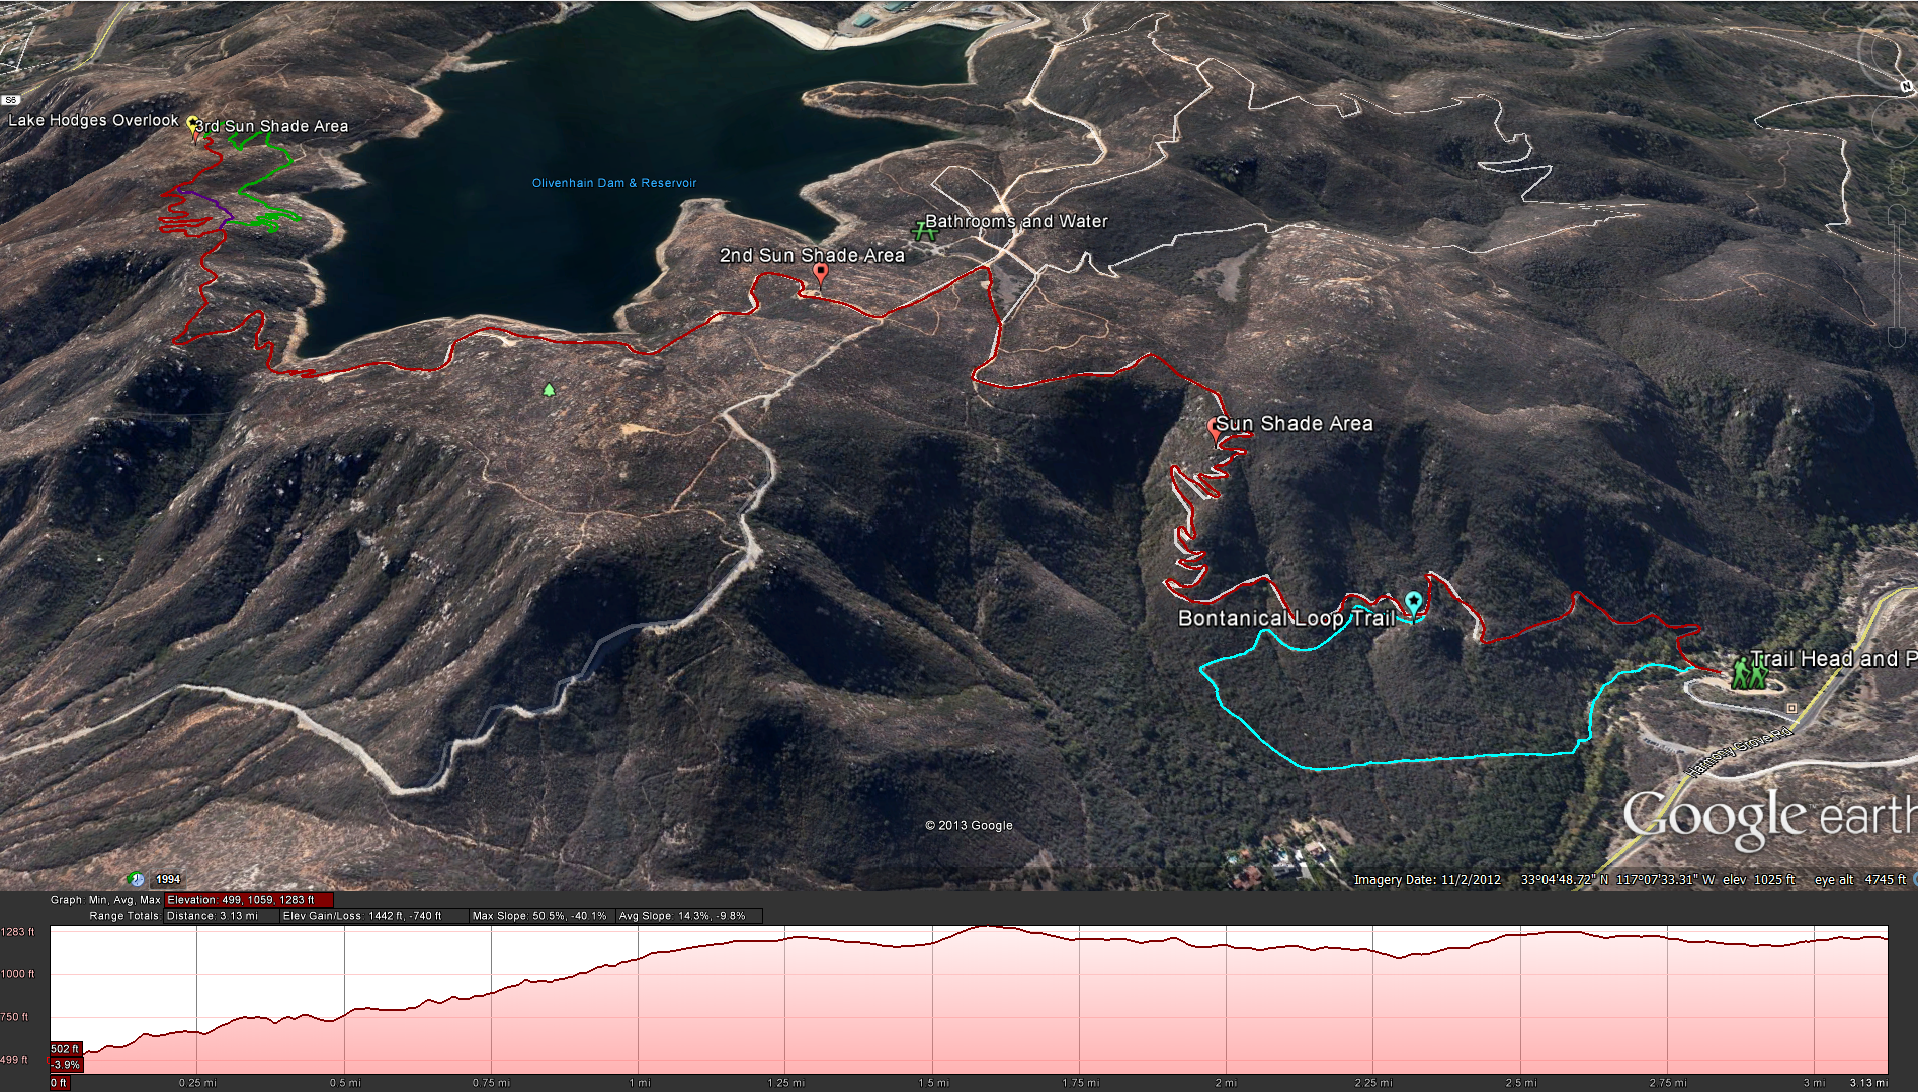
Google Earth Lake Hodges Overlook Trail
Total Distance: The whole trail is about 7.5 miles long, out and back. The way up trail is 1.5 miles long and will take you 25-45 minutes depending on your fitness level. From there the loop to the Lake Hodges overlook is about 2.32 miles long.
Time to Complete: Give yourself about 3-4 hours.
https://mapsengine.google.com/map/edit?mid=zaAdmGVAqABg.kcfRp5ohq0ZI
Map:http://olivenhain.com/files/docs/Park/trail-map2010.pdf
To Get there:
Take the 15 north or south to Escondido, take the West Valley Parkway exit. Take a left and head south west on West Valley Parkway to 11th ave. Take a right onto 11th ave, at the end of the street take a quick left onto S.Hale Ave and then a quick right onto Harmony Grove Rd. Follow Harmony Grove Road over the little river and take a left onto Harmony Grove Road (haha), follow it through a little industrial area and then take another left on,…wait for it….Harmony Grove Road : ) Follow Harmony Grove road for about 2 miles or so until you see the Elfin Forest sign on your left. Park down at the Elfin Forest Recreational Area
If you have kids and get a chance to come here during the hours when the interpretive center is open ( 9am to 3pm Thursday through Sunday) I would urge you to do so, I think its a pretty cool experience for the kids. Inside the interpretive center they have water taken from the creek and a microscope hooked up to a large monitor so that you can see what’s in the water. Fly larva, small shells and other crawling critters will fascinate your kids. On display are different animals that call this area home as well as local flora native to the San Diego Region. Its a real interesting display. After you are done checking all of this out and you are ready for the hike, head across to where the bathrooms are located and there you will see a large map of the hiking area with mileage for each trail (this is an exact copy of the pdf map that is linked above). Start up on the ” Way up Trail”, you will cross a creek on a cute little bridge and the trail starts immediately on the other side. I’ve noticed a box for hiking sticks at the start of the trail but never any hiking sticks inside of the box. The hike up hill starts right away.There are mile markers placed every quarter mile so you can keep track of how far you have gone as well as the elevation you have climbed, these are some of the coolest mile markers I have ever seen.
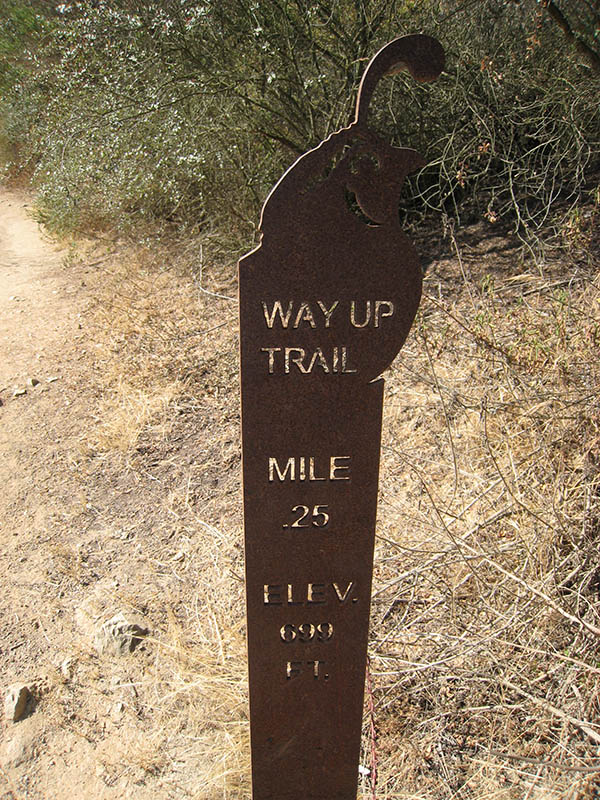
They have these nice little signs on the Way Up Trail giving you distance and elevation every .25 miles.
Soon after you see the first .25 mile marker you will see a trail towards your left, this is the Botanical Trail that heads back towards the staging area on a meandering .6 mile long trail. During the wetter months you may see a lot of cool native flora with corresponding poles that have QR codes attached to them so you can look them up, there are also maps at the bottom of the trail that have all the plants listed by number with descriptions. Right after you pass the top entrance to the botanical trail you will see a large sign with a heat index for dogs along with a corresponding temperature and humidity gauge overhead so that you can see if its safe to take your dog on the trail, this is a cool idea and I’ve never seen it anywhere else in San Diego, they should have these on all the major trails, my one suggestion is that they should be towards the beginning of the hike and not partway through it so that you can decide before you start the hike.
As you continue to go up the trail, you will find the trail is a little rocky, its the one thing that I used to hate about the Cowles Mountain trail which isn’t as bad now since they spent 2 months restoring the trail. There are a few switchbacks, but they tend to be far apart making the trail feel very easy going. There is a shade structure and stone bench about 3/4 the way up the trail, giving those who need it a nice place to sit a spell before continuing on. Not to long after the 1 mile marker you will see a sign letting you know that it is ok to take your dog off of the leash as long as you have good verbal control over your pooch. Not to long after this point the trail evens out and your pretty much at the top of the elevation. The trail continues up to the point where you have a major split.
The major trail split at the top
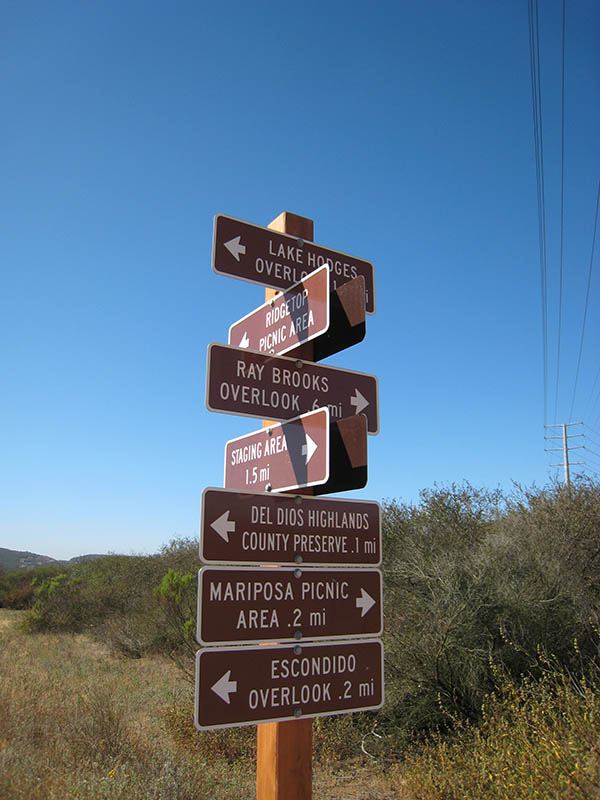
If you decide to go left you will find yourself on a service road that will eventually connect into the Del Dios Highland County Preserve which will connect into the Del Dios Highway, or the 5 mile loop to the Lake Hodges Overlook. If you take a right, the trail will take you along the western side of the Olivenhain Dam to the Ray Brooks Overlook and another access road ( Pso Del Los Suenos) that leads outside of the park towards the Celio Housing Development. If you head straight ahead from the trail split you will see the picnic area. The picnic area has a view of the lake, limited shade, but does have bathrooms (port-a-potties), a drinking fountain, and picnic tables to sit at.
Take a left onto the dirt service road that encircles part of the lake. This service road will go up a little hill and then you will make a right onto the Lake Hodges Overlook Trail. Follow this trail (service road) around the northern side of the lake until you get to another trail head for the Lake Hodge Overlook Trail, this one will be a single track that goes down hill and cross’s over to the eastern side of the lake and then starts heading uphill to go along the ridge towards the overlook. As you get towards the overook you will see a trail that splits off to the left of the one your on, it will say L.H Overlook with an arrow pointing towards the left, and another arrow with trail pointing towards the right. Take the left trail, as the right one will lead to the witch trail. The Witch trail will get you there but its an even smaller trail that meanders closer to the lake before letting you up towards the overlook.
After you take the left trail towards the overlook you will come to another point where the trail splits, it looks like if you went straight ahead it would connect into the main trail but at one point they closed off this section of the trail to let it recover. There are a few sections of the trail like this that where hit in the 2007 wildfires and are still recovering. Once you get to the Overlook, sit a spell and enjoy the view. If you look down at Lake Hodges, directly southeast you will see the mountain tops of Mt Woodson and Iron Mountain.
Weather forecast for the hike:
Pictures from the hiking trail:


