Mt Whitney Trail Map
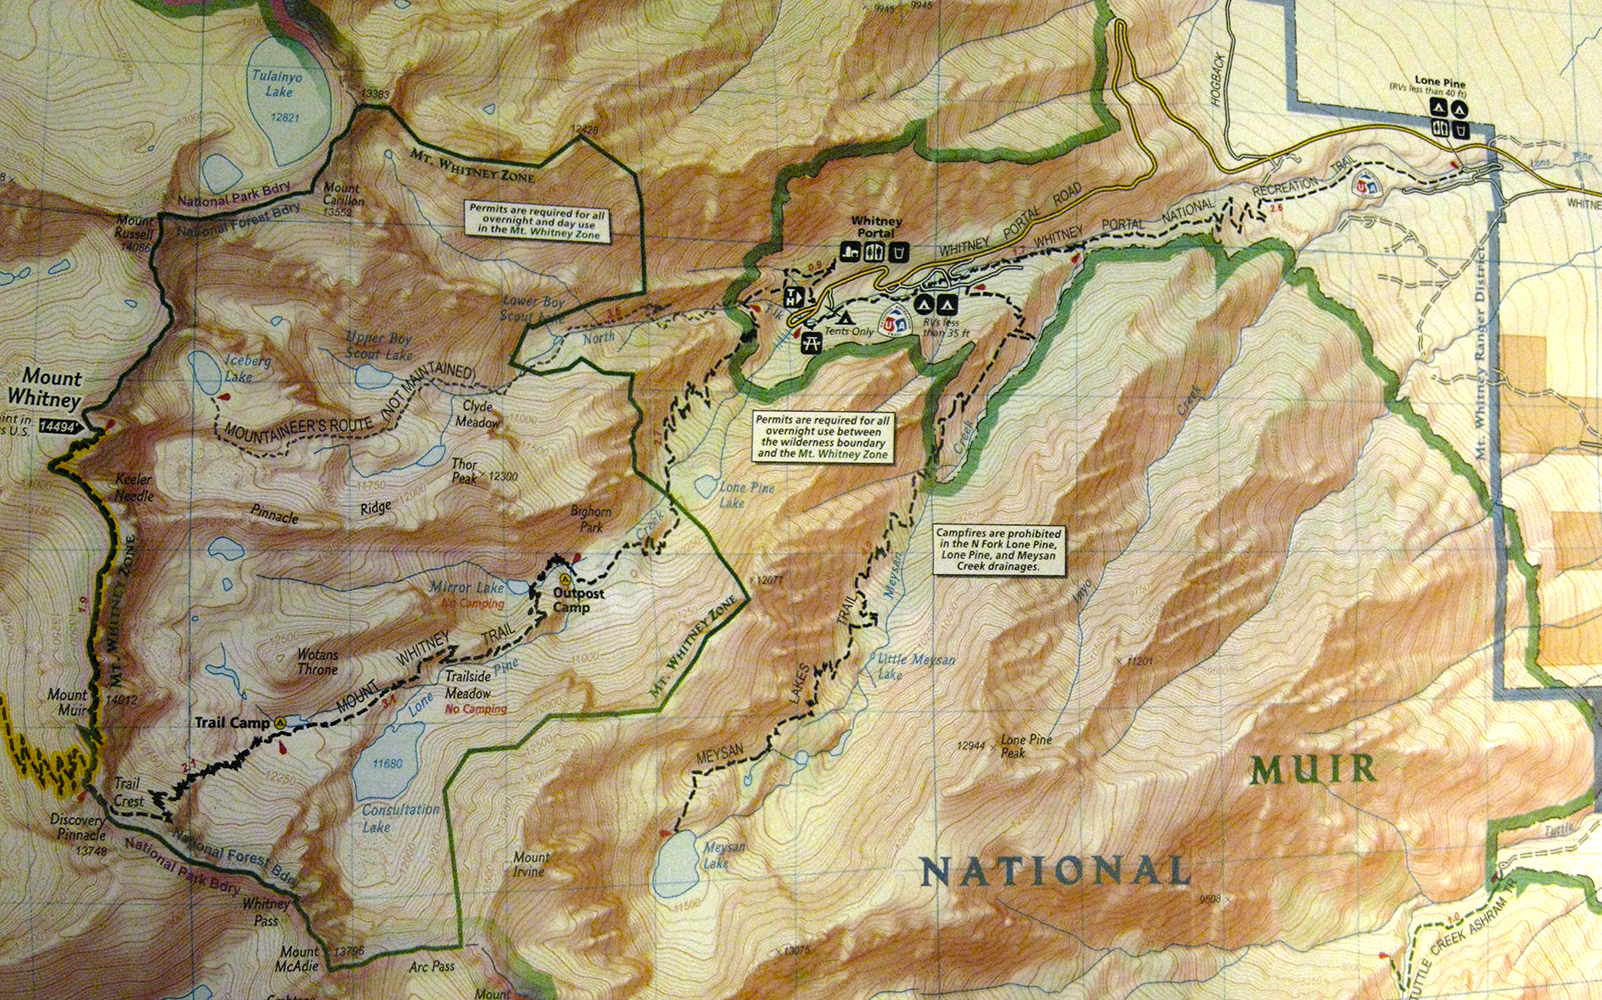
More Detailed Map of Mt Whitney Trail
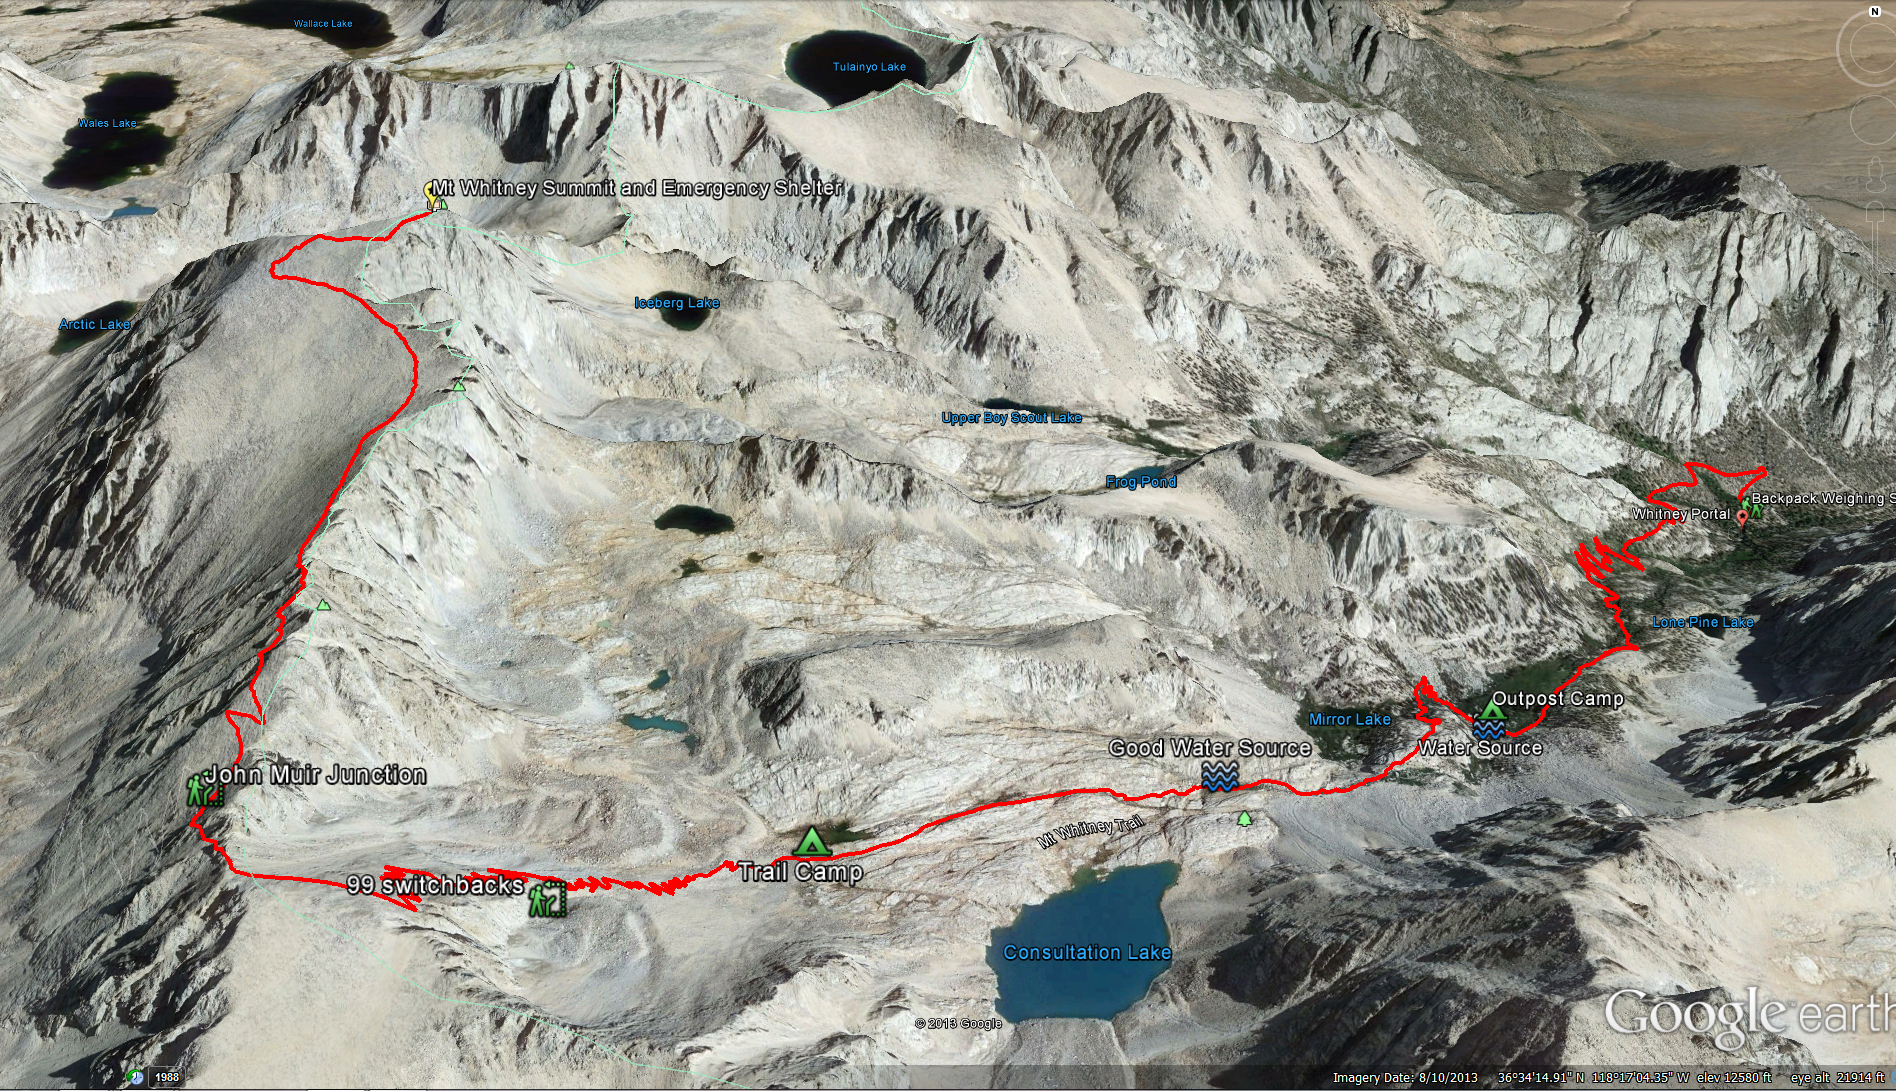
Google Earth: Mt Whitney Trail
http://en.wikipedia.org/wiki/Mount_Whitney
Distance : 22 miles round trip . Elevation Gain: about 6100 feet, with a top elevation of 14,505 feet.
Points Along the Trail
Whitney Portal : Starts at 8,360 feet
Lone Pine Lake : Elevation of 9,900 feet. It is 2.8 miles along the trail
Outpost Camp : Elevation of 10,400 feet. It is 3.8 miles along the trail
Trail Camp : Elevation of 12,000 feet. It is 6.0 miles along the trail
Trail Crest : Elevation of 13,700 feet. It is 8.2 miles along the trail
John Muir Junction: Elevation of 13,480 feet. It is 8.7 miles along the trail
Mt Whitney Summit: Elevation of 14,505 feet. It is 11.0 miles after starting the trail
Areas to camp around Mt Whitney:
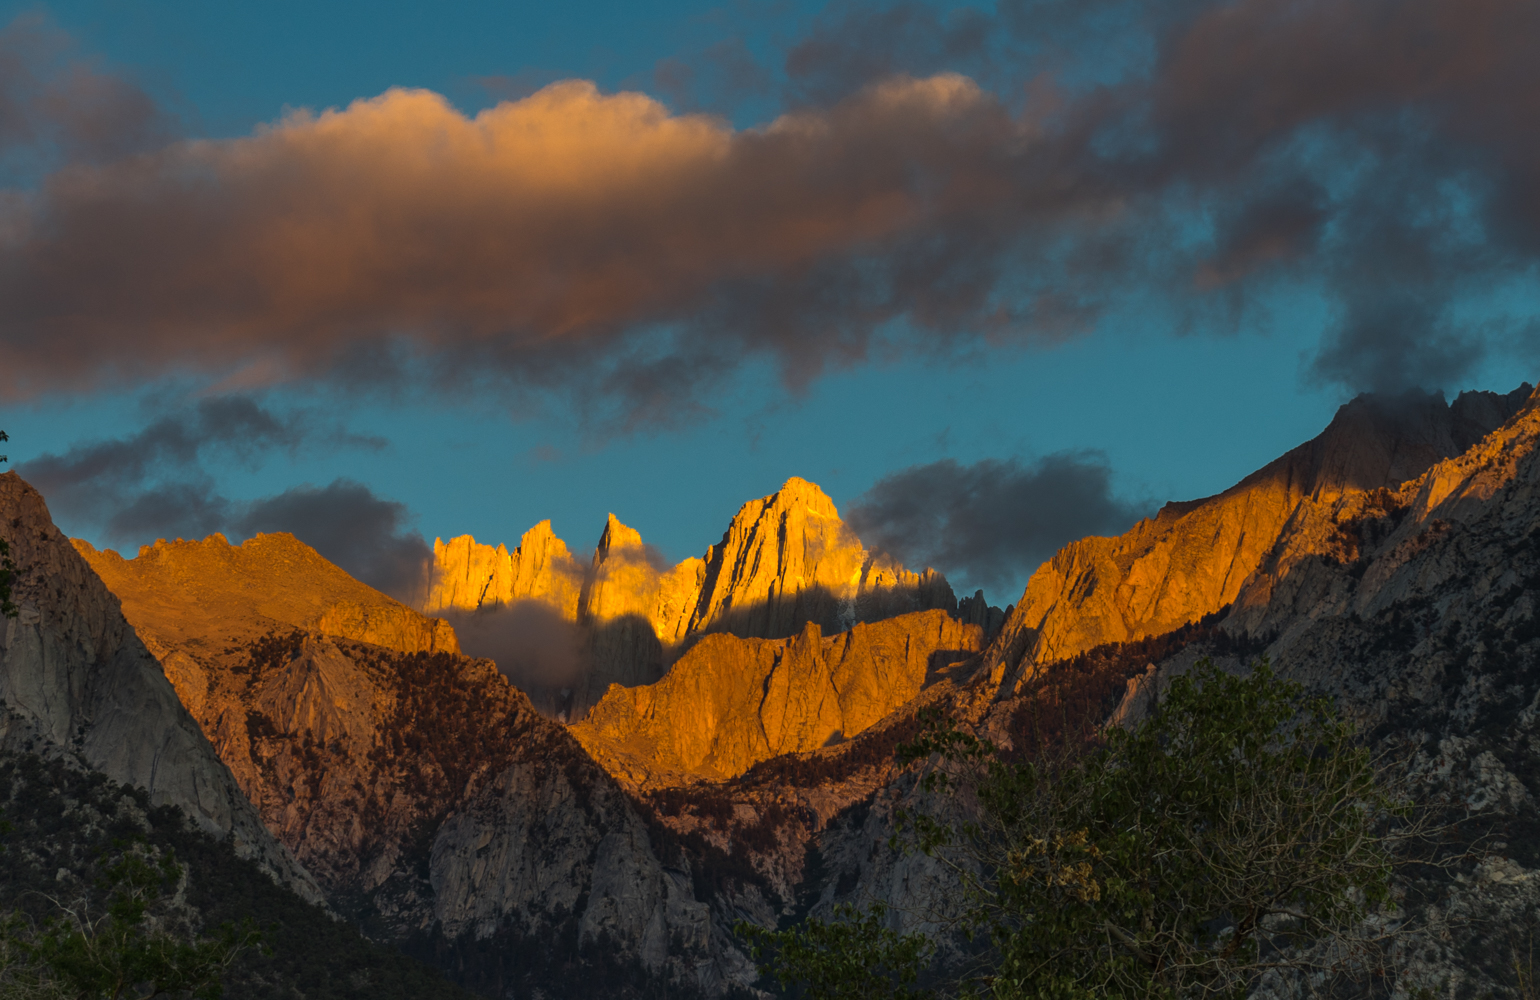
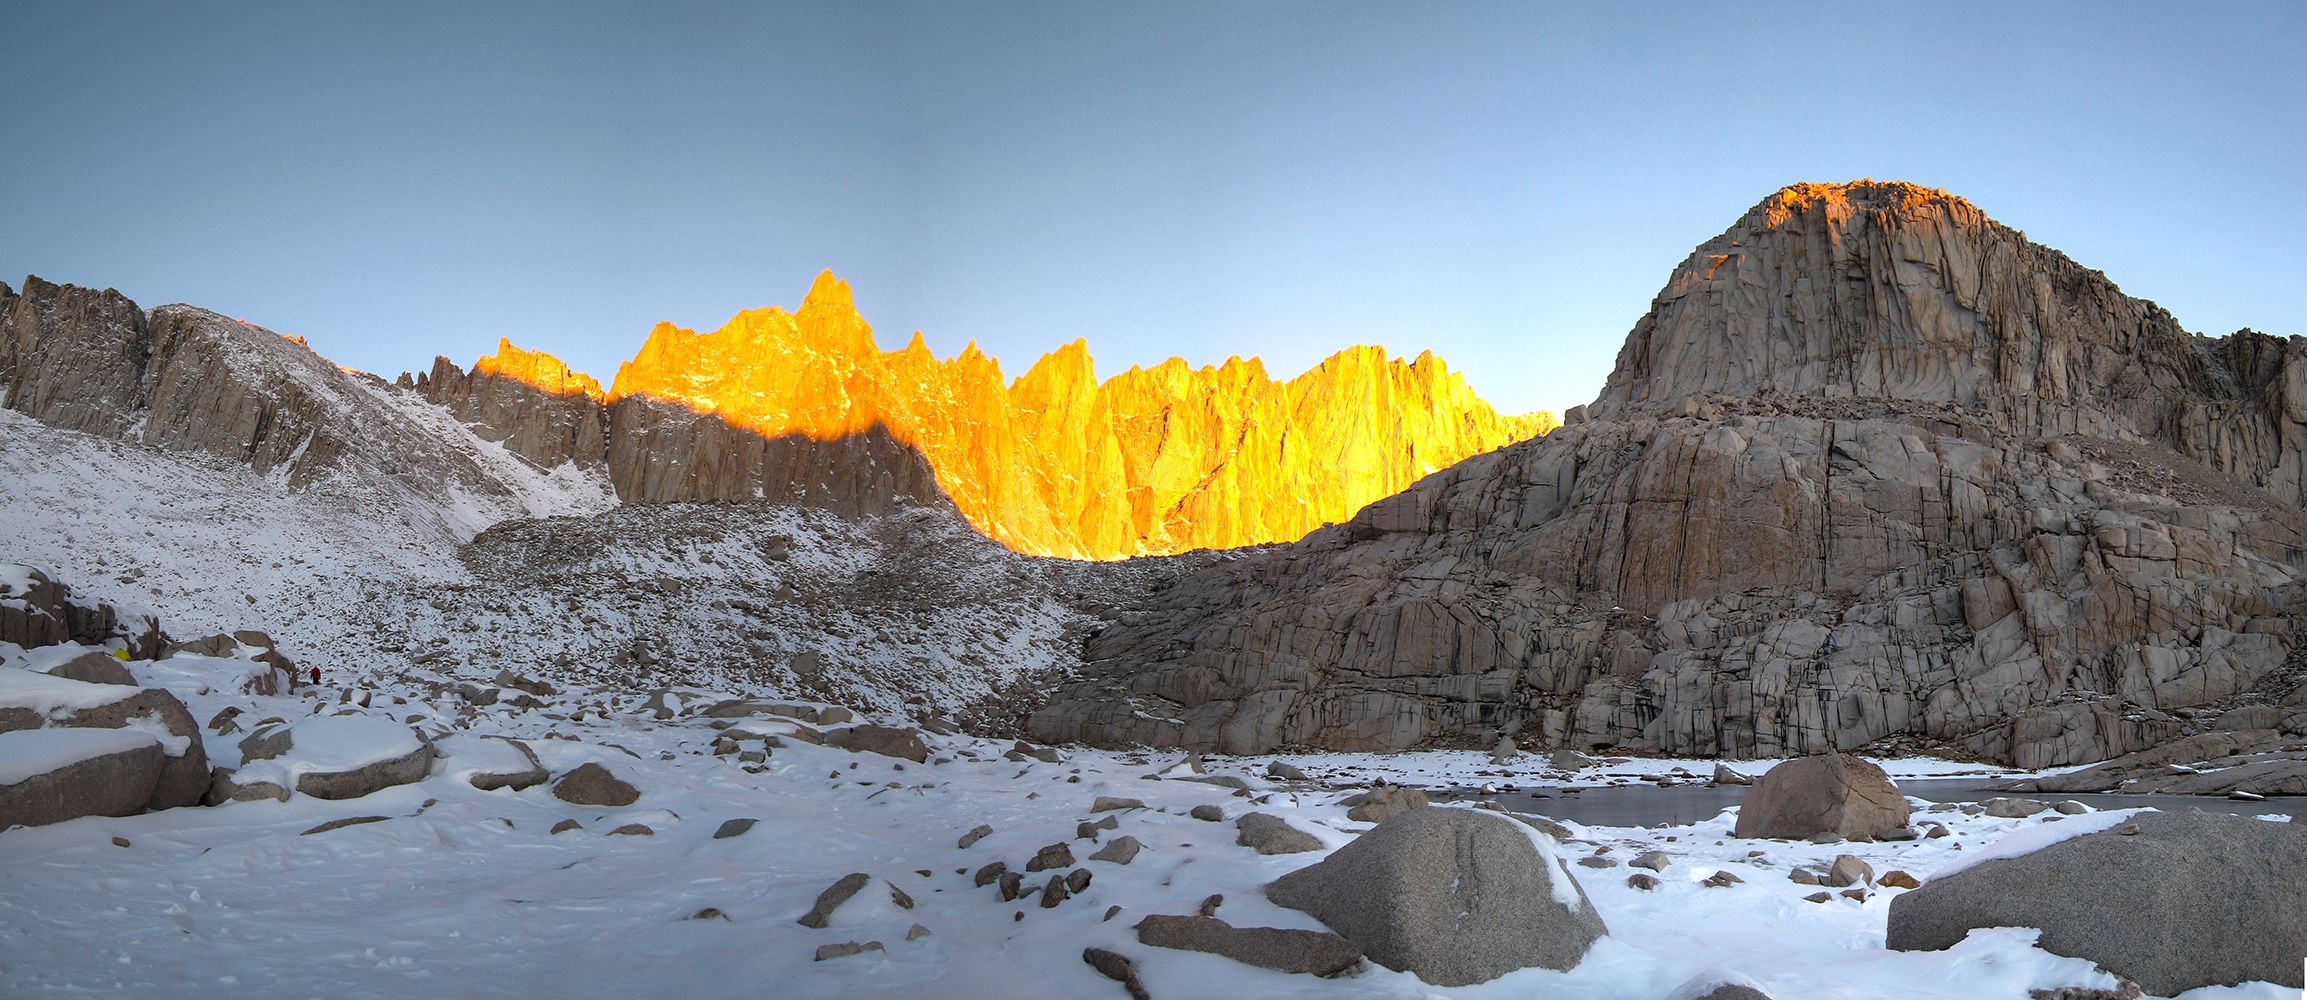
Sunrise on Mt Whitney as seen from the Lone Pine Campground
Horseshoe Meadow Area: We like this place, it was at 10,000 feet so we could acclimate faster for Mt Whitney. Nice campgrounds.
Whitney Trailhead: Located next to the Whitney Portal Parking area. 10 first come first serve walk -in-sites. One night stay only. $8 per site.
Whitney Portal & Whitney Portal Group: Located 1 mile east of the Whitney Portal. 43 Sites, and 3 group sites. $16 per campsite, and $45 group site.
Lone Pine and Lone Pine Group: Located 6.5 miles west from Lone Pine on the Whitney Portal Road. Look for the campground on the south side of the road. 43 campsites , and 1 group site. $19 per campsite, and $45 group site.
Tuttle Creek: Located on Horseshoe Meadows Road. Follow the Whitney Portal Road for 3.5 miles west out of Lone Pine until you come to Horseshoe Meadows Road. Go 1.5 miles South on Horseshoe Meadows Road and look for the signs of the campground. 85 first come first serve campsites. $5 per site.
Portagee Joe: Located 1 mile west of Lone Pine on the Whitney Portal Road. Turn left on Tuttle Creek Road for 0.1 mile. 15 sites for reservation. (760)-873-5577. $ 10 per site.
Diaz Lake County Park: Located on the west side of Highway 395 2 miles south of Lone Pine. 200 sites for reservation. (760) -876-5656. $14 per site.
Timberline Trails: This site has a pretty good write up of what to expect for the trails on Mt Whitney.
Getting in shape for climbing Mt Whitney
As soon as you even think about putting in your bid for the mountain you need to start thinking about conditioning for the mountain. Unless your in top shape your going to need to spend some time getting in cardiovascular shape, working on your muscluar conditioning, and just plane putting some time in on the trails, getting used to the milage and the altitude. One good way to accomplish this if you live around Southern California is the so called ” Six Pack of Hiking Peaks”. This course of 6 peaks follows a series of progressively strenuous day hikes up progressively more difficult peaks in Southern California. The Peaks are as follows:
Six Pack of Peaks
- Mt Wilson Length: 14 miles ; Summit elevation 5,712; Elevation gain: 4,200 feet
- Cucamonga Peak Length: 11.6 miles; Summit elevation 8,859; Elevation Gain: 4,300 feet
- Mt San Antonio (Mt Baldy) Length: 11.3 Miles ; Summit elevation 10,068; Elevation Gain: 3900 feet.
- San Bernardino Peak Length: 16.5 miles; Summit elevation 10,649 ; Elevation Gain: 4,702 feet
- Mt San Jacinto Peak Length: 11.3 miles; Summit elevation 10,834 ; Elevation Gain: 4,689 feet
- San Gorgonio Peak Length: 17.3 Miles; Summit elevation 11,503 ; Elevation Gain: 5,840 feet
Getting Your Permit:
When I decided to take the adventure of climbing Mt Whitney, little did I know that I would be battling the elements and the governments bureaucracy in order to get to the top. Mt Whitney is not a hike to take lightly, not only do you need to train and get in shape for the hike, but you also have to run the gamut of the “Mt Whitney Permit”. The “Mt Whitney Permit” along with the “Half Dome Permit” are two of the hardest hiking permits to get in the National Park and USFS systems. To get a Mt Whitney permit you will need to enter into the “Lottery” in February, the “Half Dome Lottery” is in March, the internet has made this easier, you used to have to fill out all the paperwork, send it in with your check and then wait for a thumbs up or a rejection letter, that letter hurts just as bad as rejection from a lover.
I can tell you after trying to win the “Lottery” 3 years in a row, how much a pain in the ass it can be. The first time I climbed Mt Whitney (2013) I did not win in the initial lottery, so when they released all the remaining lottery permits on April 1st I tried to snag the first one as closest to summer as I could. The middle of October was as close as I could get, getting real close to the end of the “Season”. Needless to say we were not equipped for the several feet of snow that accumulated from Trail Crest on. So we cut our loss’s that year at Trail Camp and vowed to try again.
This year (2015) I did not win the lottery again as well. It was always in the back of my mind, even though I think I resigned to not doing it this year. I’ve read that getting a walk in permit was a reliable way of getting a permit as well. Here is how it works.
8am – Permits are released for the same day.
Get there about 10-15 minutes before hand. The ranger will come out and ask who is waiting for a walk in permit, at that point they will do a mini-lottery to see what your place in line will be when you go in to see if they have any permits, this does not guarantee you a permit, just a place in line.
11am – Permits are released for the next day.
Again same thing, this does not guarantee you a permit, just a place in line to check and see if any are up for grabs.
What worked for me ! I tried doing the walk in permit lottery to no avail. I had come up to hike with a buddy and some friends of his that already had a permit for 4 people with no extra space. I had in mind that if I couldn’t get a permit for Mt Whitney I would just get one for Cotton Wood Lakes and do some hiking around there, after all I didn’t drive all the way up there for nothing ! I had attached the permit page from Recreation.gov to an easy to open icon on my smart phone several weeks before, and had been checking constantly as time went on hoping to see if anything opened up. I noticed that within a week or two of certain dates that spots would sporadically open up for a reservation and that if they had not been reserved in a day or so they would go from available for online reservation (A) to available at the facility (W). When I couldn’t get a permit for Whitney I got one for Cotton Wood Lakes and drove up to Horseshoe Meadows Campground to get a camping spot, when I got up there the weather was gnarly, dumping several inches of slushy ice. Not something I was looking forward to setting up a tent in. My buddy was still going to camp with me to help acclimate for the Whitney Hike the next day so I drove back to the front of the mountain where I could get some cell phone reception to check with him and see if he was still up for that ( mind you this only a 1/2 hour to an hour after I just tried for the 11 am lottery). While I was calling him I was also checking on line at Recreation.Gov ( hard habit to get out of when your consistently used to checking) and saw that they next day ( they day I was looking for ) had a (W) next to it. I called to make sure since I was at least 1/2 hour away and the person I talked to didn’t really seem to know what they where talking about saying that you would only see openings like that on non-quota trails. Now since I’ve been seeing this happen for several weeks that didn’t sound right to me and I decided to go and check for myself which meant driving back 1/2 hour to the Visitor’s Center that I just spent all morning at, but it paid off. When I got to the Visitors Center I found they had 4 permits that had opened up for the next day ( probably scared off by all the bad weather – did I mention that it just dumped several inches of slush at 10,000 feet), yeah for me, I was finally able to get a permit. Now the real fun begins.
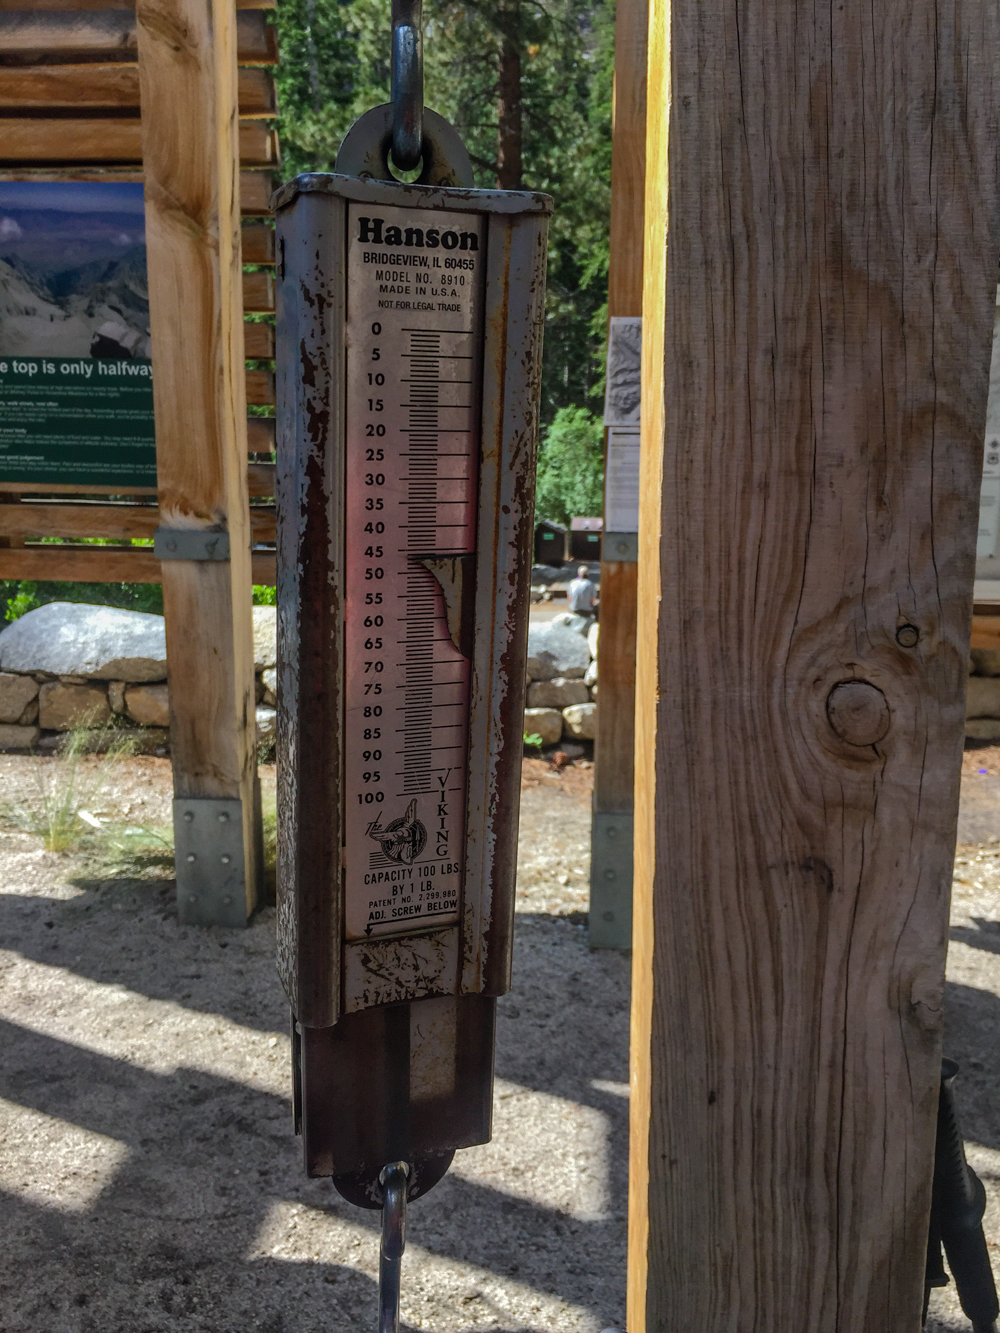
46 lbs. The weight of my bag at the start of the hike.
To Start the Hike, take the Mt Whitney Portal Road from Lone Pine all the way until it ends at the Mt Whitney Portal. Find a place to park and get yourself ready. When you are finally ready (double check to make sure you didn’t leave any food or food smelly stuff in your car) head over to the back pack weighing station at the beginning of the hike and see just how heavy that monkey on your back is going to be. The trail starts just after the weighing station. This is a very well maintained trail that has a gradual incline most of the way, its the elevation that gets to you on this trail, not the severity of the trail.
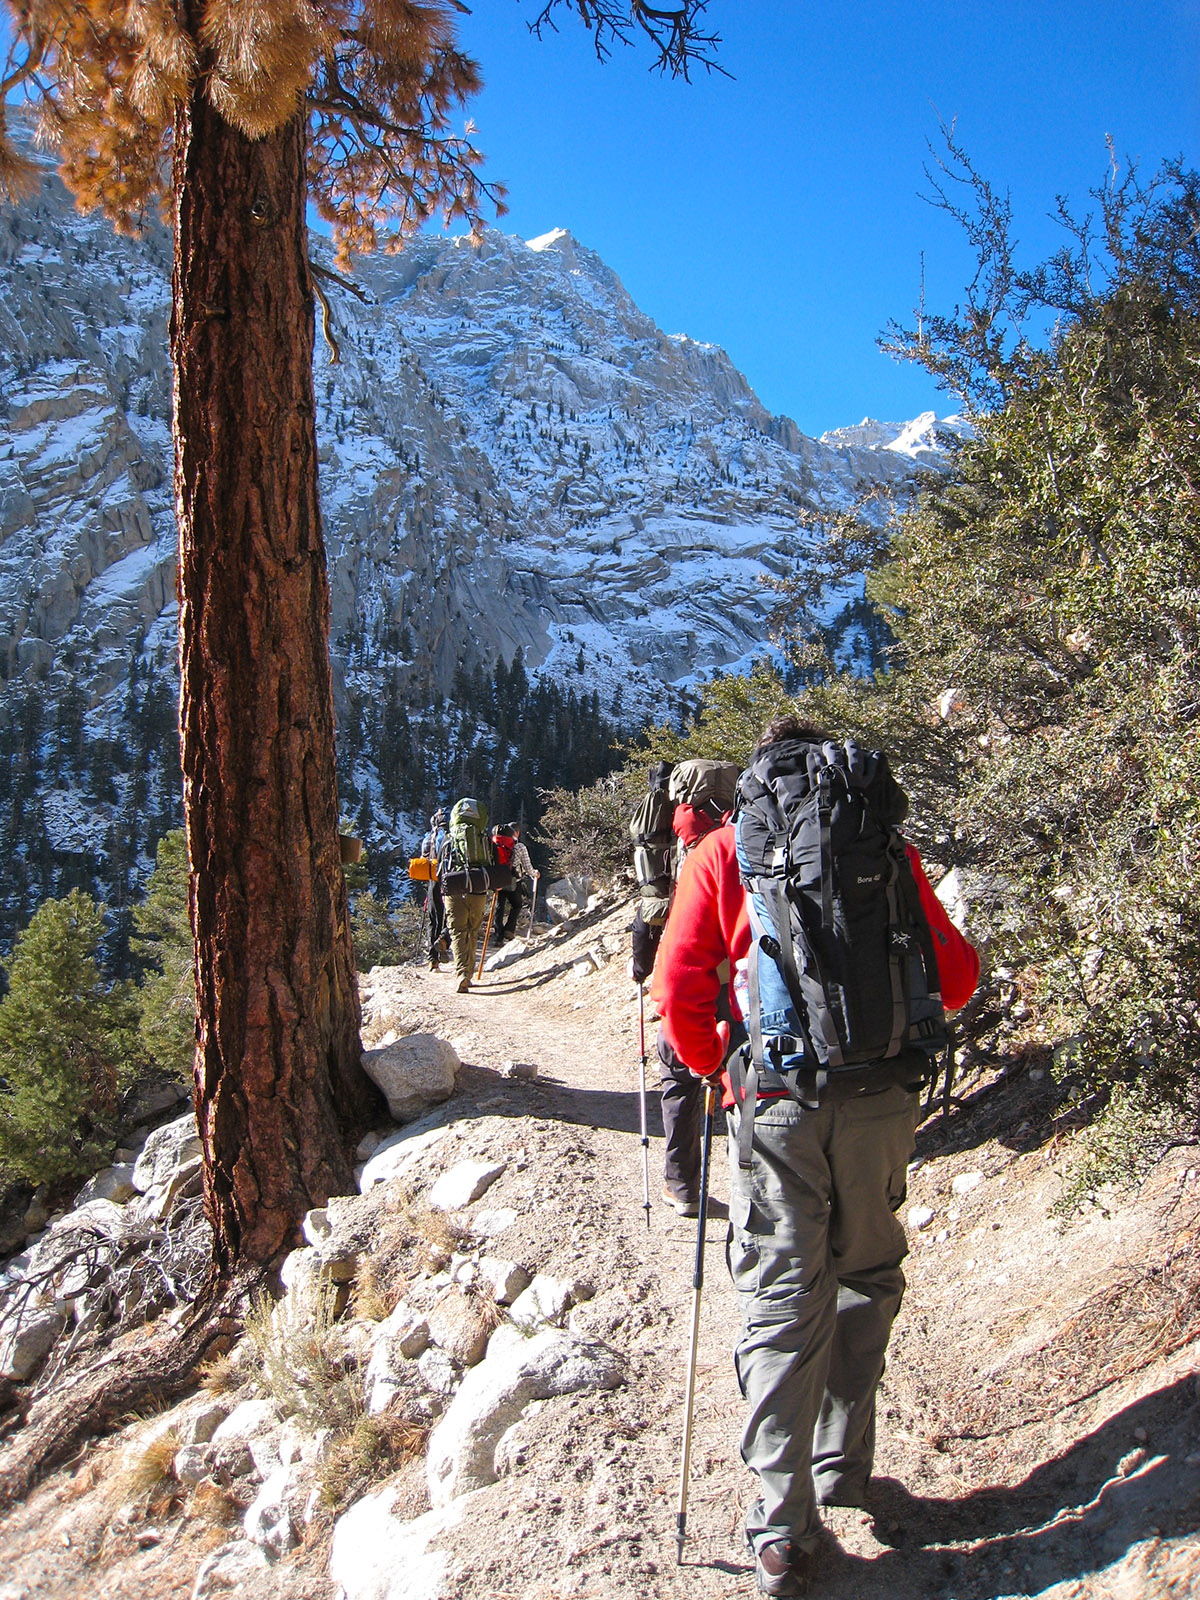
Heading up the trail in the beginning of the Mt Whitney Hike
That being said its best to make sure you are well prepared, although we had an easy time going up the trail by the time we came down the trail all the water flowing down had frozen solid and we where basically hiking down an ice cube for several hours, a pair of microspikes would be a good thing to toss into your backpack, just in case. (2013 trip, didn’t have the same issue on the 2015 trip) Its a really pretty trail, you will cross many little springs on your way up towards Lone Pine Lake, at one point you will have to cross a stream on a series of log runs that makes you think of some obstacle course.
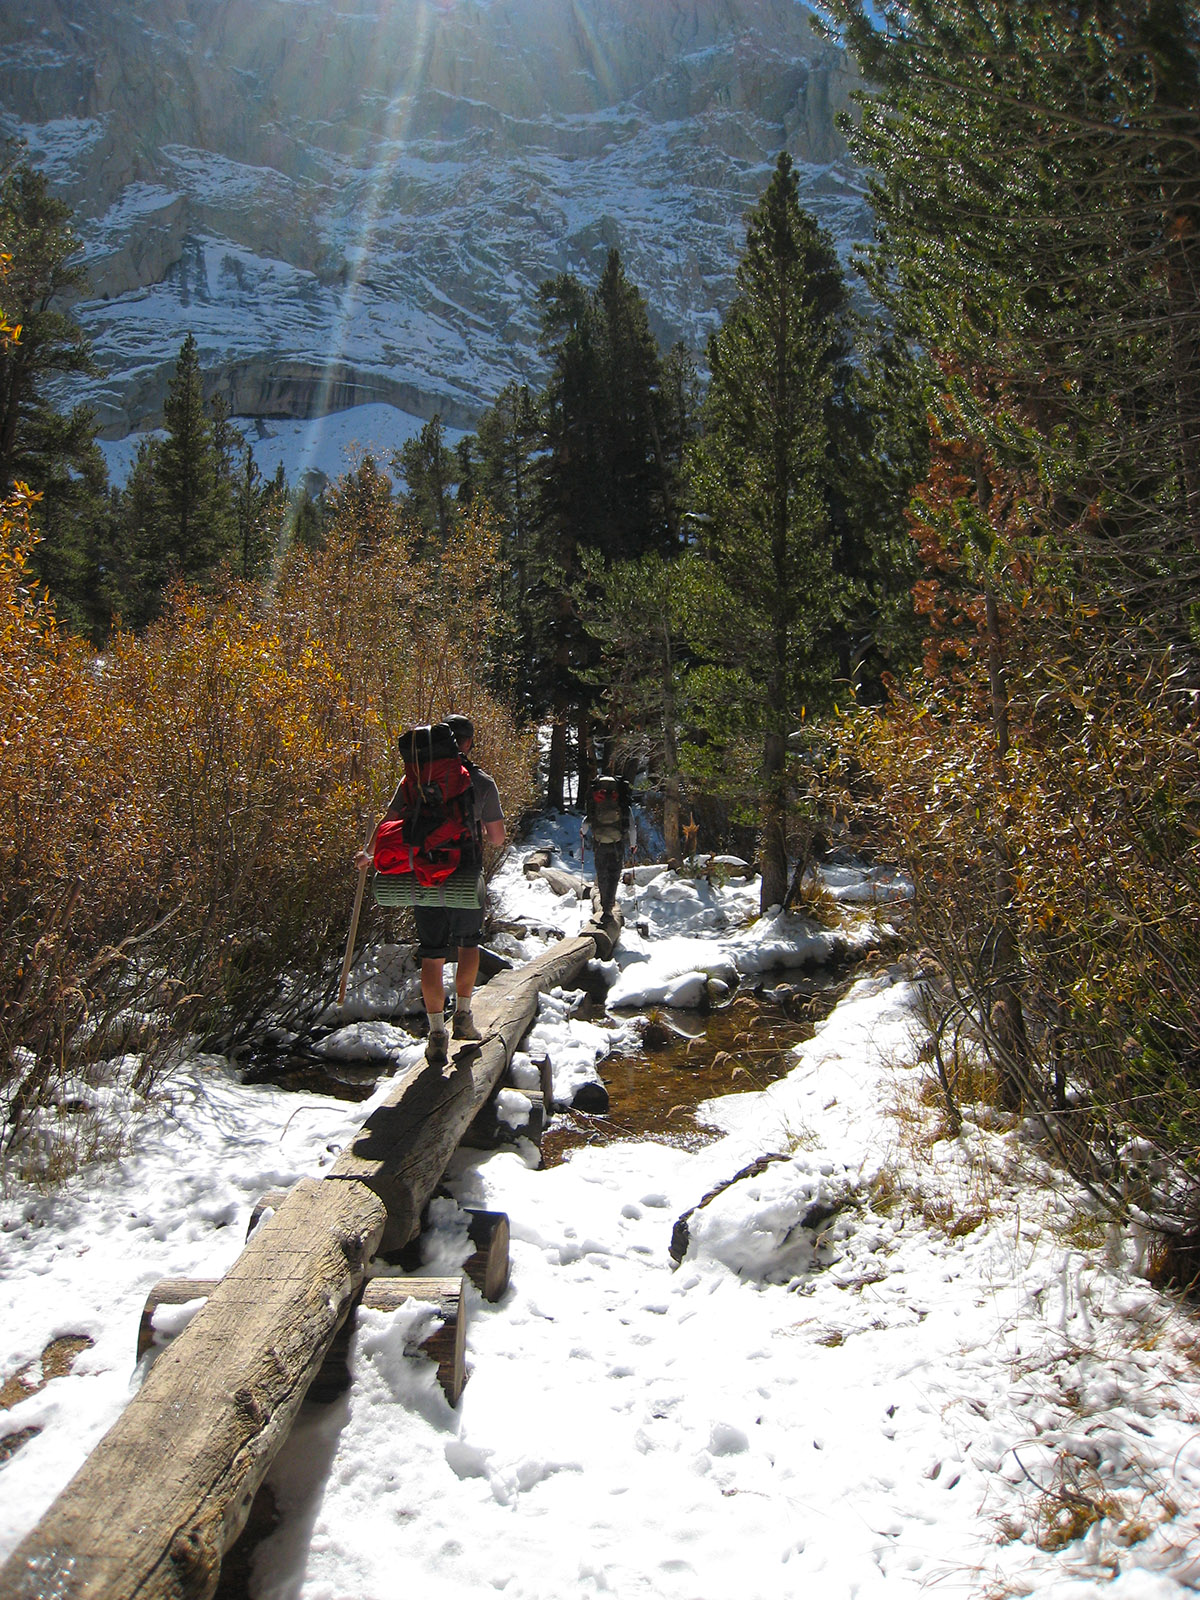
Crossing the wide creek with a log bridge
Eventually you will get to the point where the trail splits to go down to Lone Pine Lake (2.8 miles up the trail and 9,900 feet of elevation) , you will see a lot of day hikers coming up to this spot because they do not need a Mt Whitney Permit for this section of the trail and its a pretty nice little hike for most people, you should see some campsites along the trail as you go through this area and then soon afterwards you will see the sign telling you that you are entering the Mt Whitney Zone, from this point further on you will need to have your Mt Whitney Permit ( unless you happen to visit during a government shutdown ).
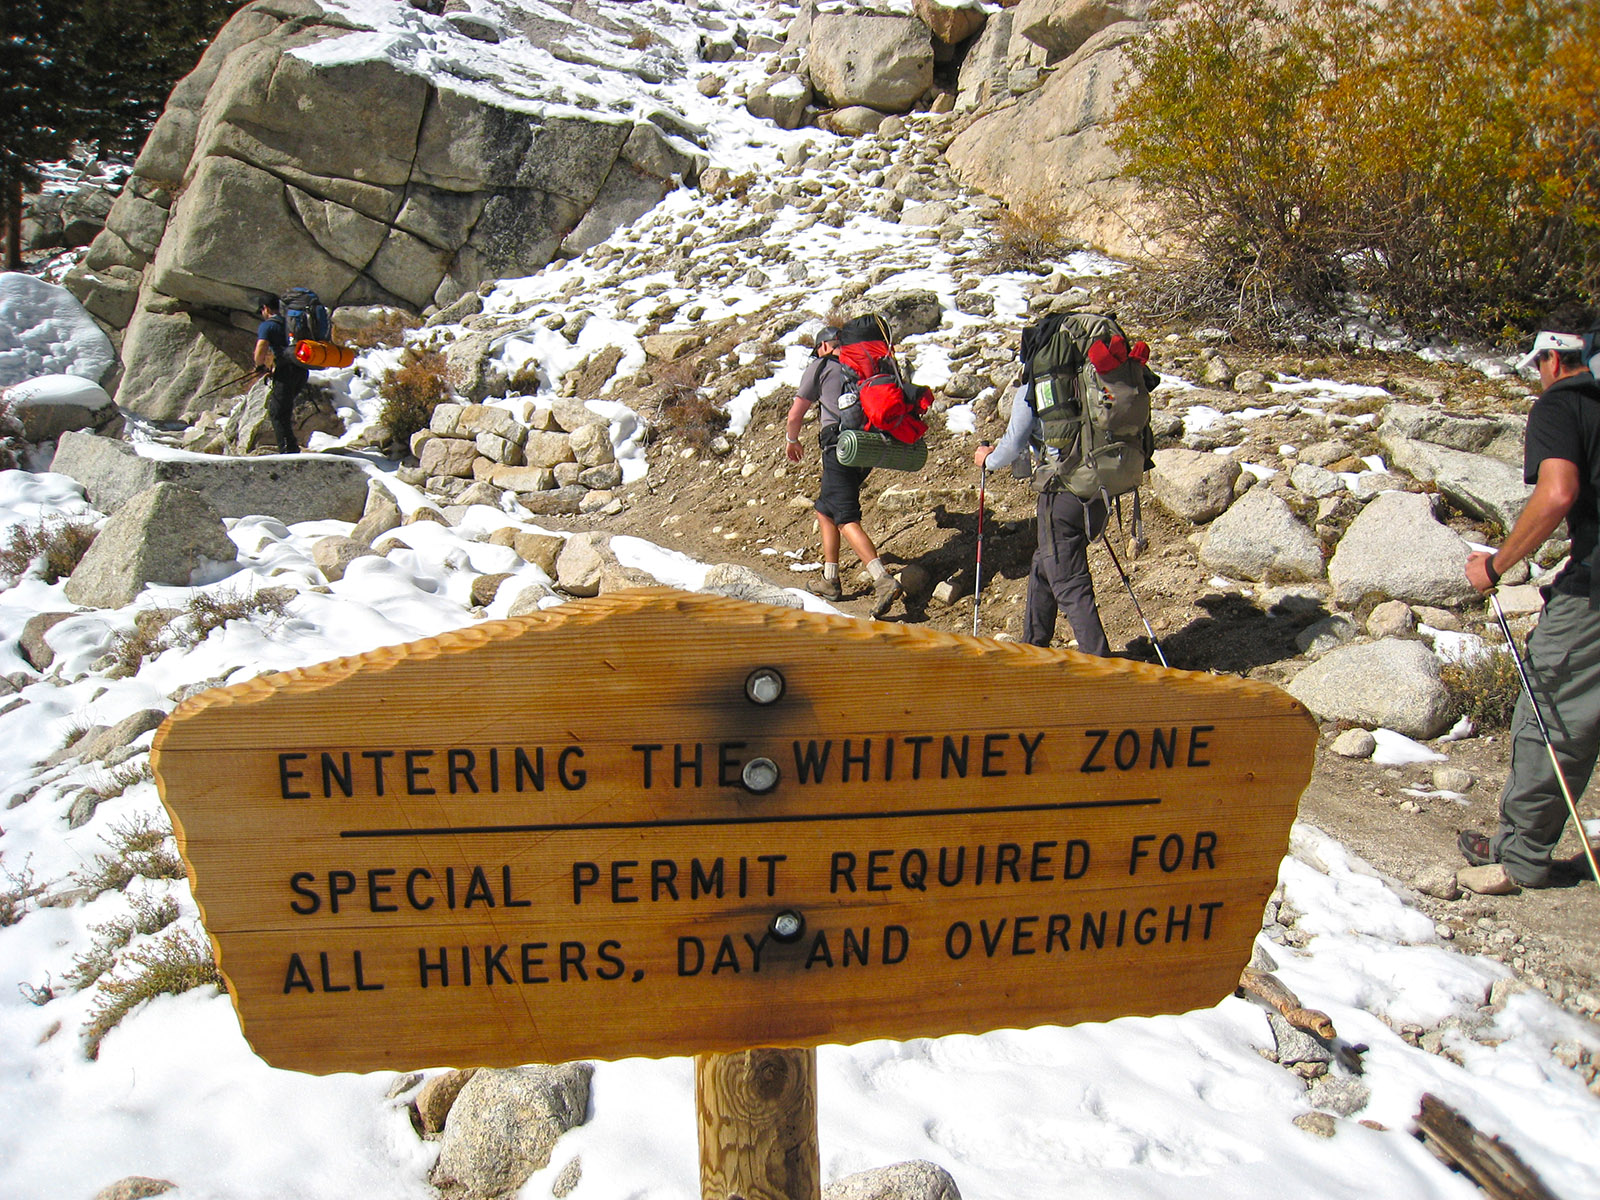
Entering the “Whitney Zone” permits are required past this point.
At this point Outpost camp is just a mile away, as you make your way up through some switch backs and rock outcrops you will practically burst into the start of a long meadow valley with little streams flowing through it, its really a little picturesque spot to stop for a break or to camp for the night at Outpost Camp (3.8 miles up the trail and at 10,400 feet of elevation).
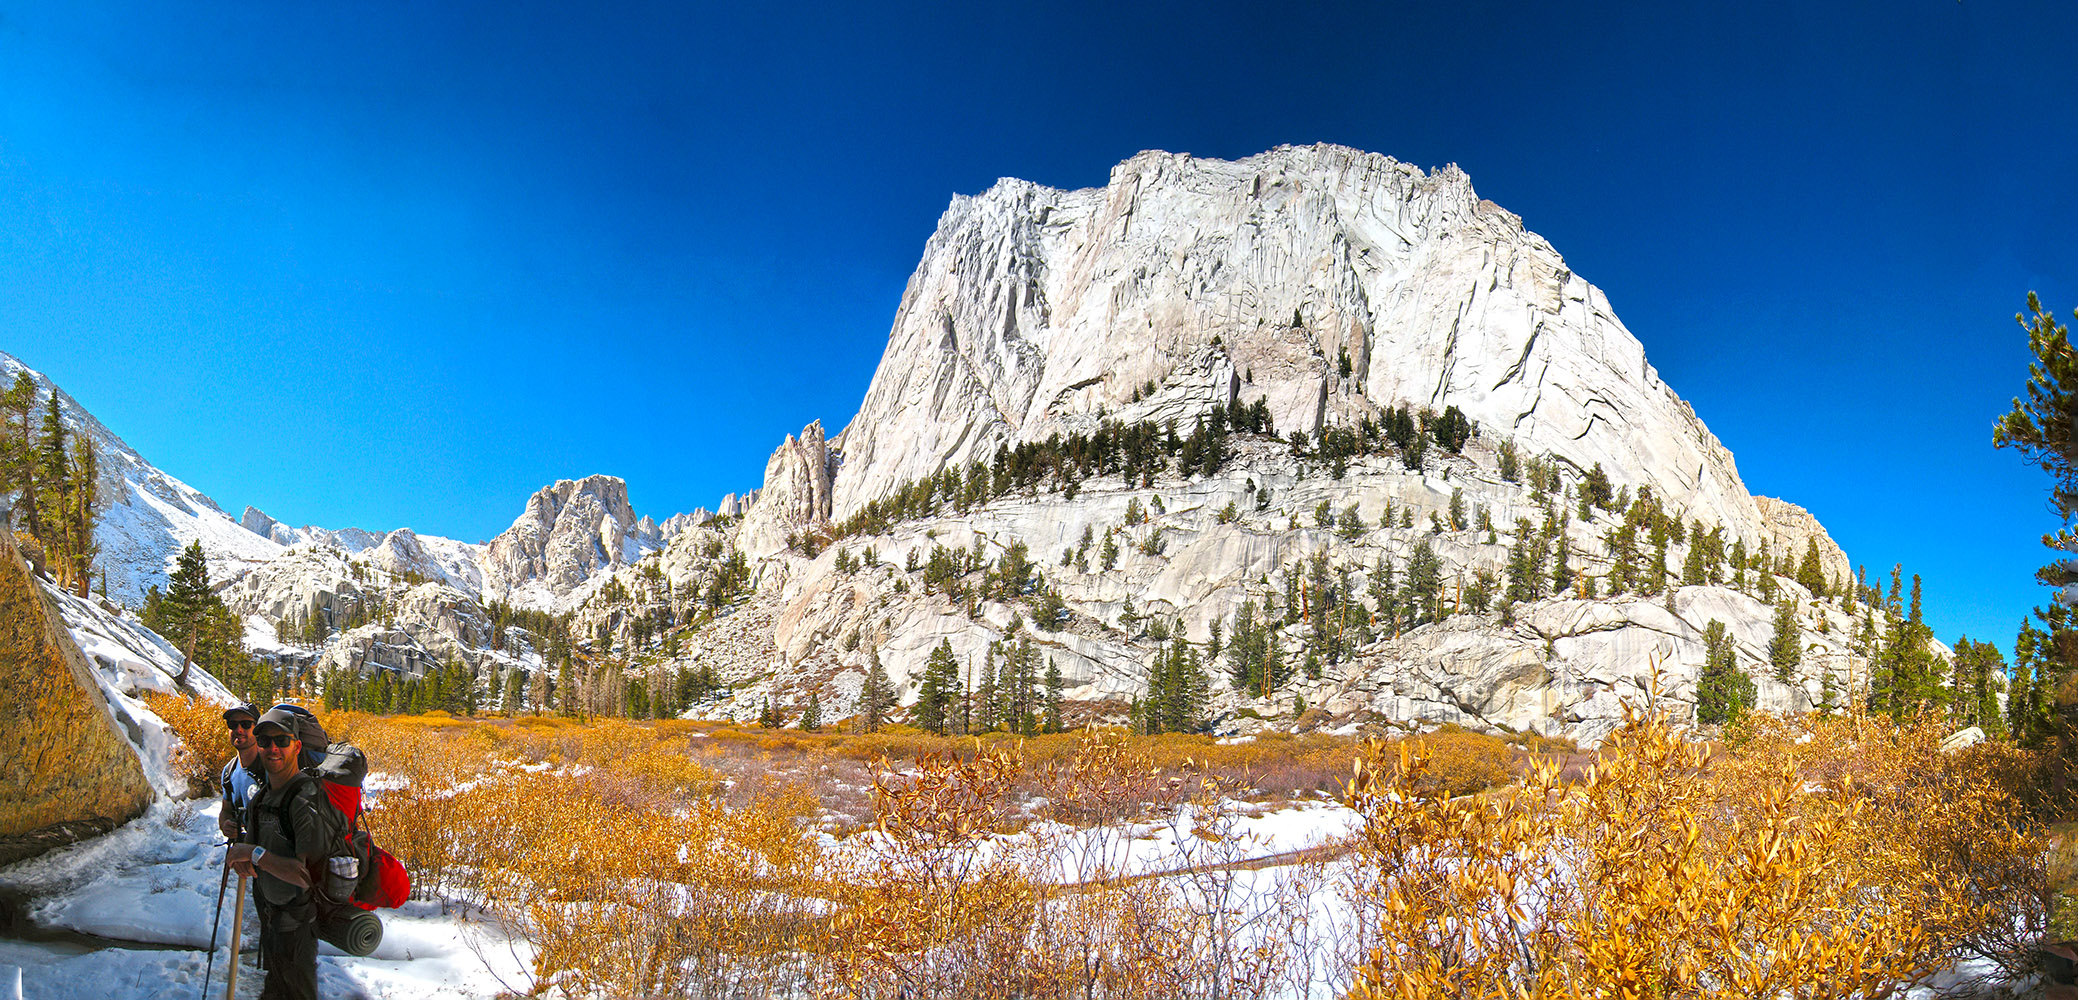
The long valley with a meadow and stream running through it. Outpost Camp is at the far end of the valley before you start heading up again.
At outpost camp you are still in the tree line and there is a reliable source of water nearby. Soon after leaving Outpost camp you will come up and over the rocks to look down at Mirror Lake at the edge of the tree line, from here on out you are among the rocks. You will make your way up through a long rock pile to the left of Mirror Lake on your way up to Trail Camp, along the way you should see a meandering stream coming down through a little meadow from Consultation Lake, this is a great place to fill up on water if you need it before you make it to Trail Camp. Soon after this meadow you will make your way up and over a rocky trail to reach Trail Camp ( 6 miles up the trail and at 12,000 feet of elevation), Consultation Lake will be down below you to the left of the trail while there is a small lake to the right of the trail, when we went up this small lake was completely frozen.
2013 Trip

Freezing my butt off at Trail Camp
We had always planned on using Trail Camp as our launching point the next morning to go for the top of the mountain but it seemed like everyone we came across that had made it to the top of the switch backs were turned back by the conditions ( snow drifts knee to hip high) and we were not properly equipped for that sort of adventure, so we hunkered down for the night planning on heading back down the mountain the next morning. If we had any inkling of an idea of trying for the top before we retired to our tents that night put those thoughts to rest, the temperature was somewhere in the teens and with wind gusts of 40 mph or so we got little sleep that night even though we were hunkered down in our tents from 7pm until 6:3o am. I will give you one peace of advice that I had read somewhere and had ignored to my own peril. If you are a guy bring and empty Gatorade bottle to pee into. The decision to get up and pee that night seemed like the hardest decision to make, it didn’t help that I had the tinniest one man tent that gave me no room to turn in and made me get leg cramps just trying to get my boots on, save yourself the trouble and pack a empty plastic bottle ( with a big enough opening, all joking aside), in the morning you will thank me.
Sunrise at Trail Camp
Needless to say after sleeping through what felt like a hurricane and having little sleep to show for it our feelings to head back down the mountain where cemented. It took us about 1/2 the time to get down as it took to get up to Trail Camp, 6 hours or so to get up to Trail Camp and about 3 hours to get back down. After the hike we went down into the town of Lone Pine to find a decent burger and a cold beer we ended up at Jakes Saloon and sat down to a good meal while we watched a parade in honor of the Lone Pine Wild West Film Festival that happens every year in October, can’t beat it after a hike, good burger, cold beer, and entertainment.
2015 Trip
We woke up at 3am ( after sleeping sporadically all night) to start getting ready for our 2nd day of hiking, ascending the famous “99 switchbacks” and making our way for the top along the “Trail Crest”. The storm that had dumped a few inches of slushy snow on us the night before had moved on and the sky was completely clear.
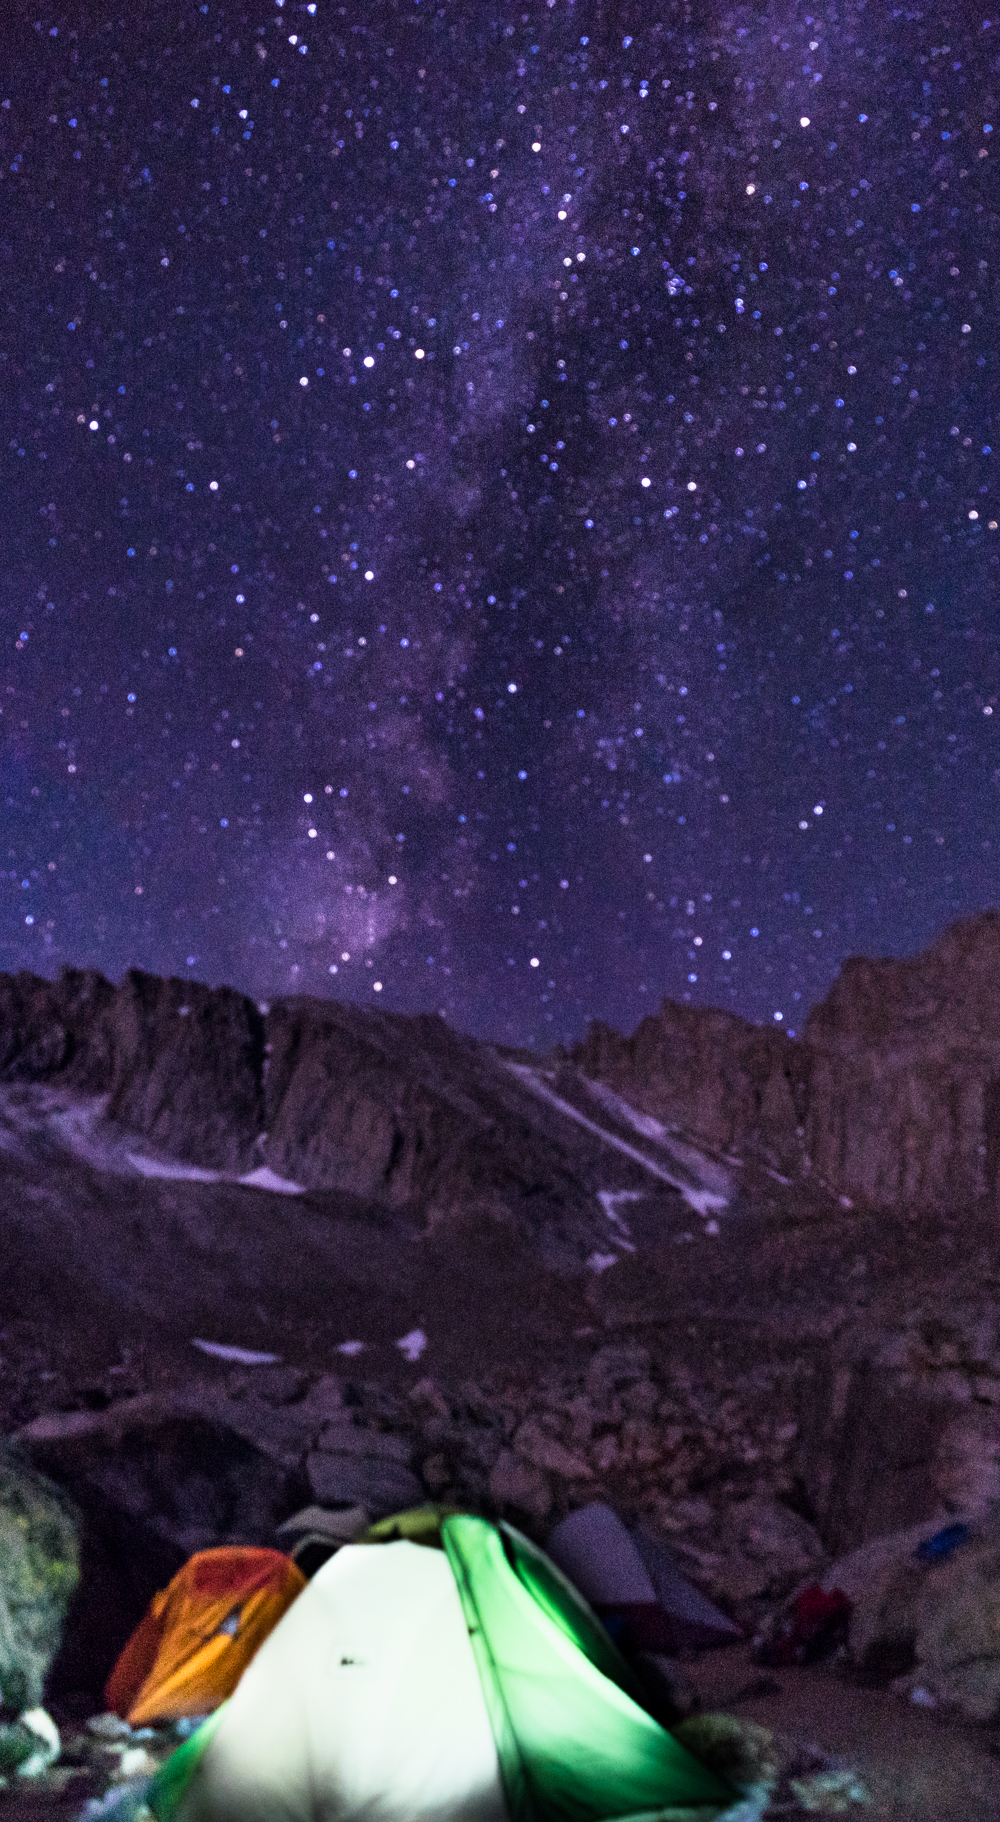
Milky Way and Mt Whitney in the background. Still learning my new camera and its bag of tricks.
I wanted to play with my camera as we ate breakfast getting ready for the hike so we probably started a little later then we would have otherwise. We started up the the mountain at 4am. The trail to the switchbacks is relativity easy to find even in the dark, just put on your headlamp and head for the mountain. If you are worried about it you may want to do some trail reconnaissance the day before to make sure you know where you are going. I’ve always heard how brutal the “99 switchbacks” are, they did not disappoint. As you started heading up you wondered what switch back you where on and when the cables would come up ( funny thing is I felt the same way going down), you lose track of the switchbacks as you make your way up and look at the scenery ( if the sun is coming up). We finally made it to the cables just as the sun peaked over the mountain rims and lit up the front side of Mt Whitney.
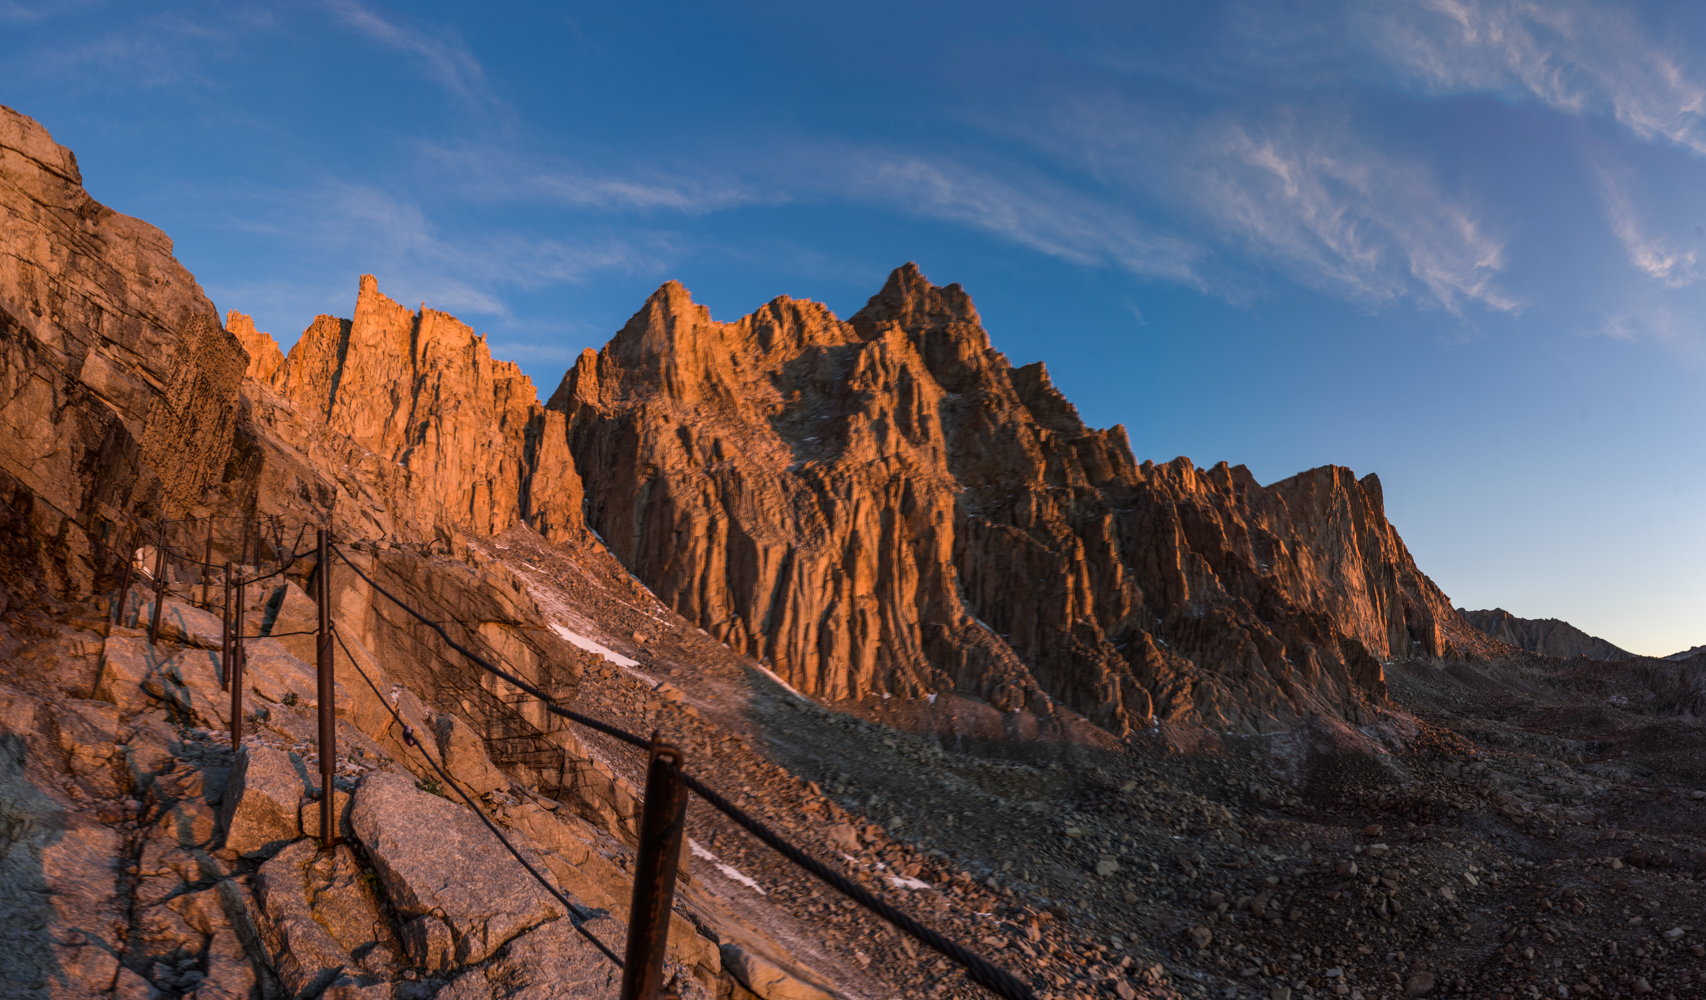
Sunrise at the cables on the famous “99 switchbacks” on the way up the Mt Whitney Trail
It got really icy as we hit the cable section of the “99 switchbacks” and we needed to stop and put on our micro spikes for the rest of the trip ( a great thing to have in your bag and they don’t weigh that much). It seems like it takes forever to make your way up these switchbacks but eventually you will get closer to the “Trail Crest” and start to traverse rather then climb.
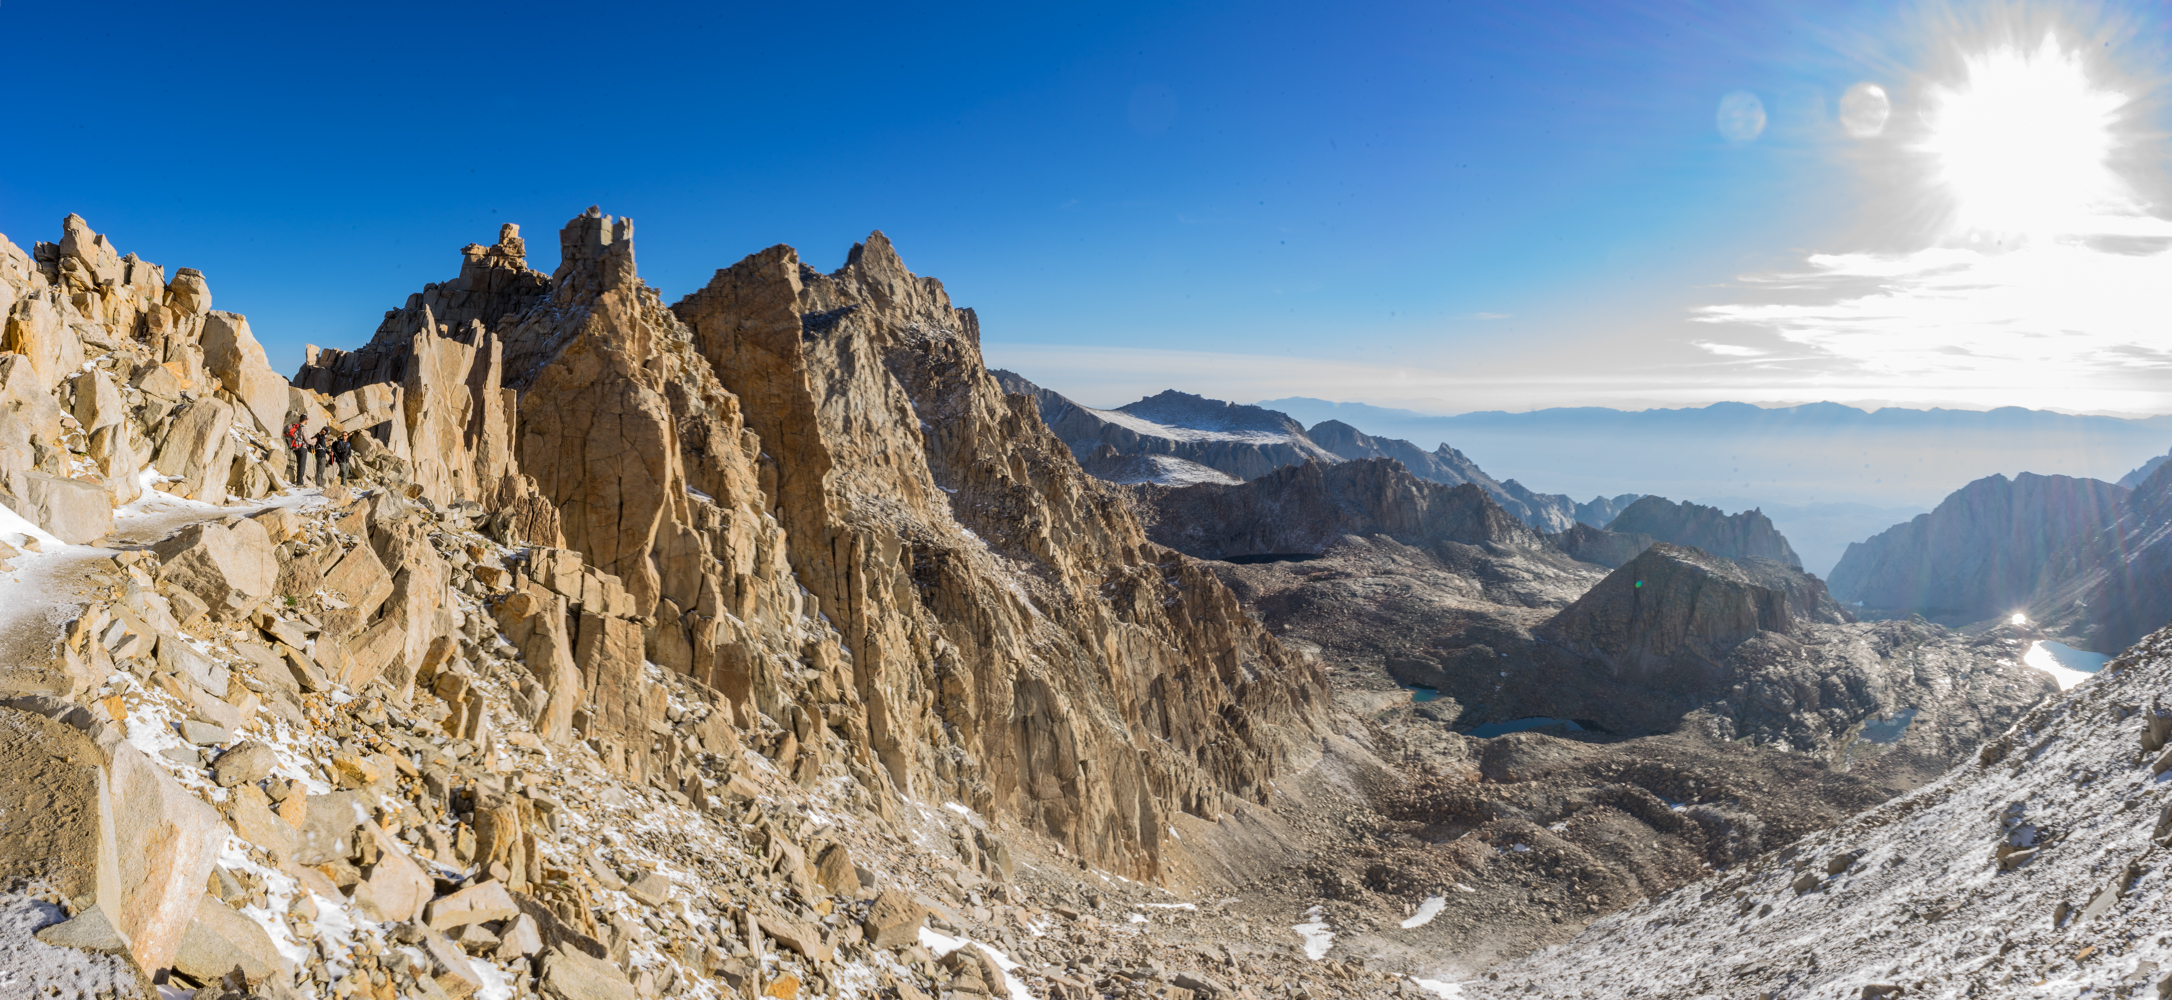
Almost to “Trail Crest” on the Mt Whitney Trail
As you hit the ” Trail Crest” stop and take in the scenery. At one point you will be able to see to either side of the mountain, its pretty cool. Sequoia National Park on one side, and the front side of Mt Whitney on the other.
Trail Crest. Sequoia National Park on one side, and the front side of Mt Whitney on the other
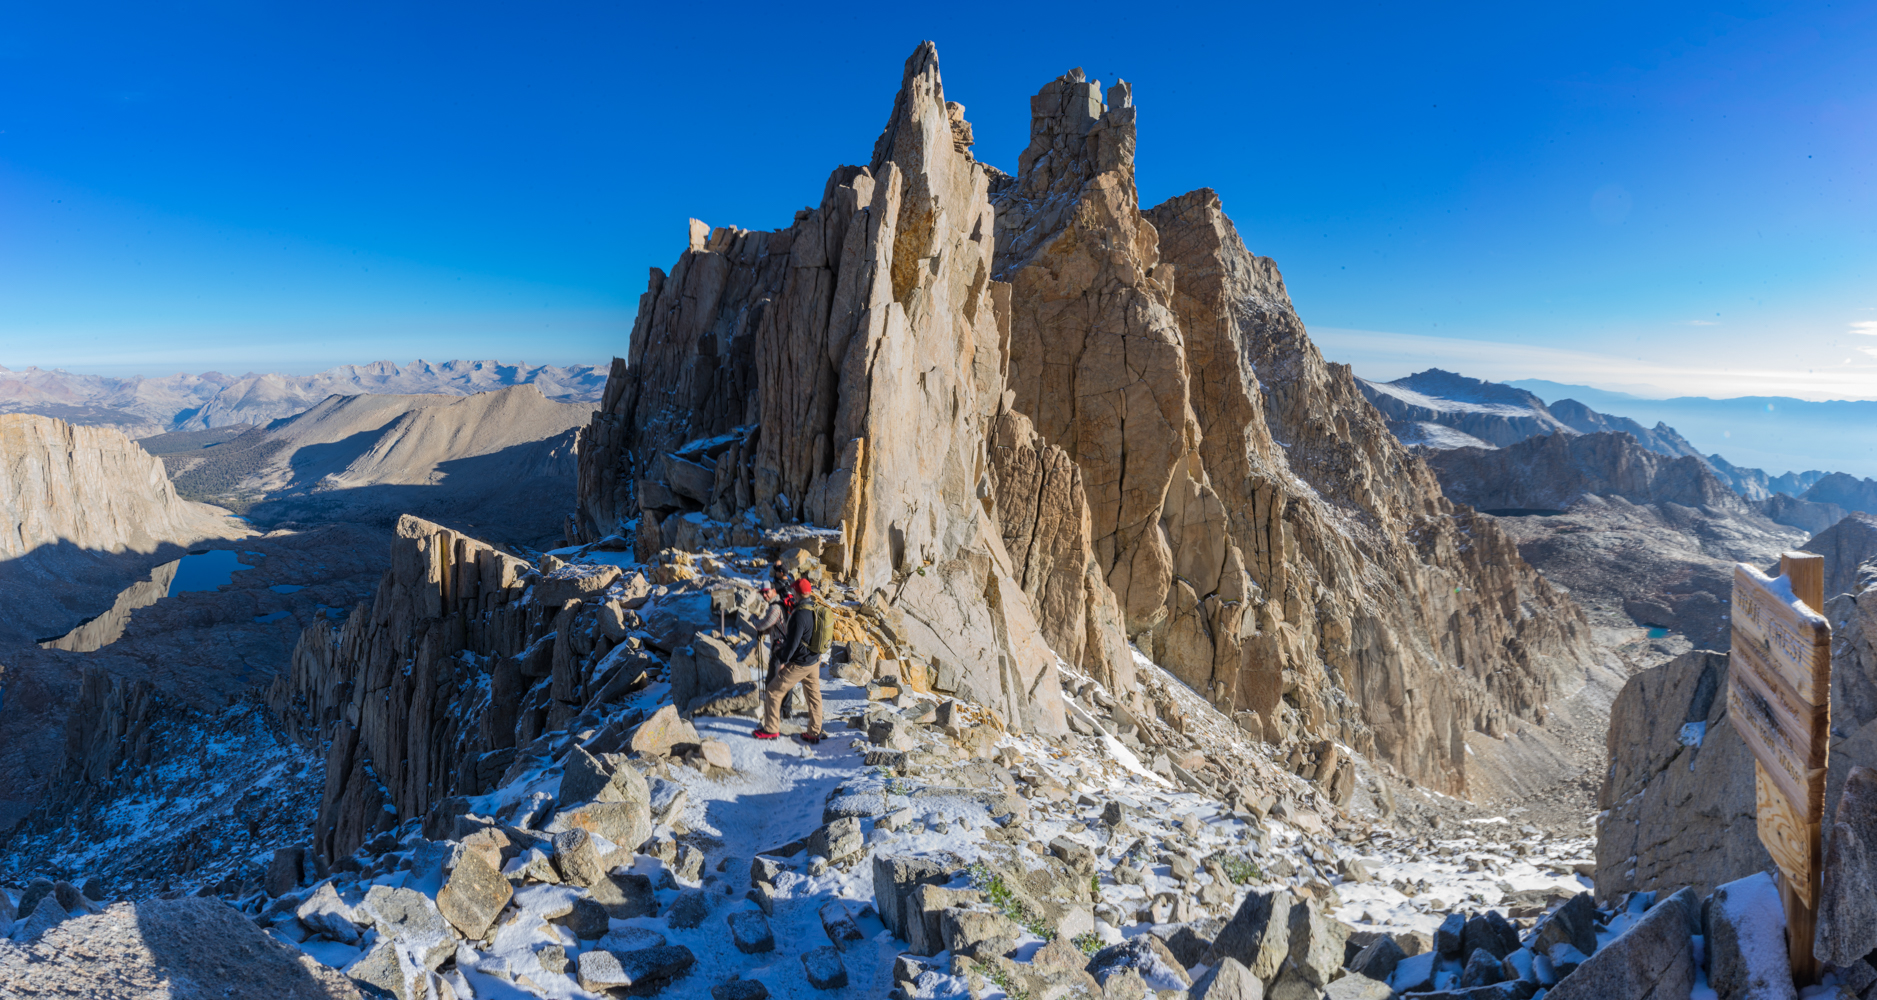
As you make your way along the ” Trail Crest” you will have a great view to the west, to Sequoia National Park, in fact in about 0.5 miles you will meet up with the John Muir Trail coming up the backside of Mt Whitney from Sequoia. While we were making our way along this ridge we could see people breaking down their campsites where they hunkered down the night before on the side of a mountain.
Someone coming up the John Muir Trail from Sequoia on the backside
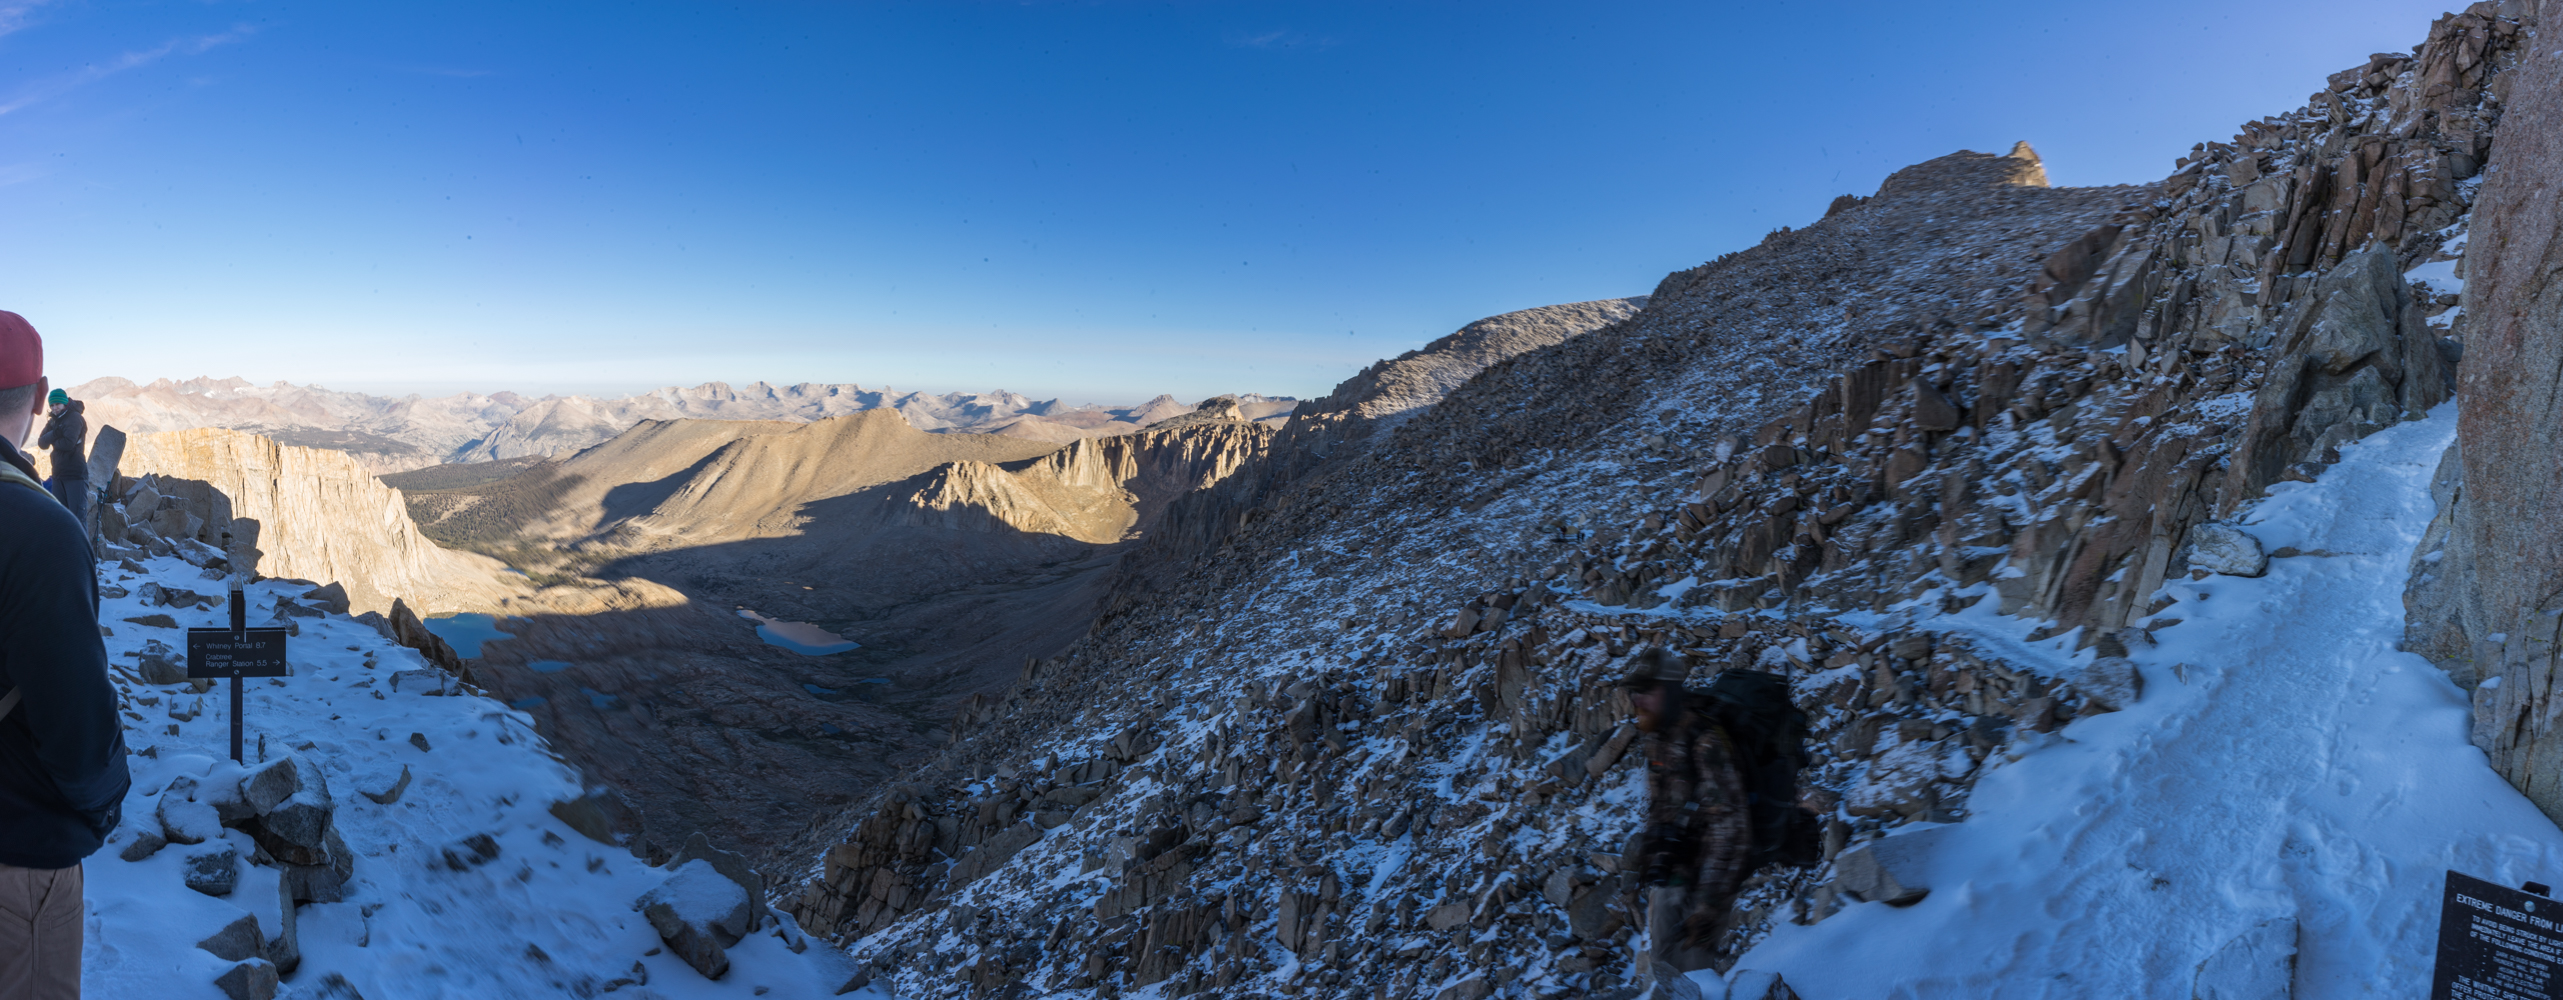
This part of the trail makes its way along the western side of the mountain peaks of Mt Whitney. There are some areas of the trail where in narrows down to less then a couple of feet wide and there are sheer drops on the western side. I am afraid of heights but did not have a problem with this but others with a fear of heights may.
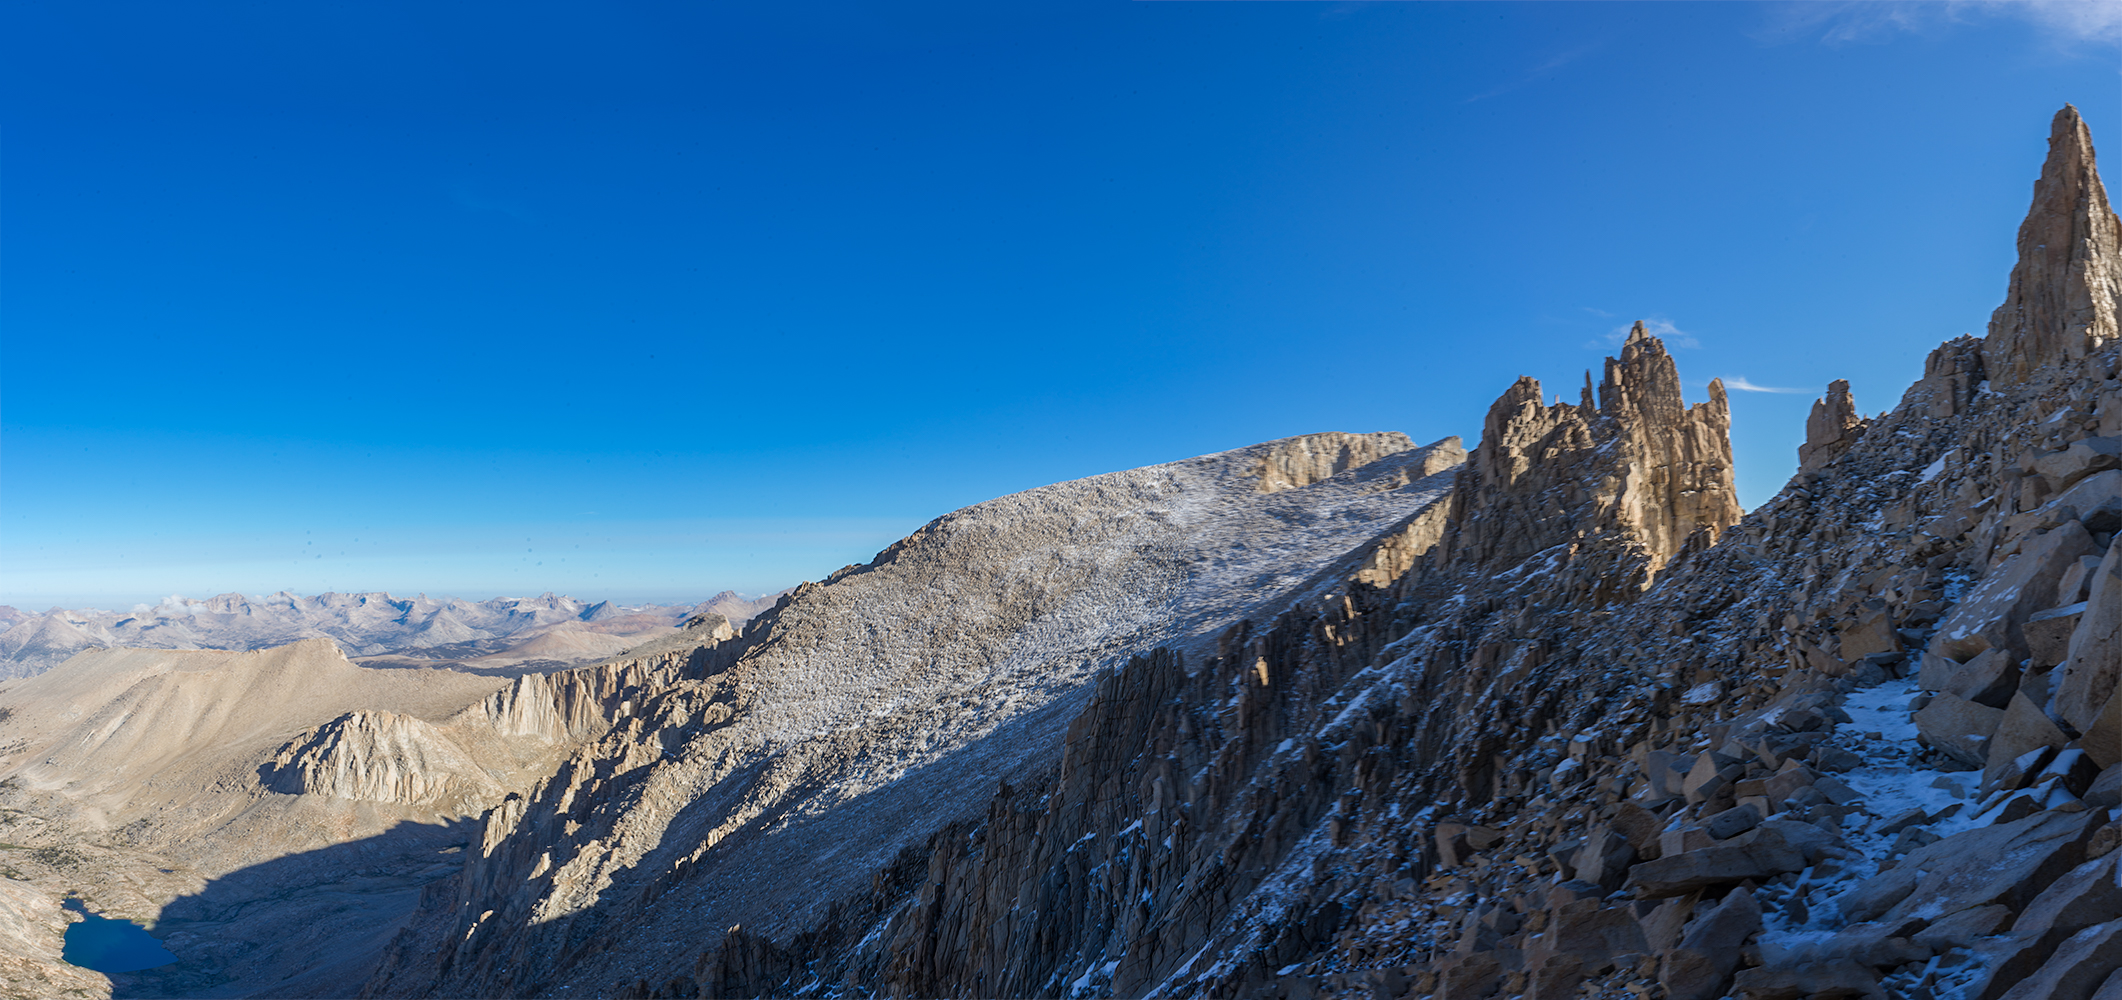
The trail heading along the backside towards the top of Mt Whitney
Once thing I noticed for my self is that this is where the altitude started to get to me. No confusion or nausea, but a very rapid heart rate ( it sounded like my heart was going to explode out of my ears), I don’t think I was even short of breath, but I needed to be aware of how I was feeling and stop every once in a while in order for my heart rate to come back down to a manageable level. By the time I made it to the top I was stopping every 30 feet or so in order for my heart rate to come back to normal, but I made it !
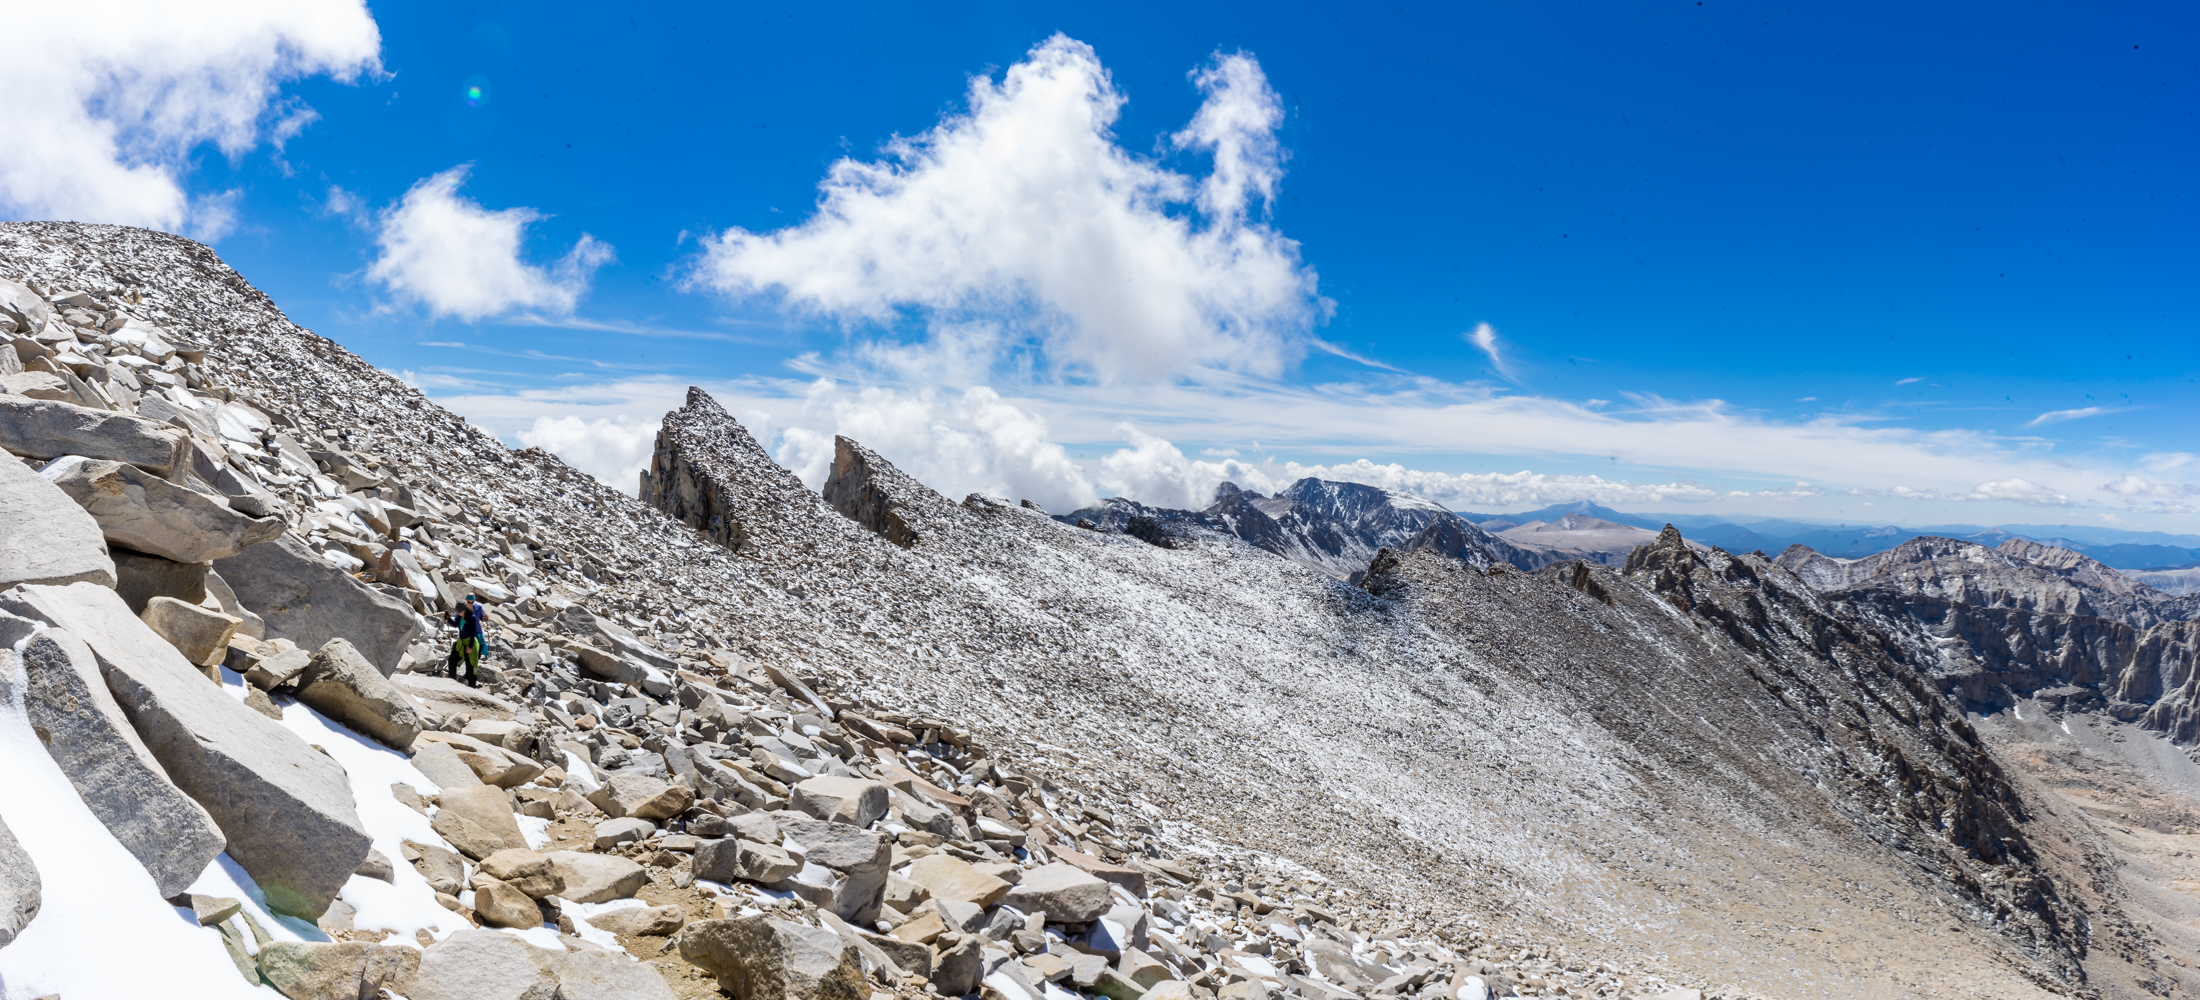
Almost to the top along the backside trail
Unfortunately by the time I made it to the top ( a little behind my buddies) the clouds had started to make their way up the mountain and where blocking the view down the eastern side.

Smithsonian Hut at the top of Mt Whitney
Don’t forget to take enough food with you to not only fuel your hike up from “Trail Camp”, but also the way down. Even though heading down is always easier, it still requires energy and you can plan on at least taking 1/2 as much time getting down as it took you to get up. That could be a 6 hour hike back down to the portal and you waiting car.
Weather forecast for the Mt Whitney Hike:
For a more detailed weather report I would suggest this page: http://timberlinetrails.net/WhitneyWeather.html They do a pretty good job of breaking down the expected weather for the next 7 days at the portal, the trail camp, and the crest of Mt Whitney.


