Mt Wilson via Chantry Flats
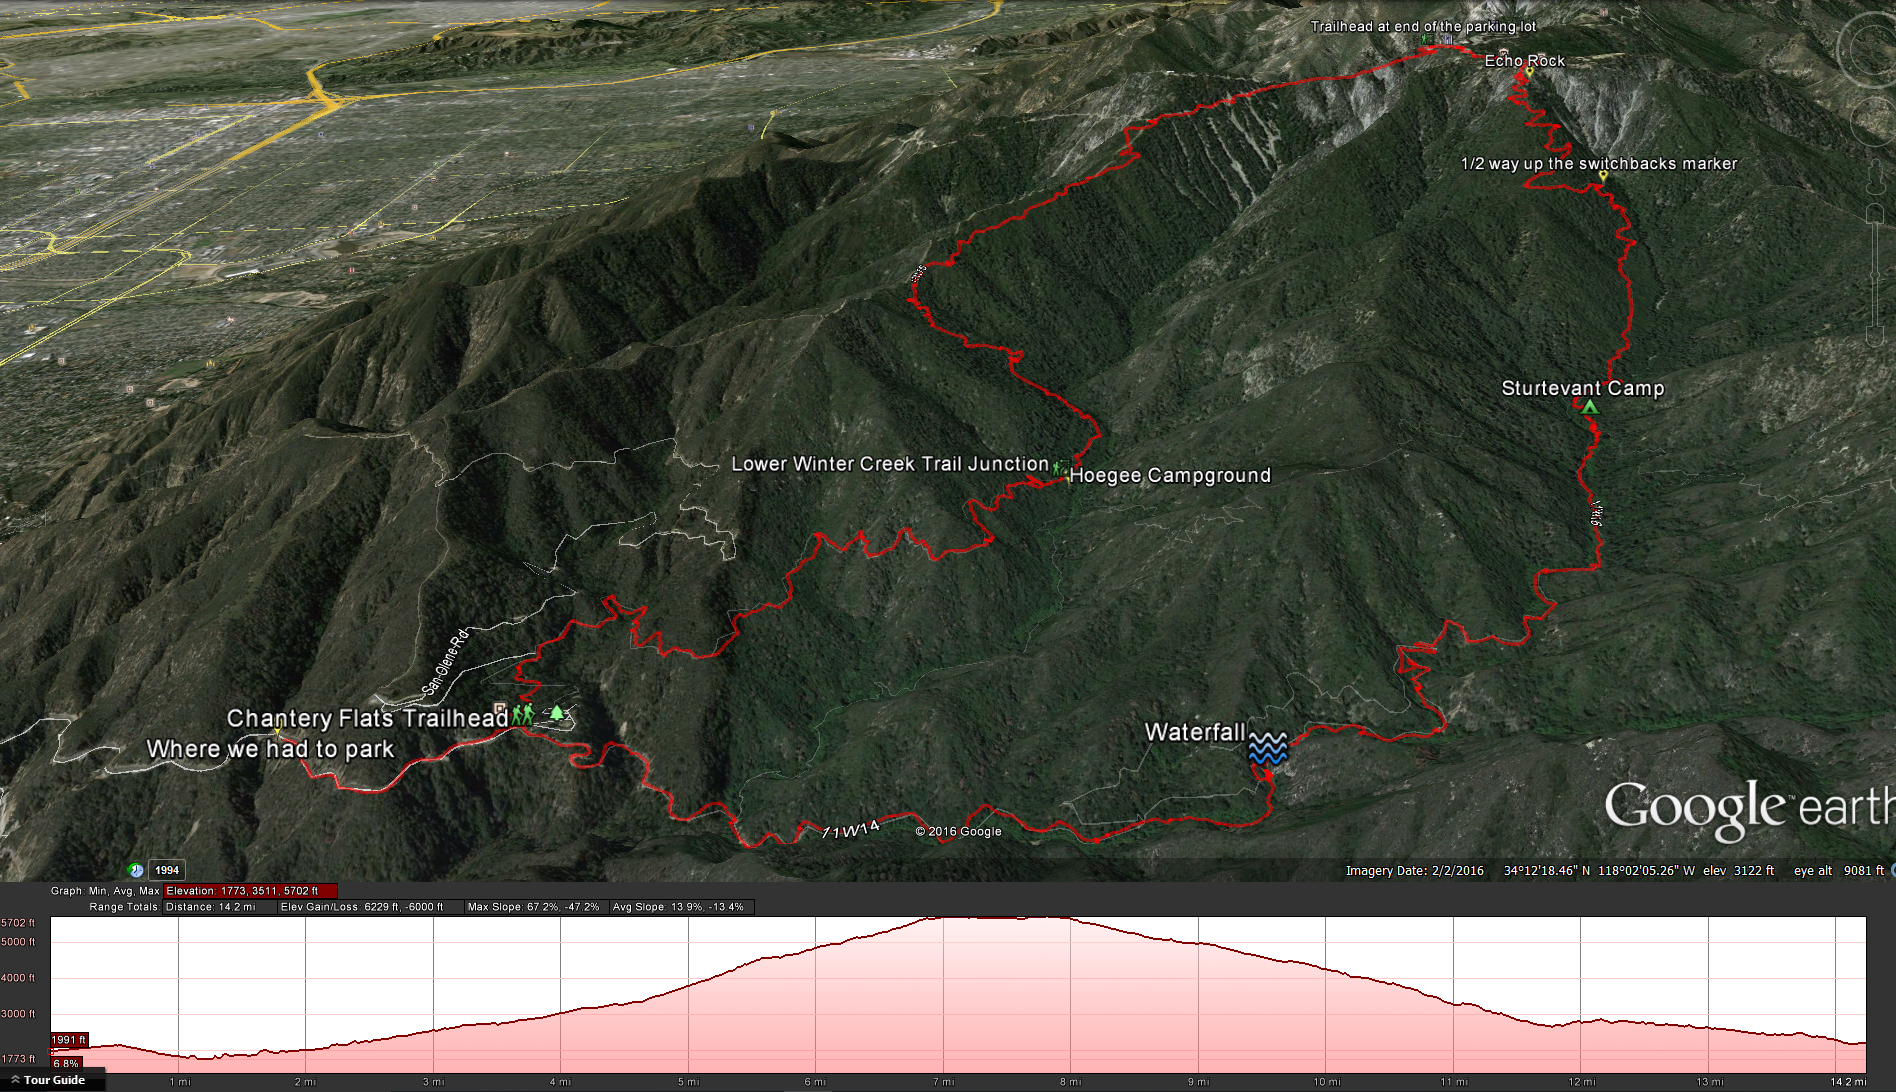
Google Earth: Mt Wilson HikeMt Wilson GPX File
Distance : 14 miles Elevation Gain: 4000 feet. Time to complete: 8 -9 hours. Difficulty: Moderately Strenuous
Directions: From the 210 freeway, take North Santa Anita Blvd, head north towards the mountain and through the sleepy neiborhood. After a few miles, it becomes Chantry Flat Road. Follow this windy road up the mountain for a few more miles and you’ll reach Chantry Flat Recreation Area. Google Maps Directions Here.
Permit: You do not need a permit for the hike but you will need a Forest Service Adventure Pass, you can pick up this pass at the Adams Pack Station there at Chantry Flats ($5.00 – day use ), you can also pick up the adventure pass ahead of time at your local stores, I personally pick up a annual pass ( $30.00 – year ) at Big 5 every year and just stick it in my glove box so I don’t need to worry about it. The Chantry Flats parking lot fills up early ( one of our party arrived at 6am and said it had already started filling up) so if you do not want to add and extra mile or two to your hike as you hike up the Forest Service road to the recreation area I would suggest that you arrive as early as you can.
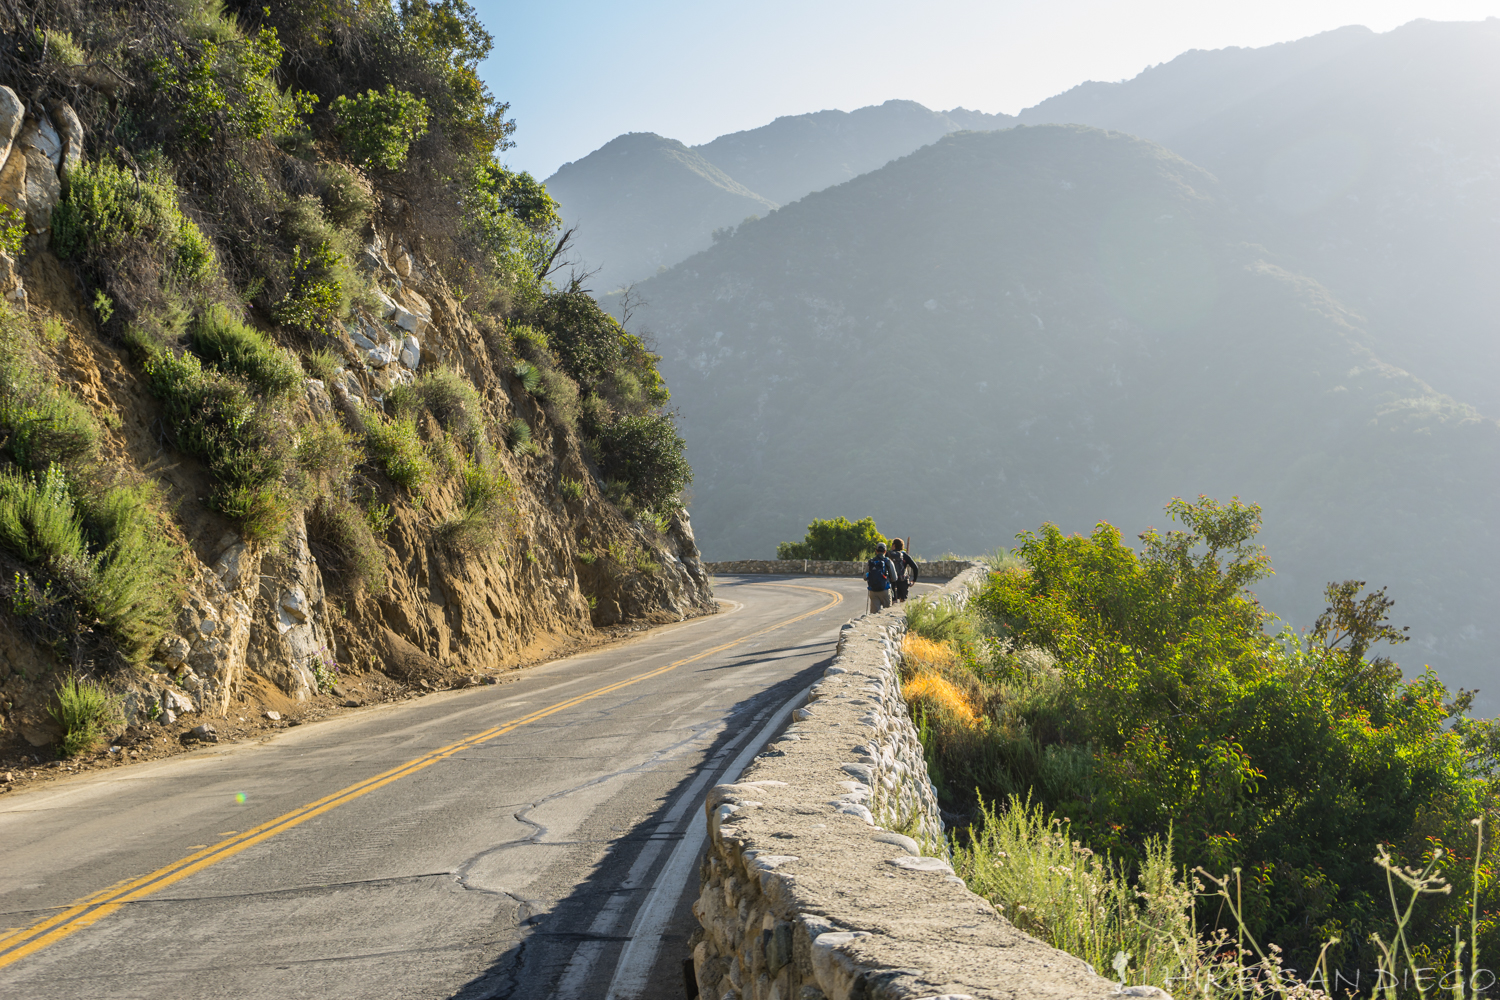
Taking in that extra mile because all the parking is filled up.
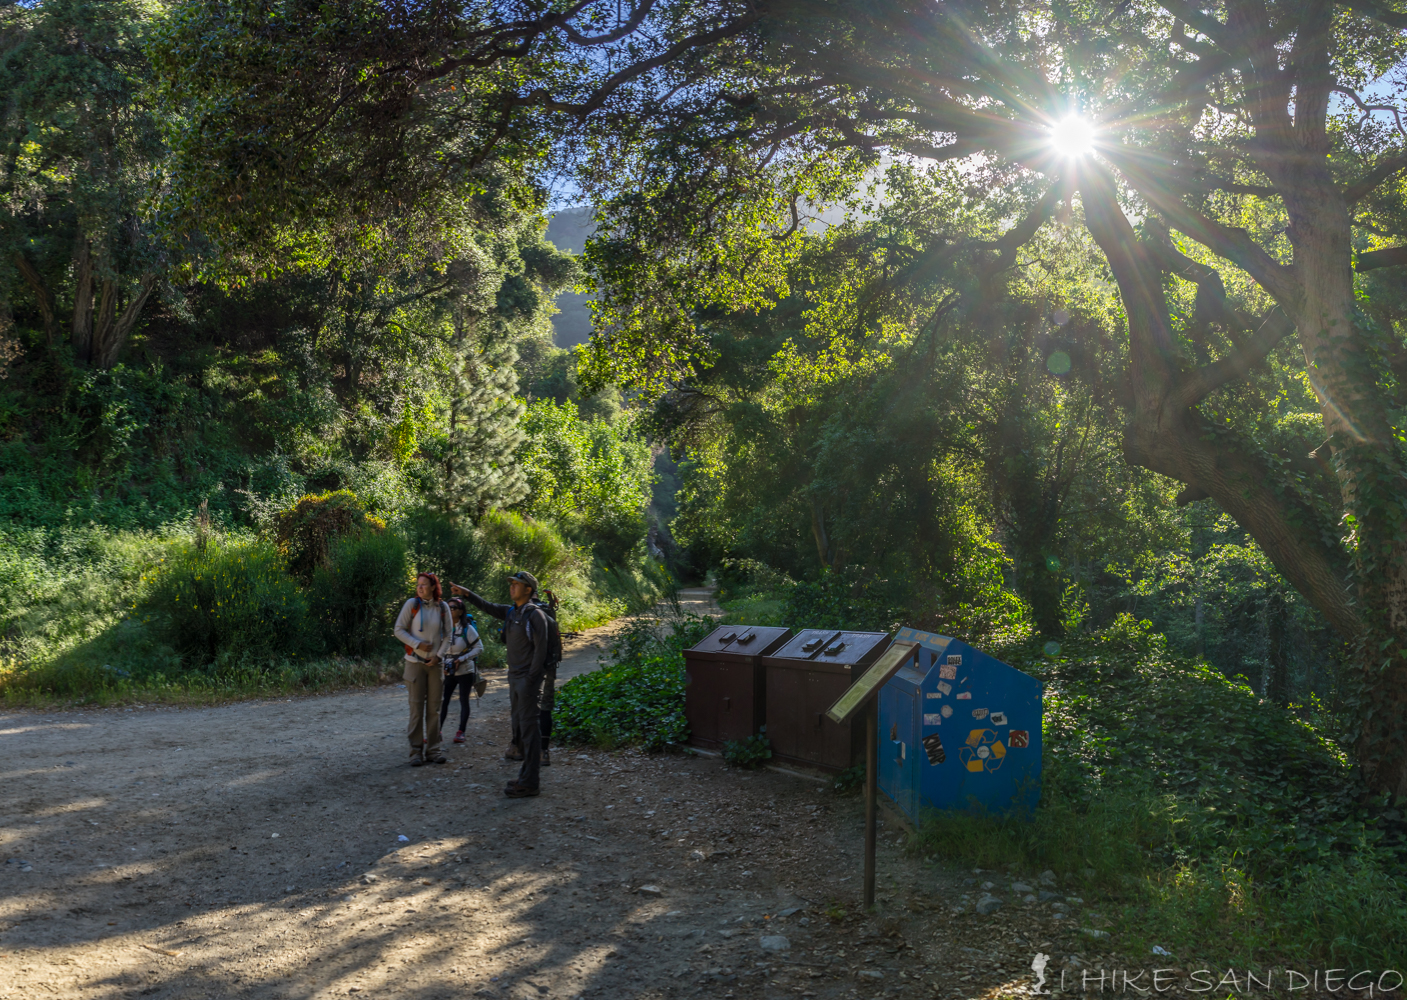
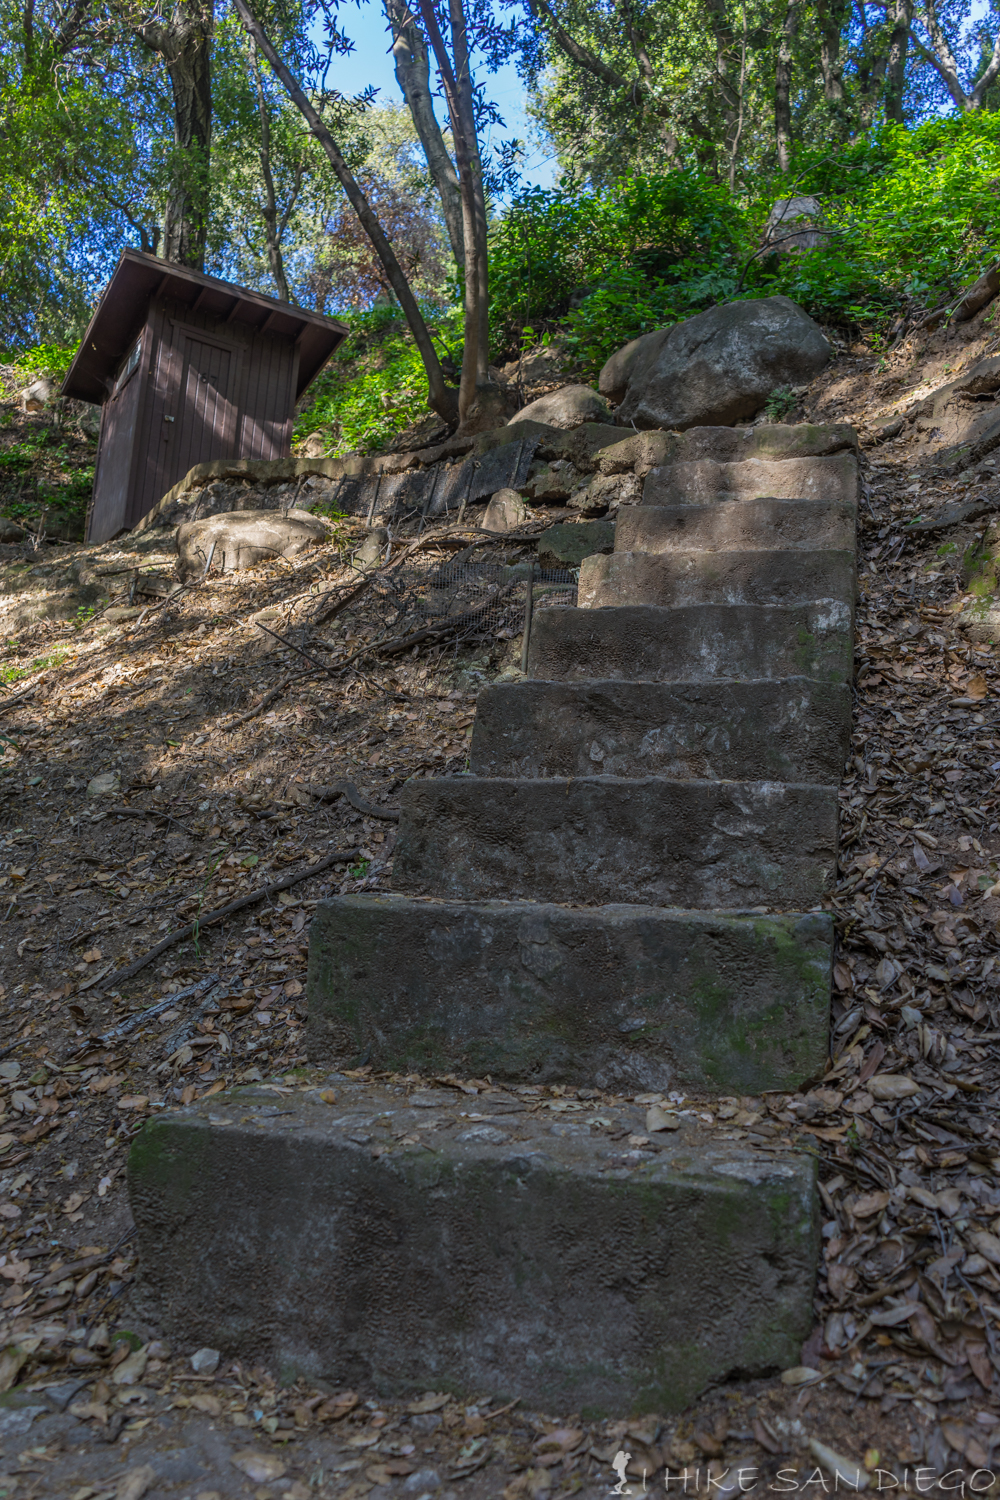
To Start the hike, head to the Gabrieleno Trail ( just behind the first bathroom facility in the Chantry Flats parking lot ) and head down into the valley below.
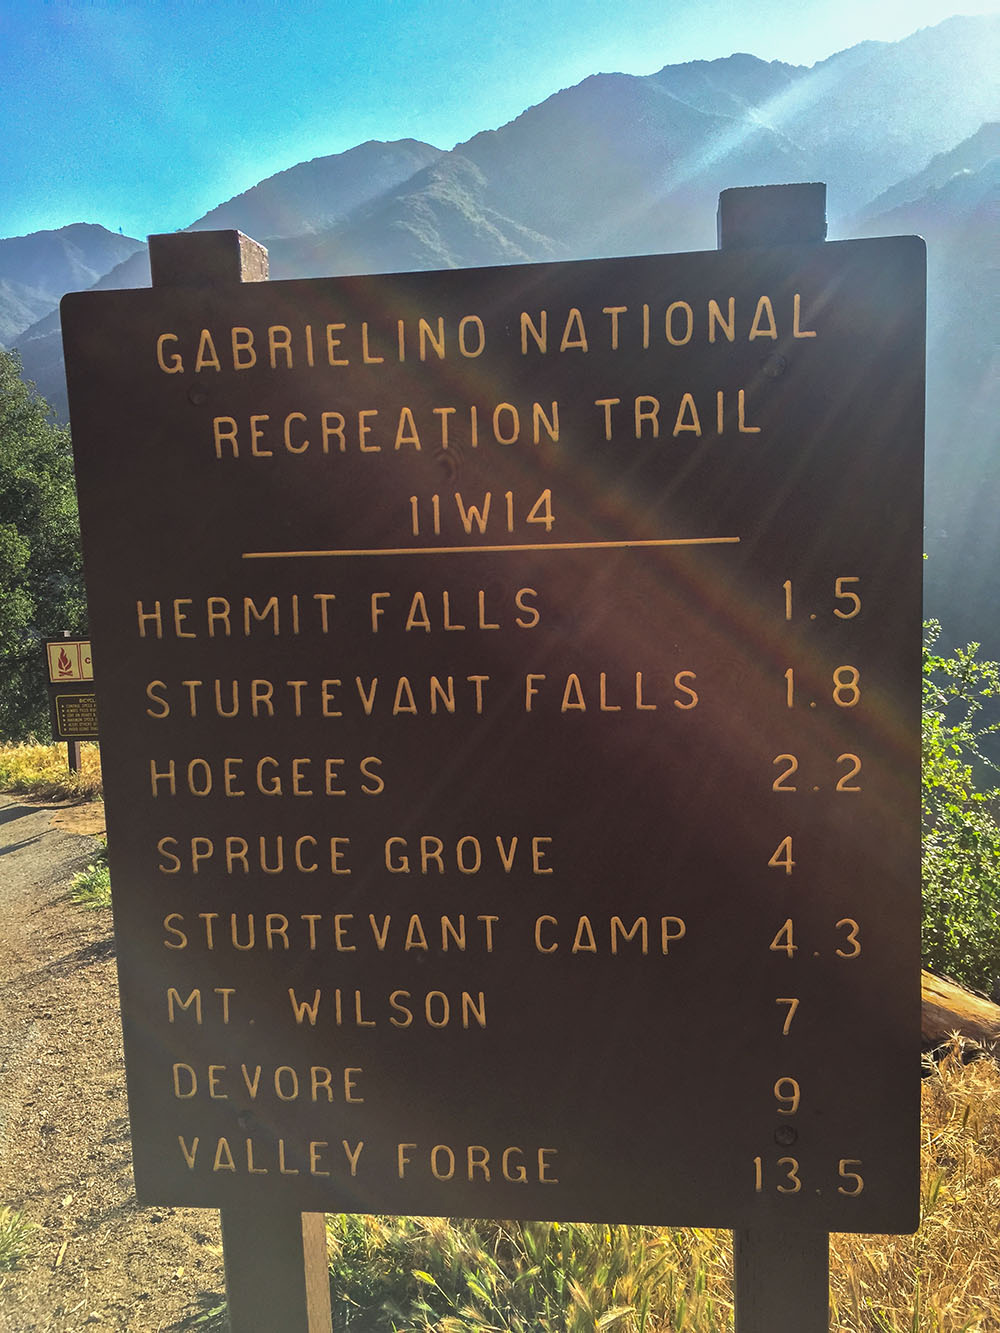
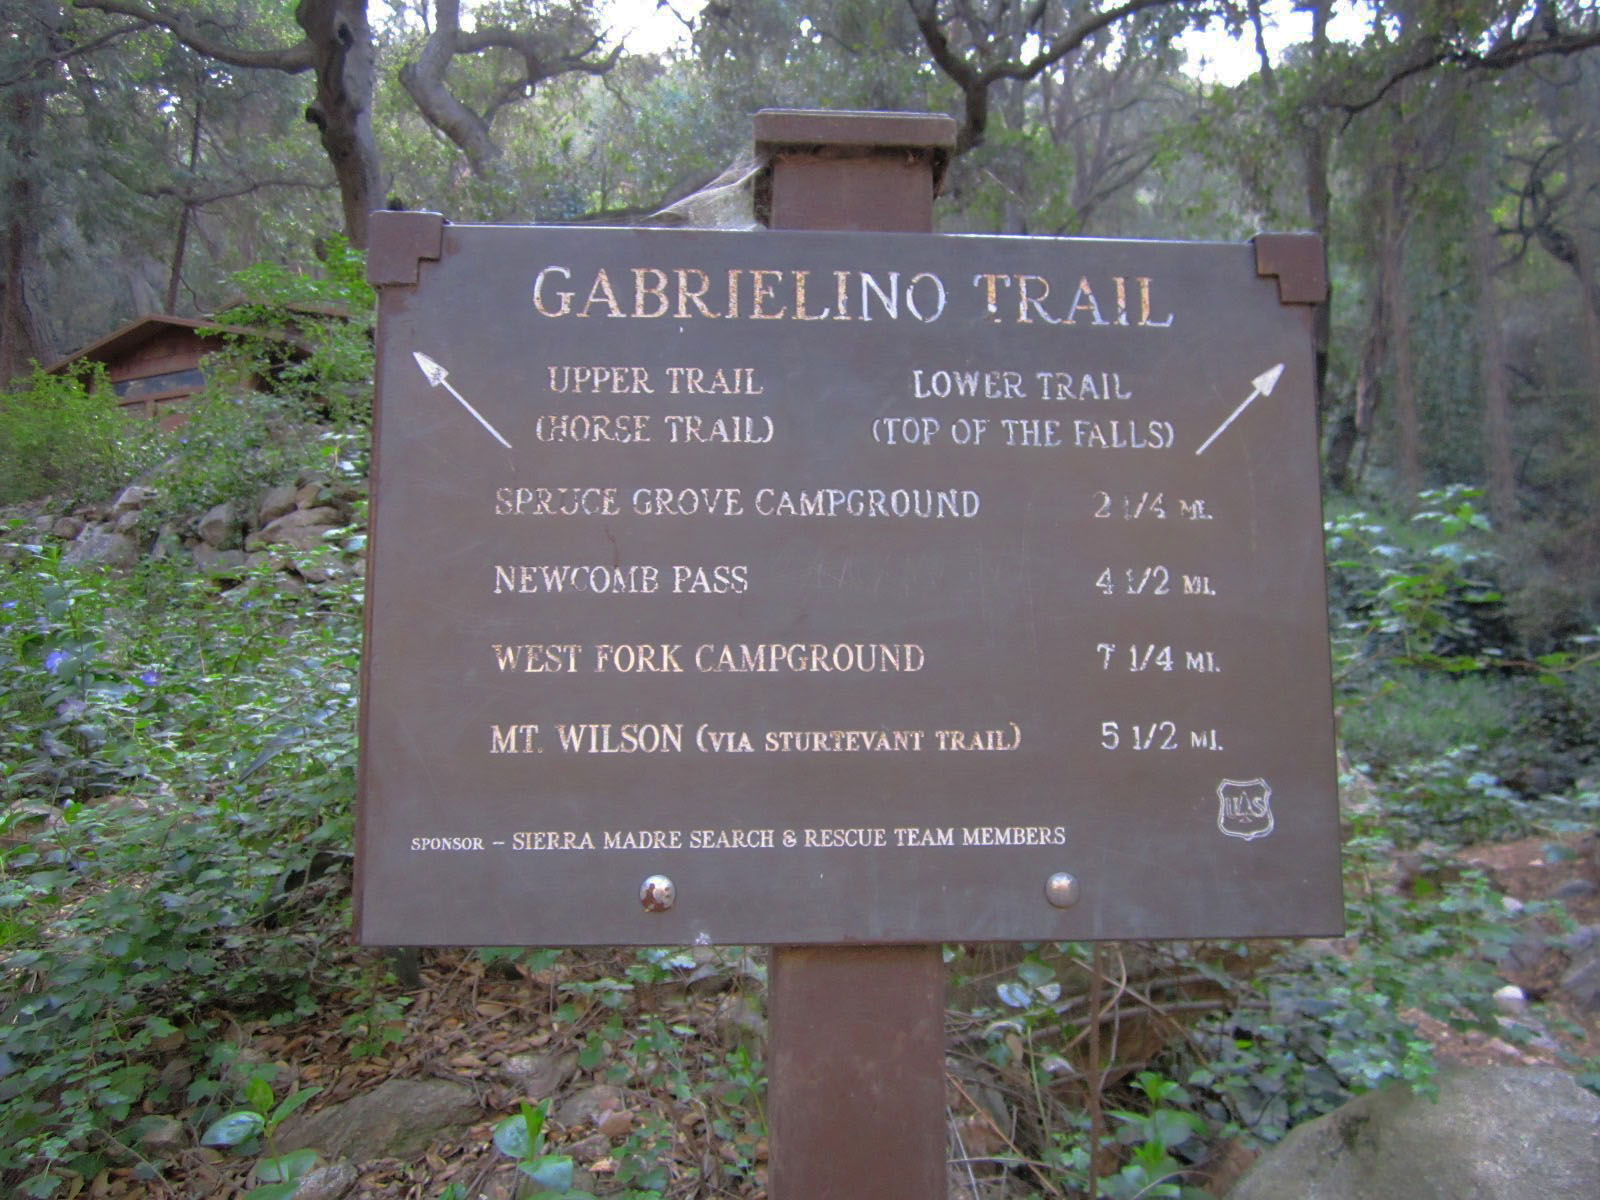
The sign at the start of Gabrielino Trail as you head down into the canyon.
Follow the paved road about 6/10 of a mile until you get to the bottom of the canyon. The day we hiked this we came across a film crew filming along this paved road.
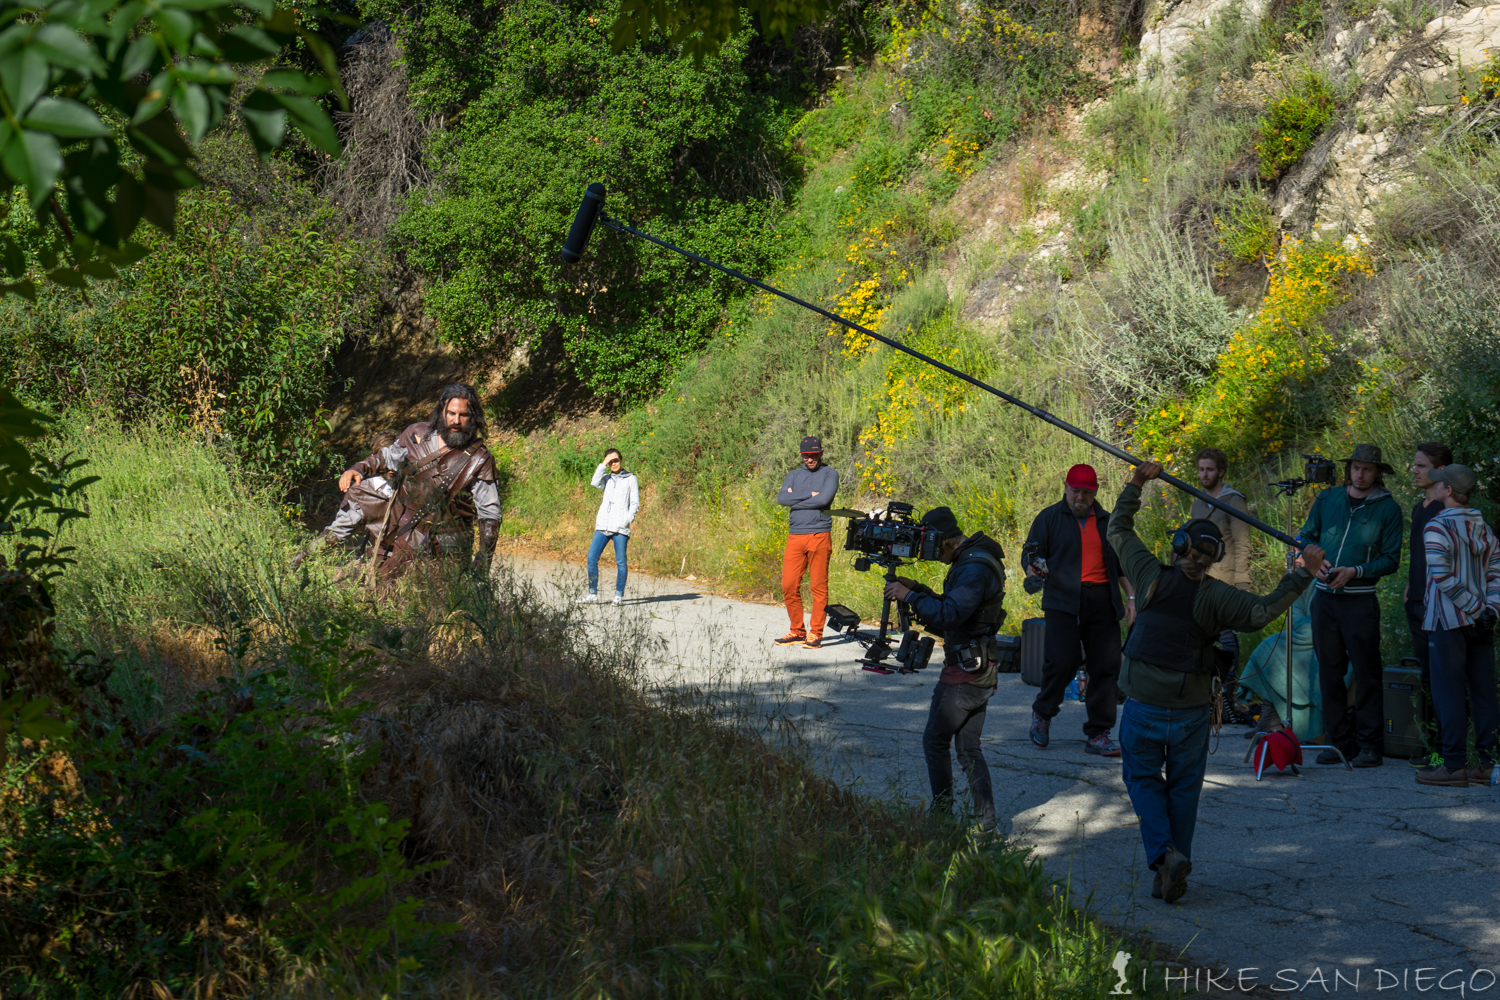
A film crew working along the Gabrielino Trail the day we were hiking to Mt Wilson.
Cross the Winter Creek Bridge, at this point the trail splits, with the Lower Winter Creek Trail heading up a canyon from the left side of the Bathroom Facility and the main trail continuing on past the right side of the bathroom facility.
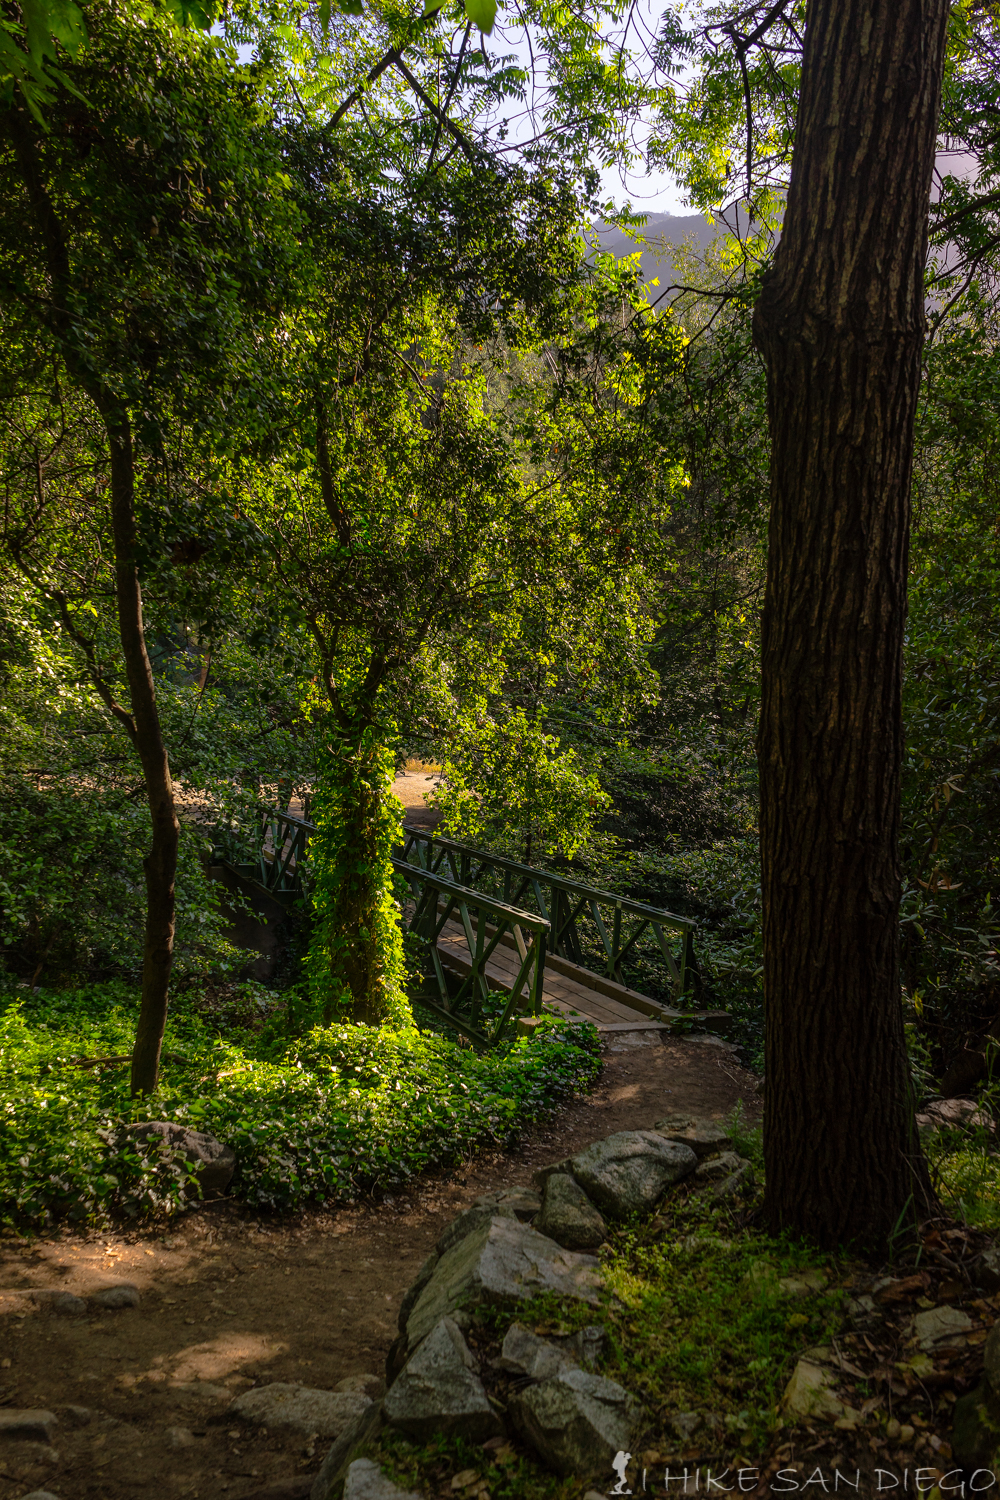
Winter Creek Bridge
At the trail split just after the Winter Creek Bridge
One thing you will notice as you make your way through the canyon are all the check dams along the way. These dams where built during the late 1950’s to early 19060’s as a way of helping with flood control, but to no avail. Just a few years after the dams were completed a strong El Nino season in 1969 left these dams filled with debris resulting in the loss of 9 cabins in the area. As you hike through here you may even notice that some of these dams are missing their “sill dams” a small dam just below the larger one to help protect the foundation of the larger dam eventually leading the the eroding away of the larger dams foundation.
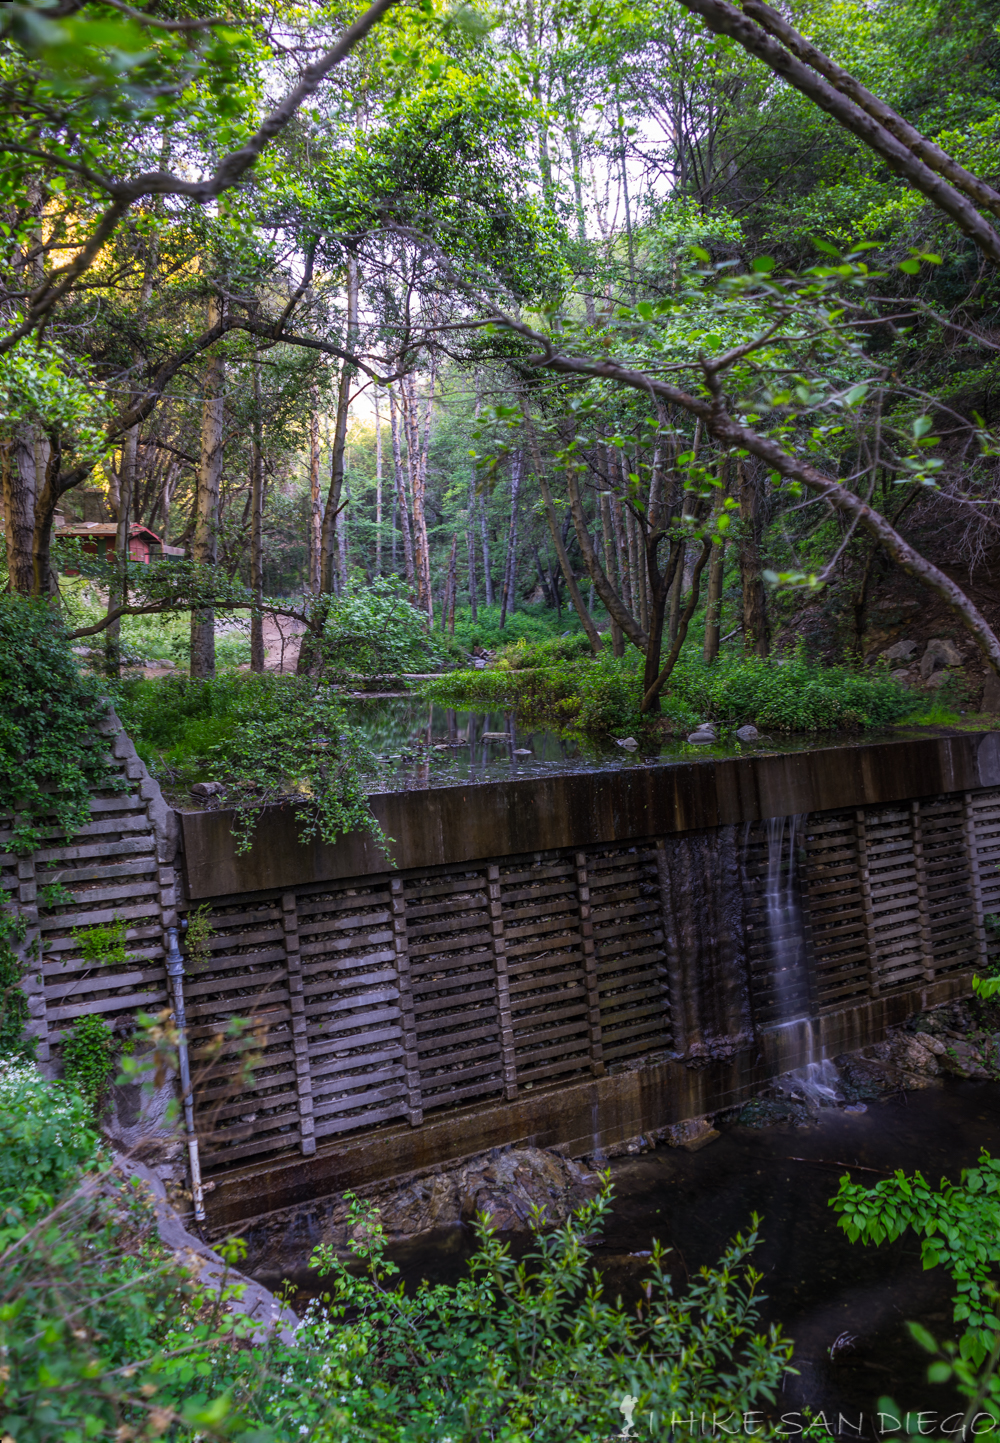
Check Dam in the Santa Anita Canyon and along the Gabrielino Trail.
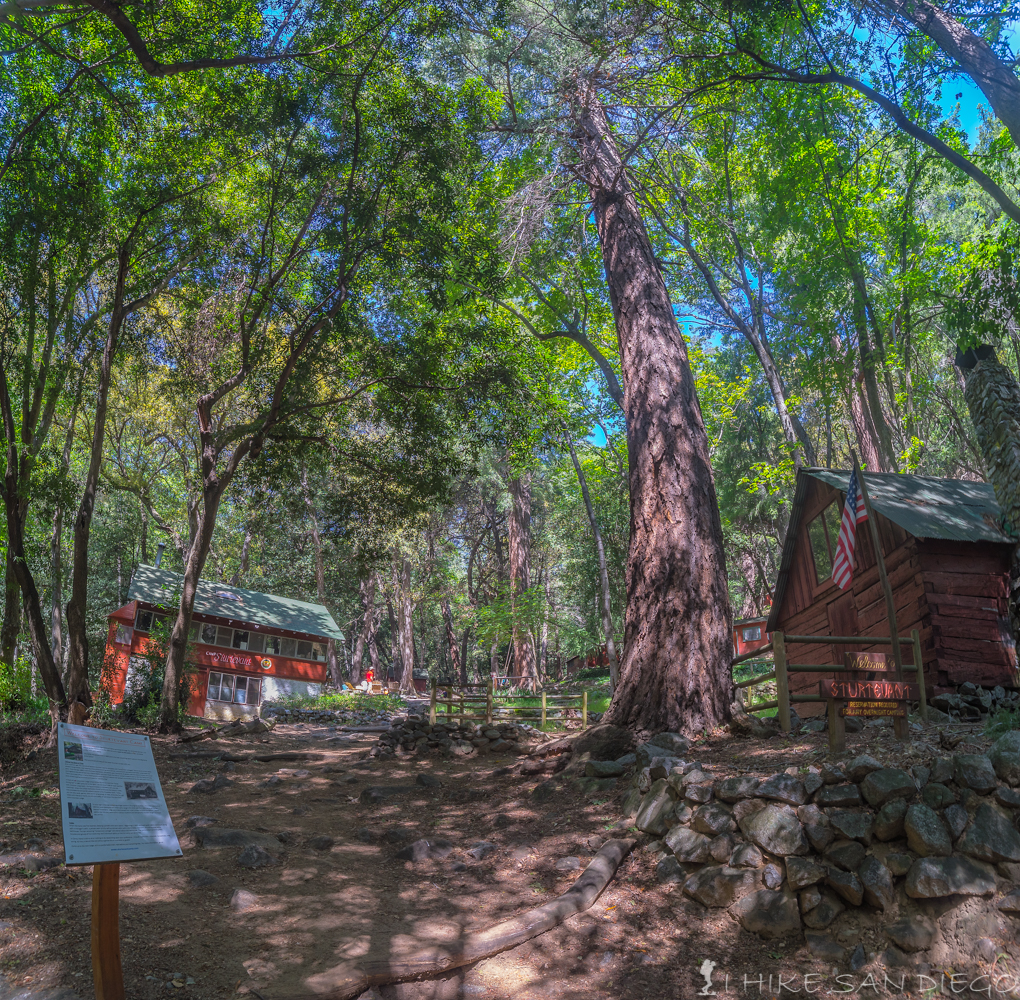
You will also notice a large number of small cottages in the area as you continue to hike. There are 81 cottages remaining of the 350 original cabins. None of these cabins have any modern amenity’s such as running water, electricity, or indoor plumbing, which is why you will also see an outhouse near each cabin. All these cabins are privately owned and where constructed from the 1890’s through the 1920’s. One extremely unique feature in this area is the last existing magneto-type crank phone system in the United States, connecting all the cabins and pack station at the bottom, it reminds me of an old crank phone system I used to use in the Army way back when. The only way anyone gets any supplies to these cabins is to either hike them in or to use the pack trains that are still in use at the Adams Pack Station back at the trail head.
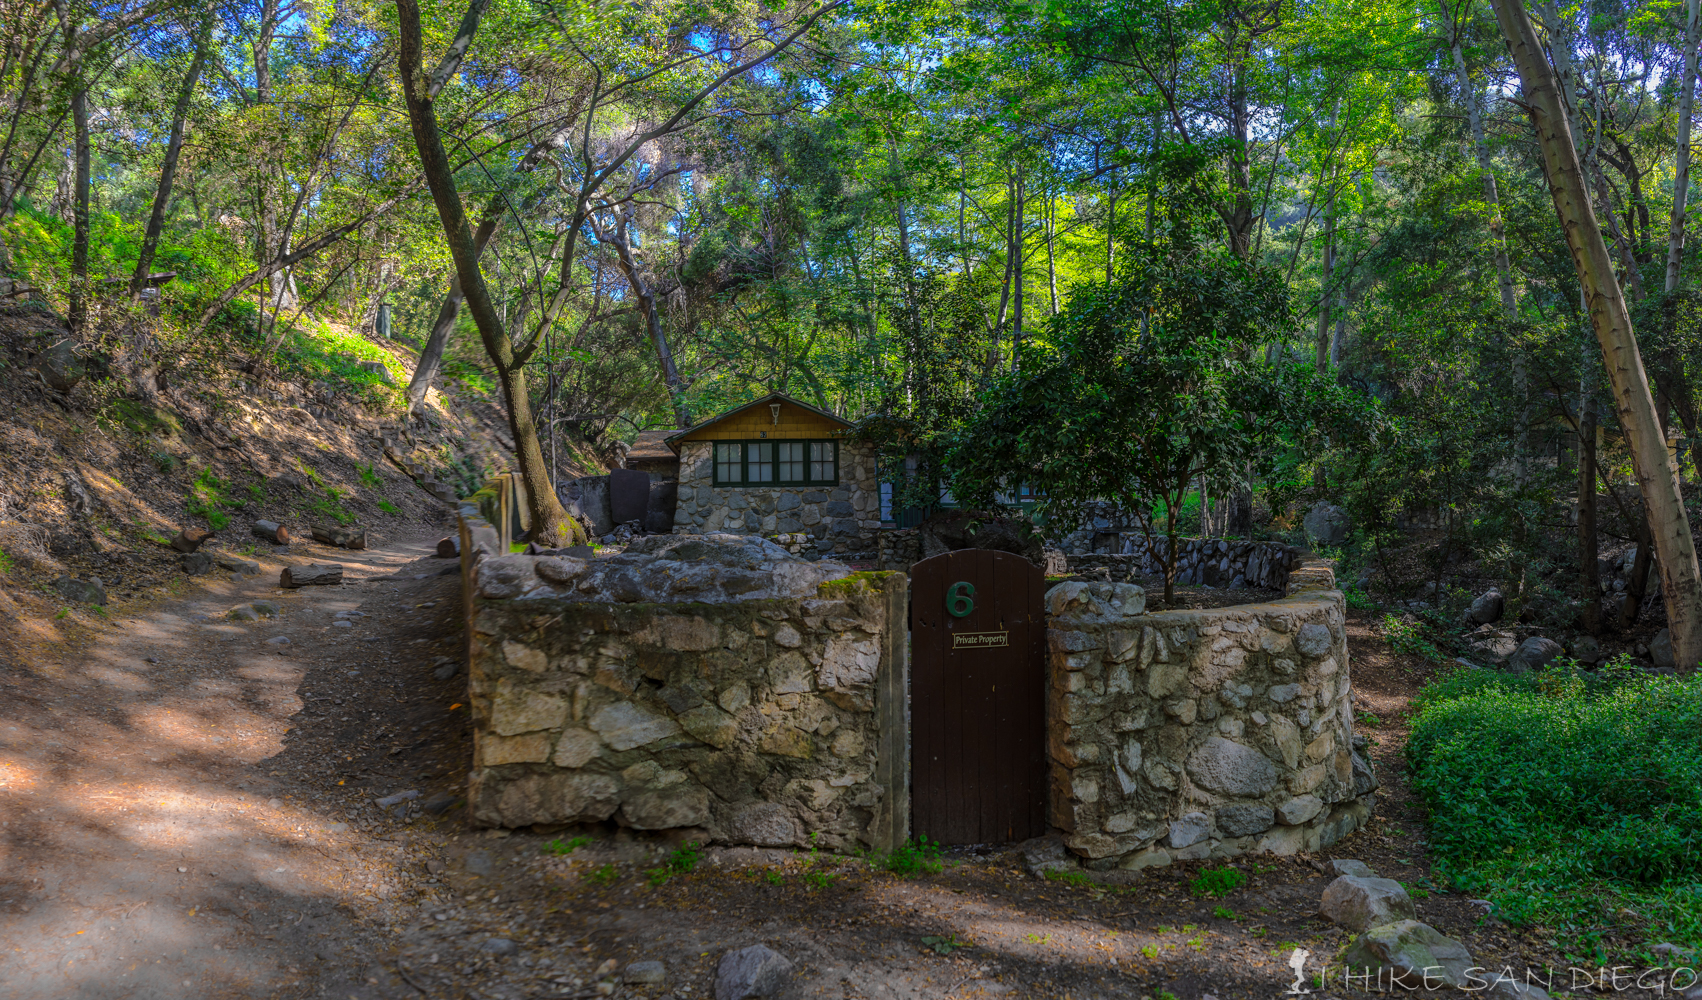
Small privately owned cabin along the Garielino Trail
Each of the cabins you see along the way has its own outhouse to go along with it.
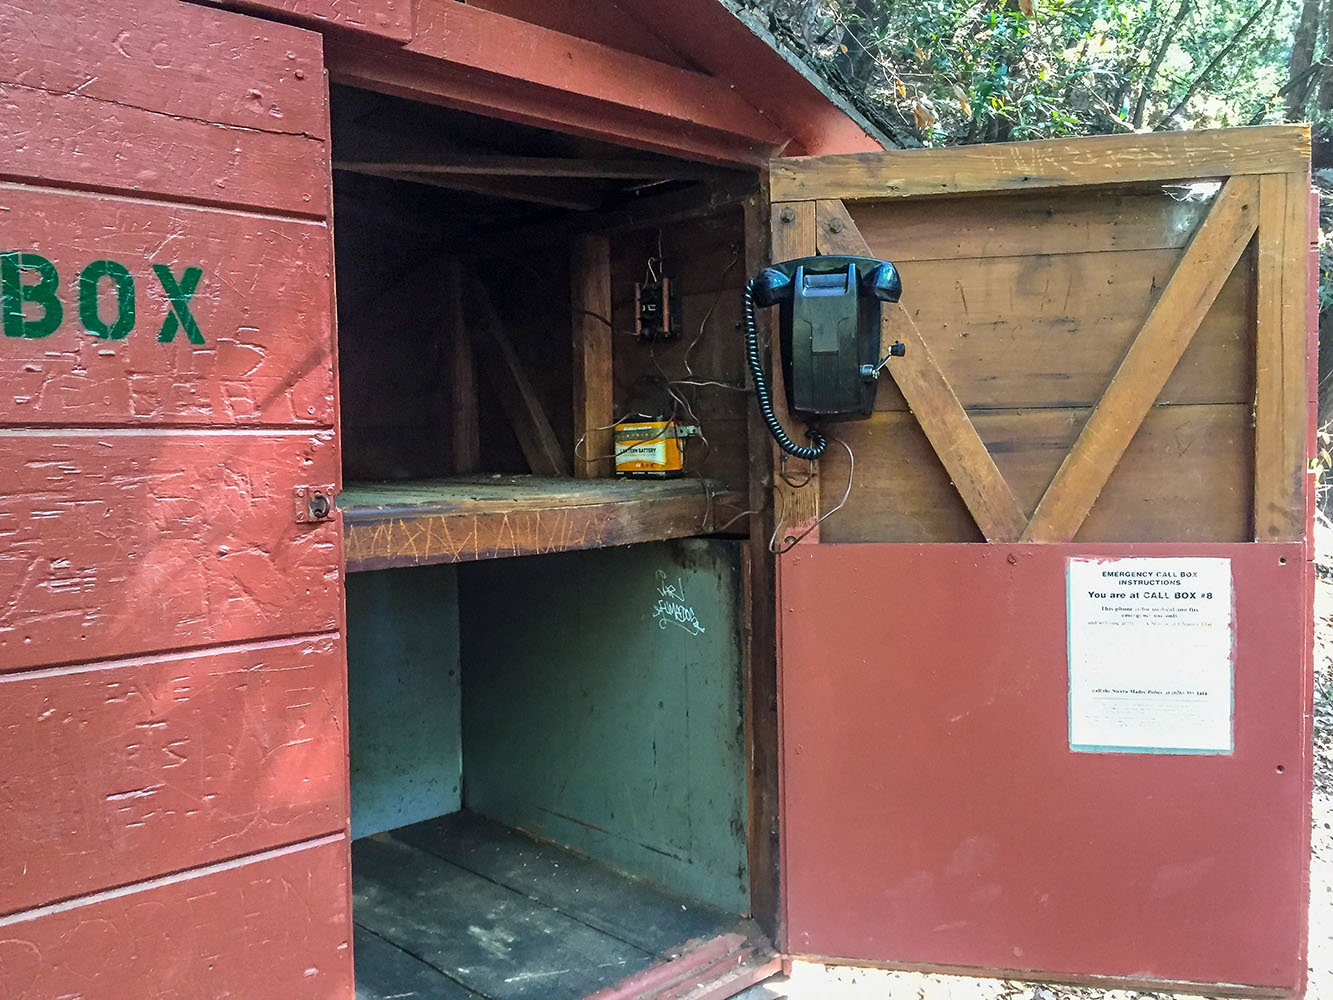
One of the old magneto-type crank phones that is part of the system that incorporates all of the cabins, some emergency phones on the trails and the pack station.
You will reach Sturtevant Falls a little more then a mile after reaching the bottom of the canyon or about 1.8 miles into the hike from the trailhead. Before you reach the falls you will see the trail split, going left for the Upper Trail ( used by pack trains), and heading to the right for the Lower Trail ( going to the top of the falls), you can follow the trail to the bottom of the falls as well, there is a cut going up the side of the hill by the falls to get you back to the trail that goes by the top of the waterfall but I would recommend just retracing your steps back to where the trail is, the cut up the hill is steep, and the continuing erosion by using this short cut will eventually ruin part of the trail requiring some major trail work to bring it back to usable format.
Upper and Lower Trail split before Sturtevant Falls
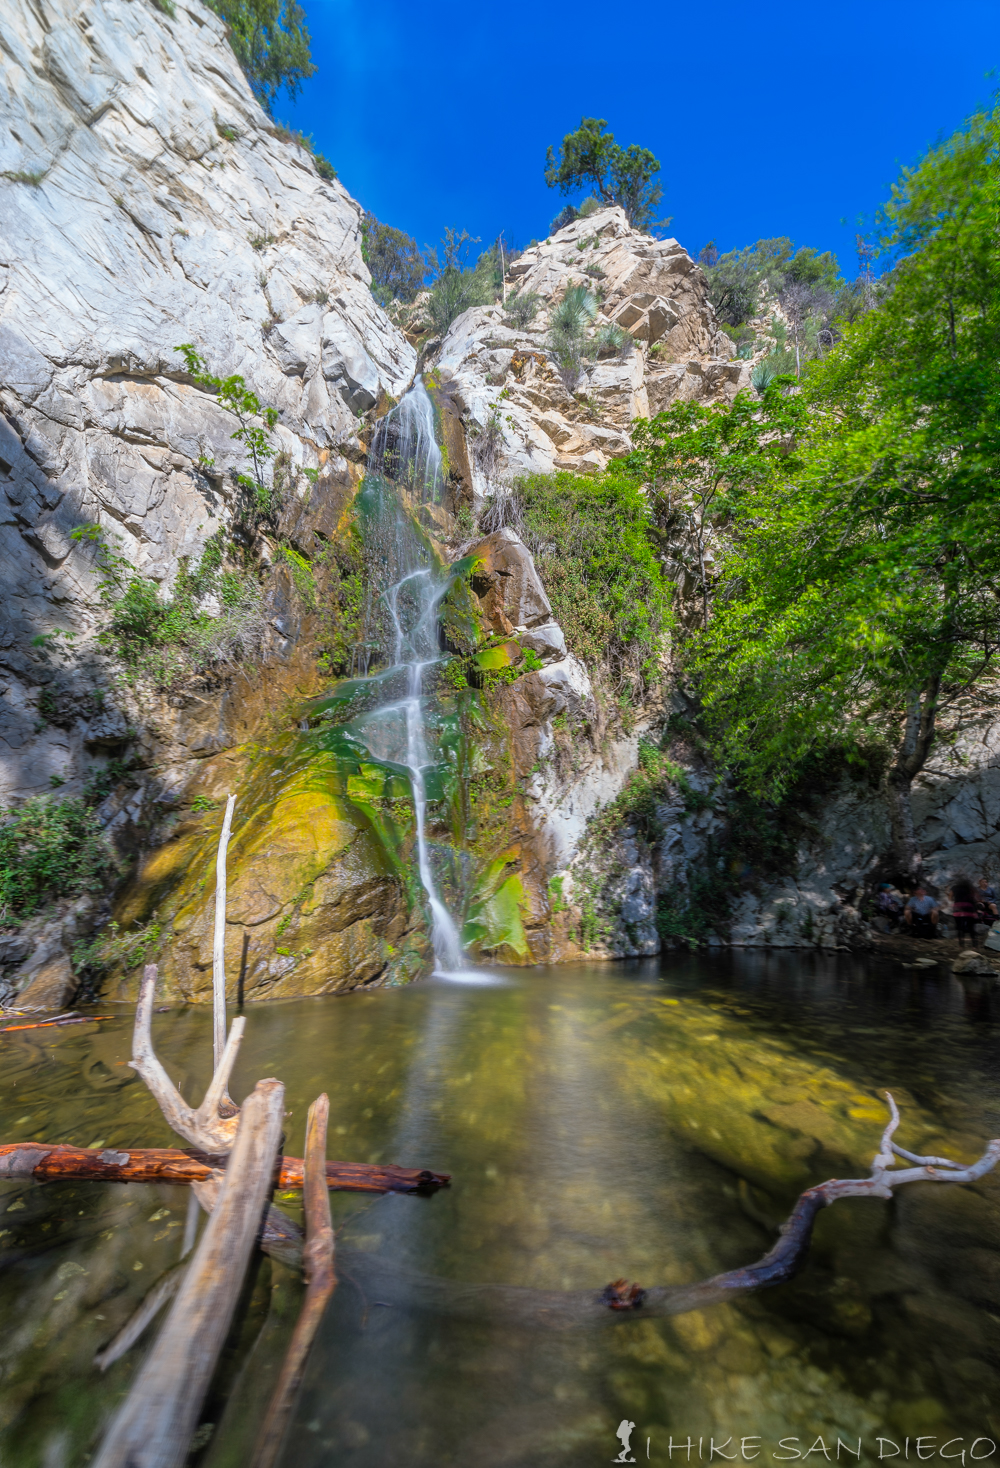
Sturtevant Falls
After enjoying Sturtevant Falls head back to the trail and make your way along the trail past the top of the waterfall and back under tree cover again. You will continue on the trail crossing over the creek and making your way along the right side of the canyon before crossing back over to the left side again and making your way past the Cascade Picnic Area and the Spruce Grove Trail Camp before you make it to Sturtevant Camp 4.3 miles after starting your hike. You will find many people camping in the the camp sites along the way or having a little hiking picnic in the picnic areas.
Entering Sturtevant Camp along the Gabrielino Trail on the way up to Mt Wilson
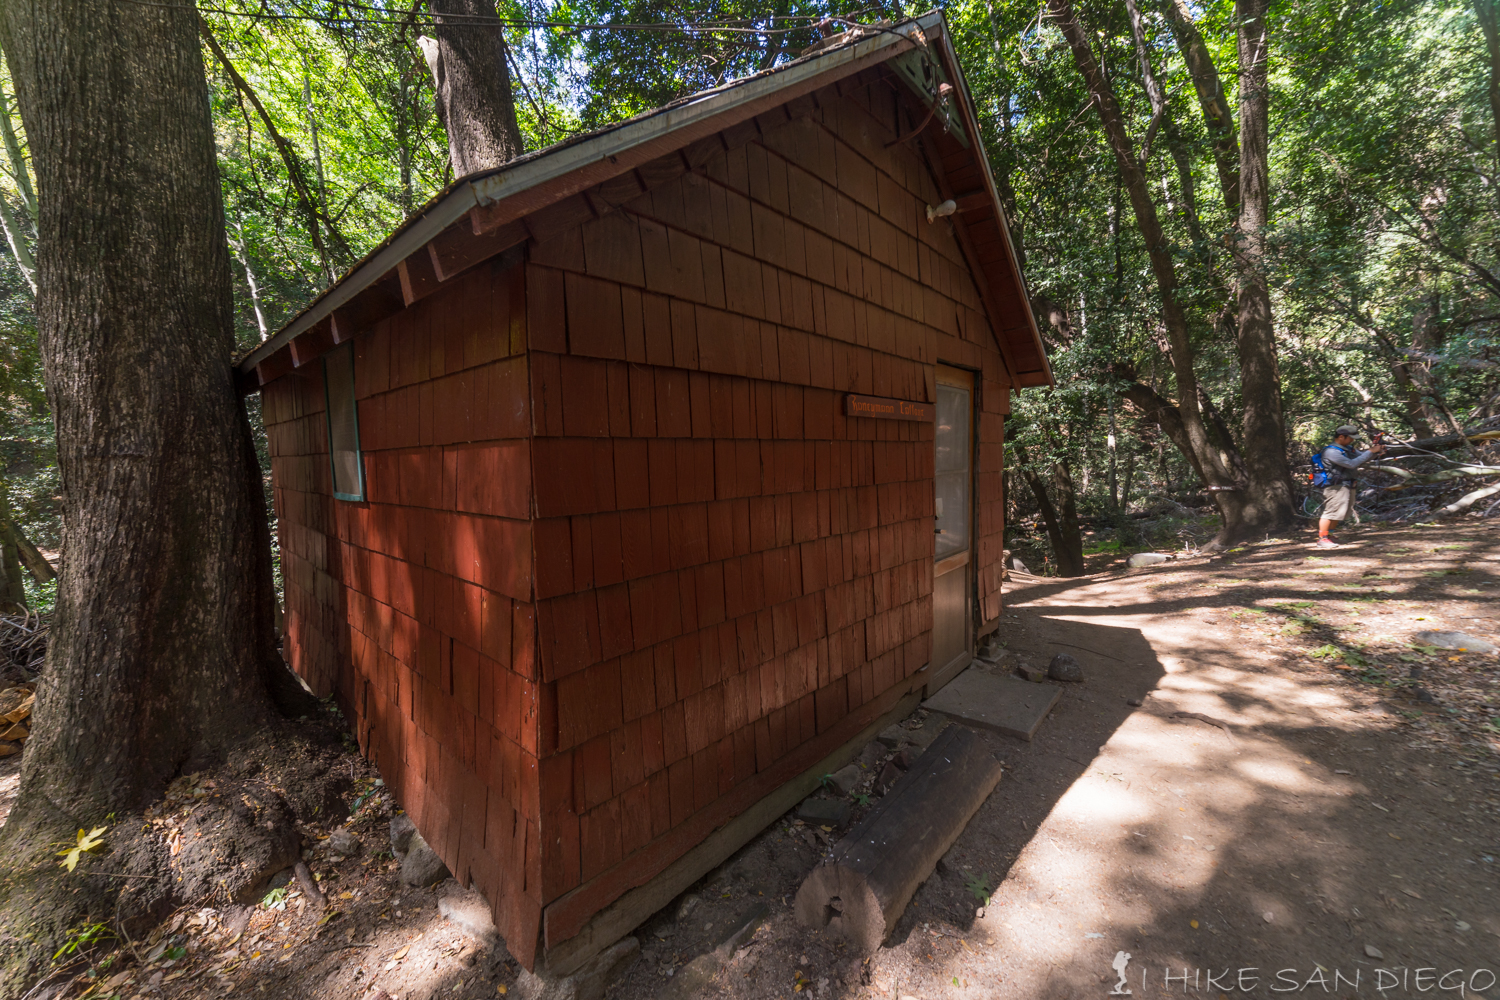
One of the “Honeymoon Cottages” in Sturtevant Camp that you can rent out for the night
When you reach Sturtevant Camp, stop and and take a look around, its a real pretty site and if you want to stay there you can rent out one of the cabins or bunks, either way take a little breather, because after Sturtevant Camp the trail starts to get much steeper and you will climb another 3 miles before you reach the top.

Half way along the switch backs between Sturtevant Camp and the top of Mt Wilson.

Making our way along the steep switch backs between Sturtevant Camp and the top of Mt Wilson.

Looking back from the top of the trail by the Observatories and Echo Rock on Mt Wilson.
After you reach the top you will see some observatory buildings and a sign for Echo Rock, I would suggest taking in Echo Rock before continuing on.
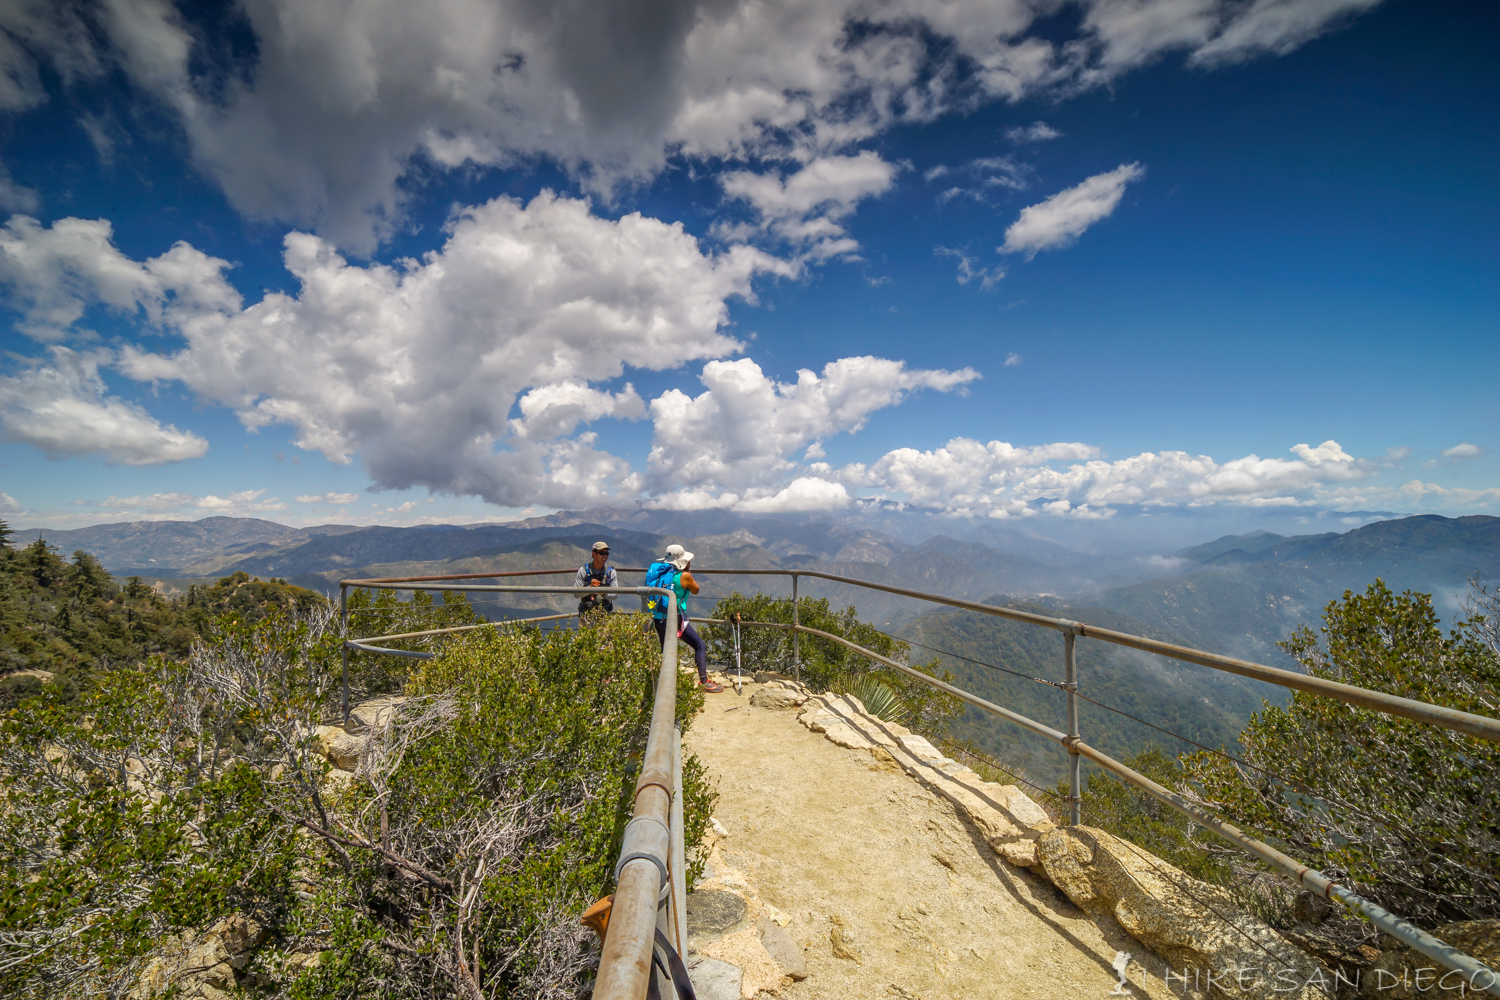
Echo Rock on top of Mt Wilson.
After taking in the view from Echo Rock work your way around the mountain top taking a look at all the world famous telescopes such as the 100 inch Hooker Telescope or the 150 tall Solar Tower before making your way down to the Cosmic Cafe for a little lunch break, but if you plan on eating from there plan ahead, the line at the Cosmic Cafe took 1/2 hour when we where up there.
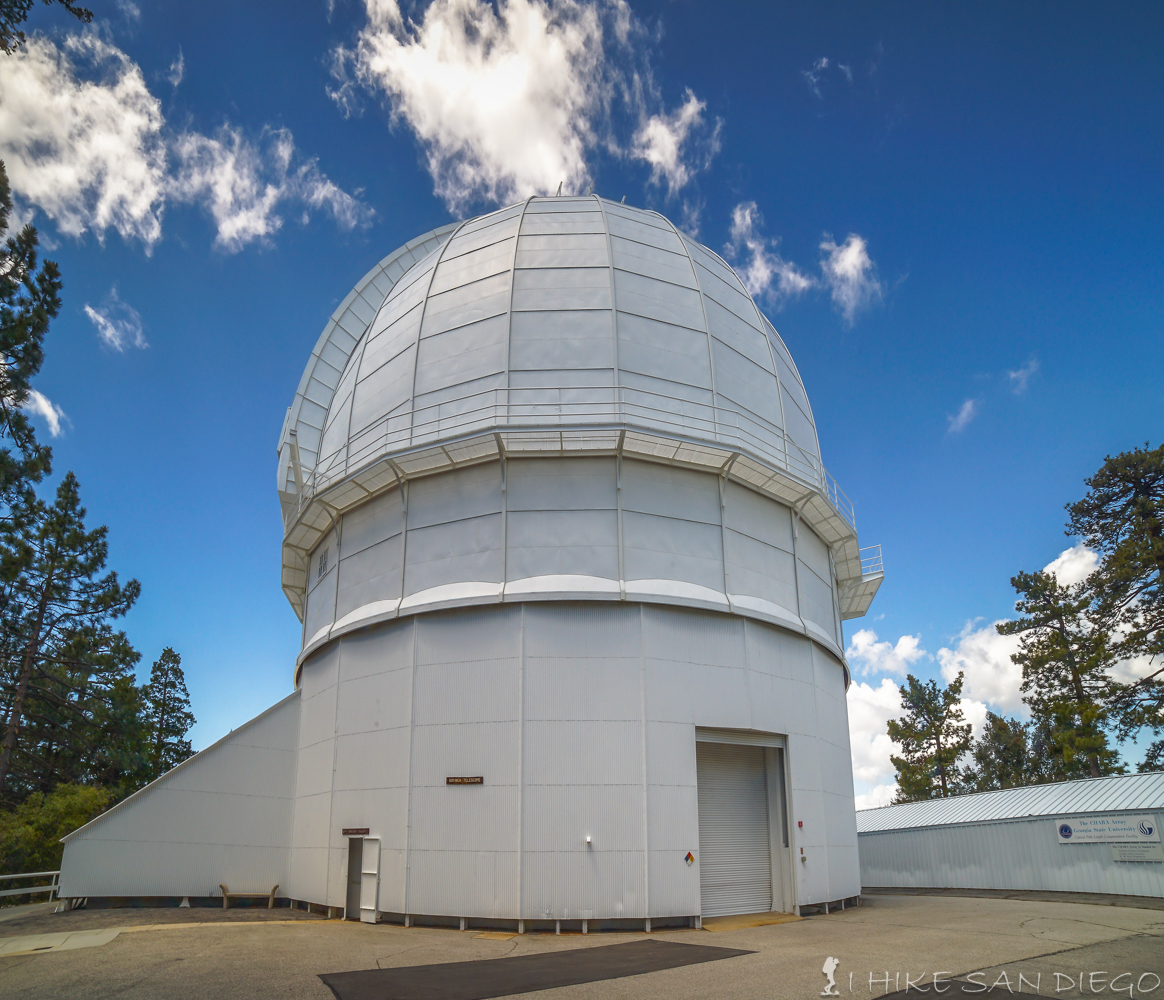
100 inch Hooker Telescope Observatory on Mt Wilson
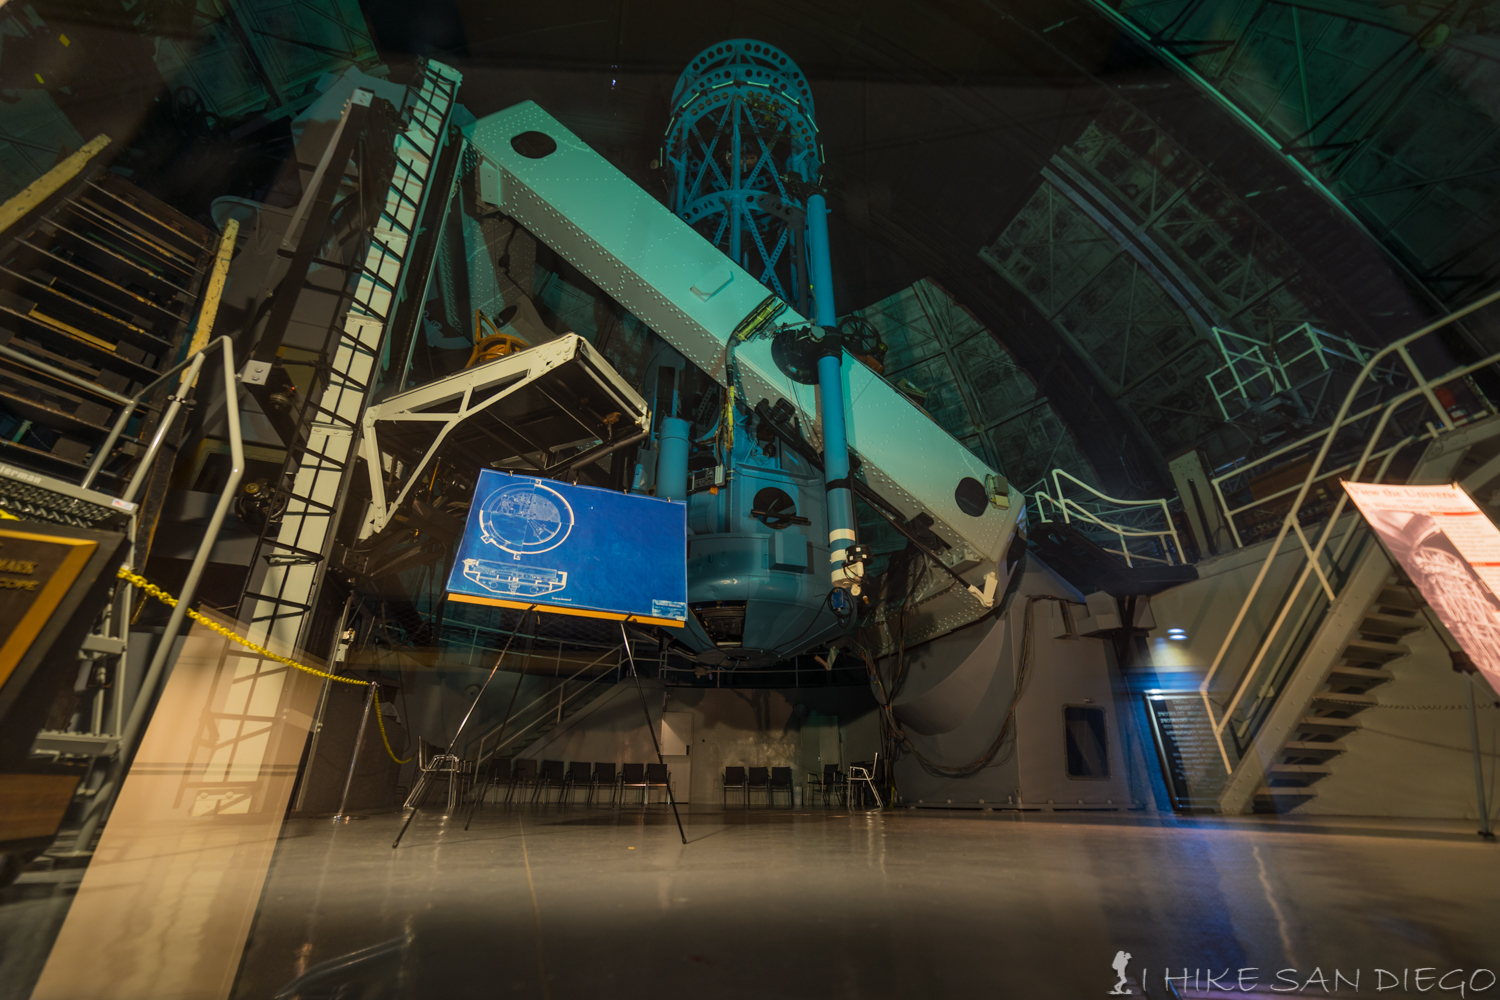
The 100 inch Hooker Telescope on Mt Wilson.
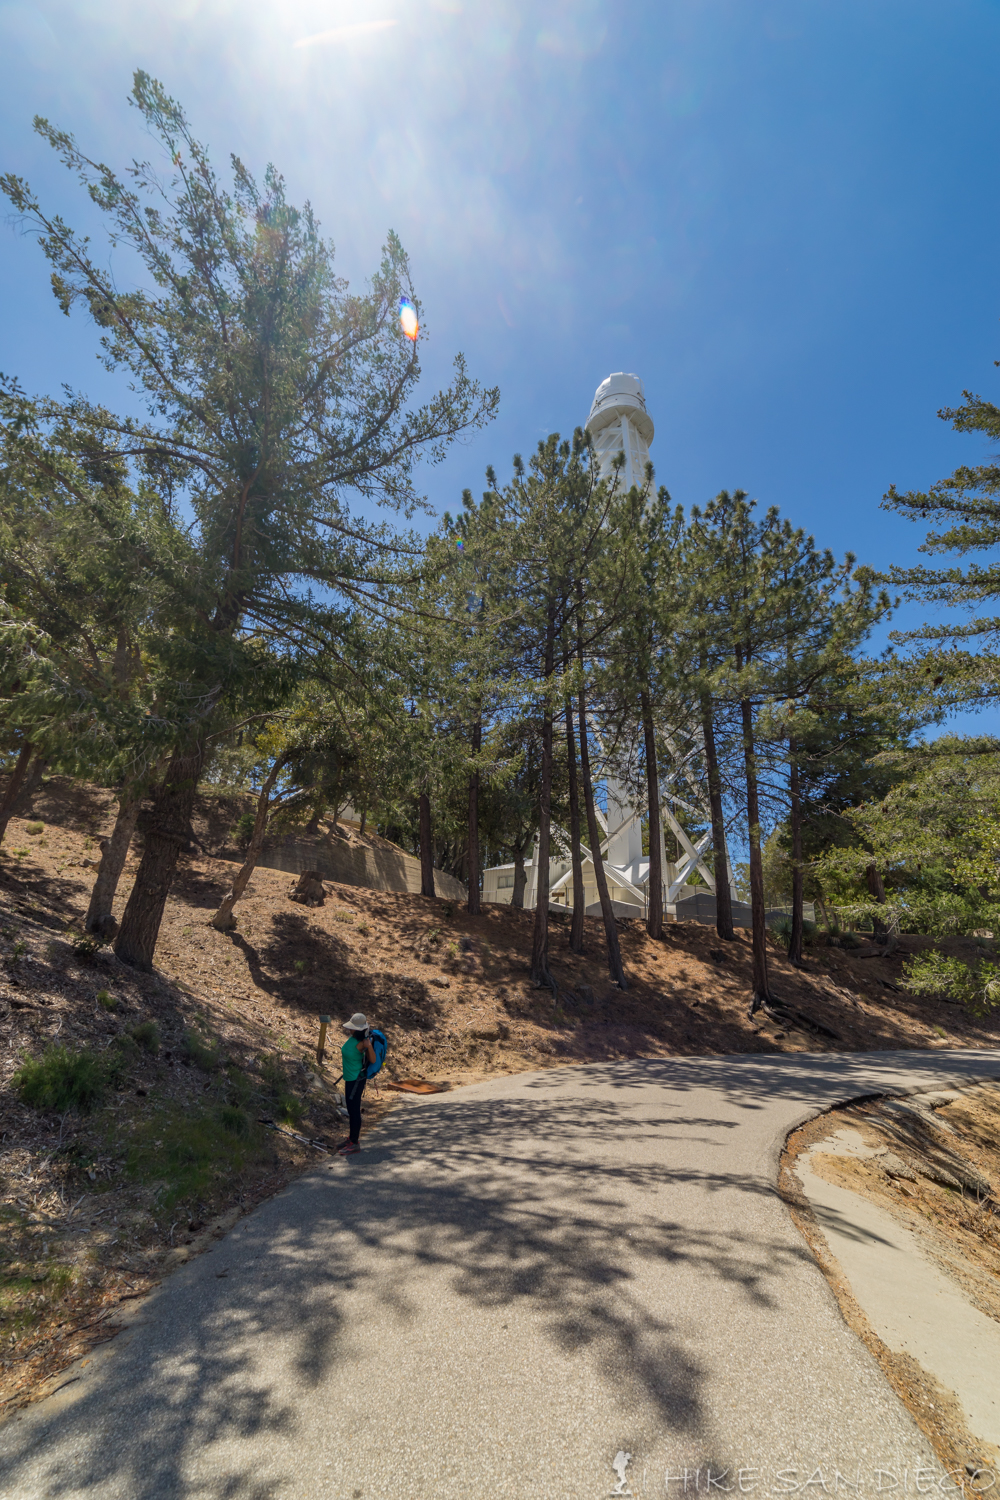
150 tall solar tower observatory on top of Mt Wilson.
After enjoying your lunch if you are ready to head back down head past the cosmic cafe down to the large parking lot directly below the cafe. On the far side of the parking lot you will find a sign for the Mt Wilson Sierra Madre Trail, follow this trail down towards the toll road.

Mt Wilson Sierra Madre Trail Sign at the far end of the parking lot just below the Cosmic Cafe
The trail back down is pretty easy to follow when you reach the dirt road ( Mt Harvard Road ) you will see the trail continue just to the left, keep following the trail down and enjoy some of the beautiful views on the way down. About 0.5 miles along the old toll road trail the trail will split off of the to the left, keep following the trail as it turns back into a single track trail. After about another 0.55 miles on the trail you will reach the Manzanita Ridge / Winter Creek Trail Junction. You see a nice little bench off the the left side and a trail sign facing away from you on the right side. Take the trail on the left back down. We ran into a women going back down at this point who told us she ran into a bear on the way up in the morning.
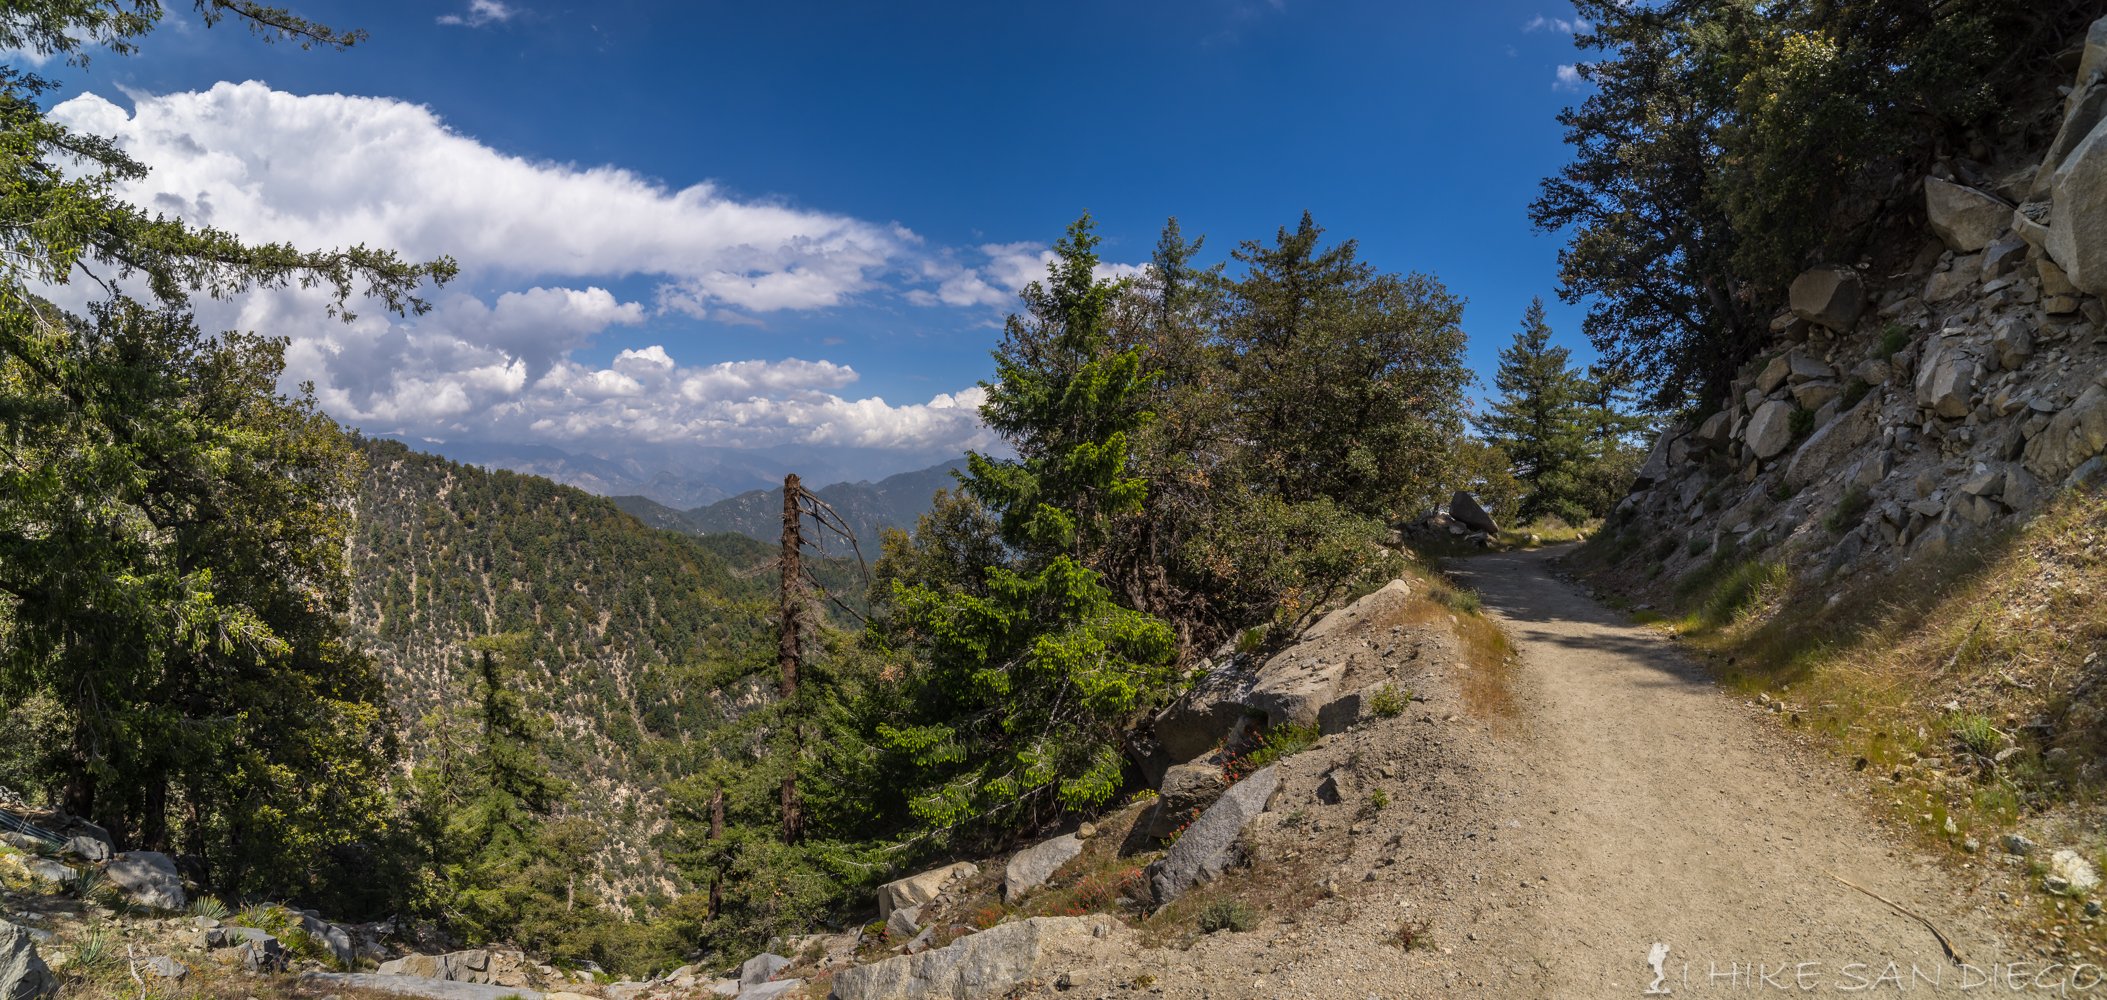
Looking across the mountains on the way down the Mt Wilson Trail
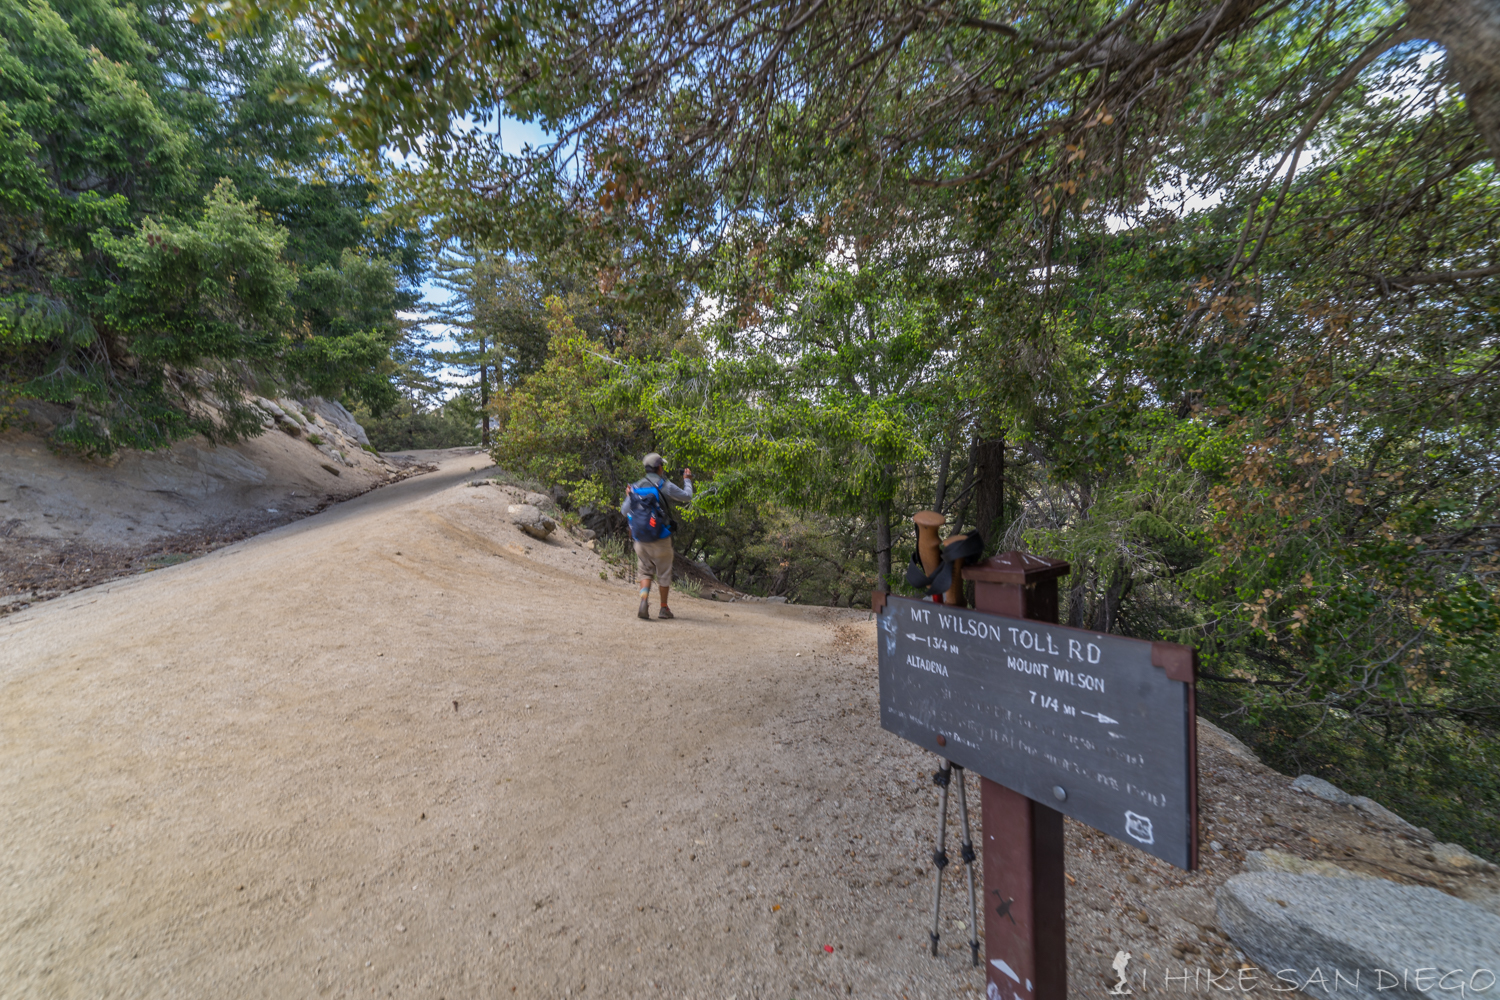
The trail splitting off of the old toll road on the way down from Mt Wilson.
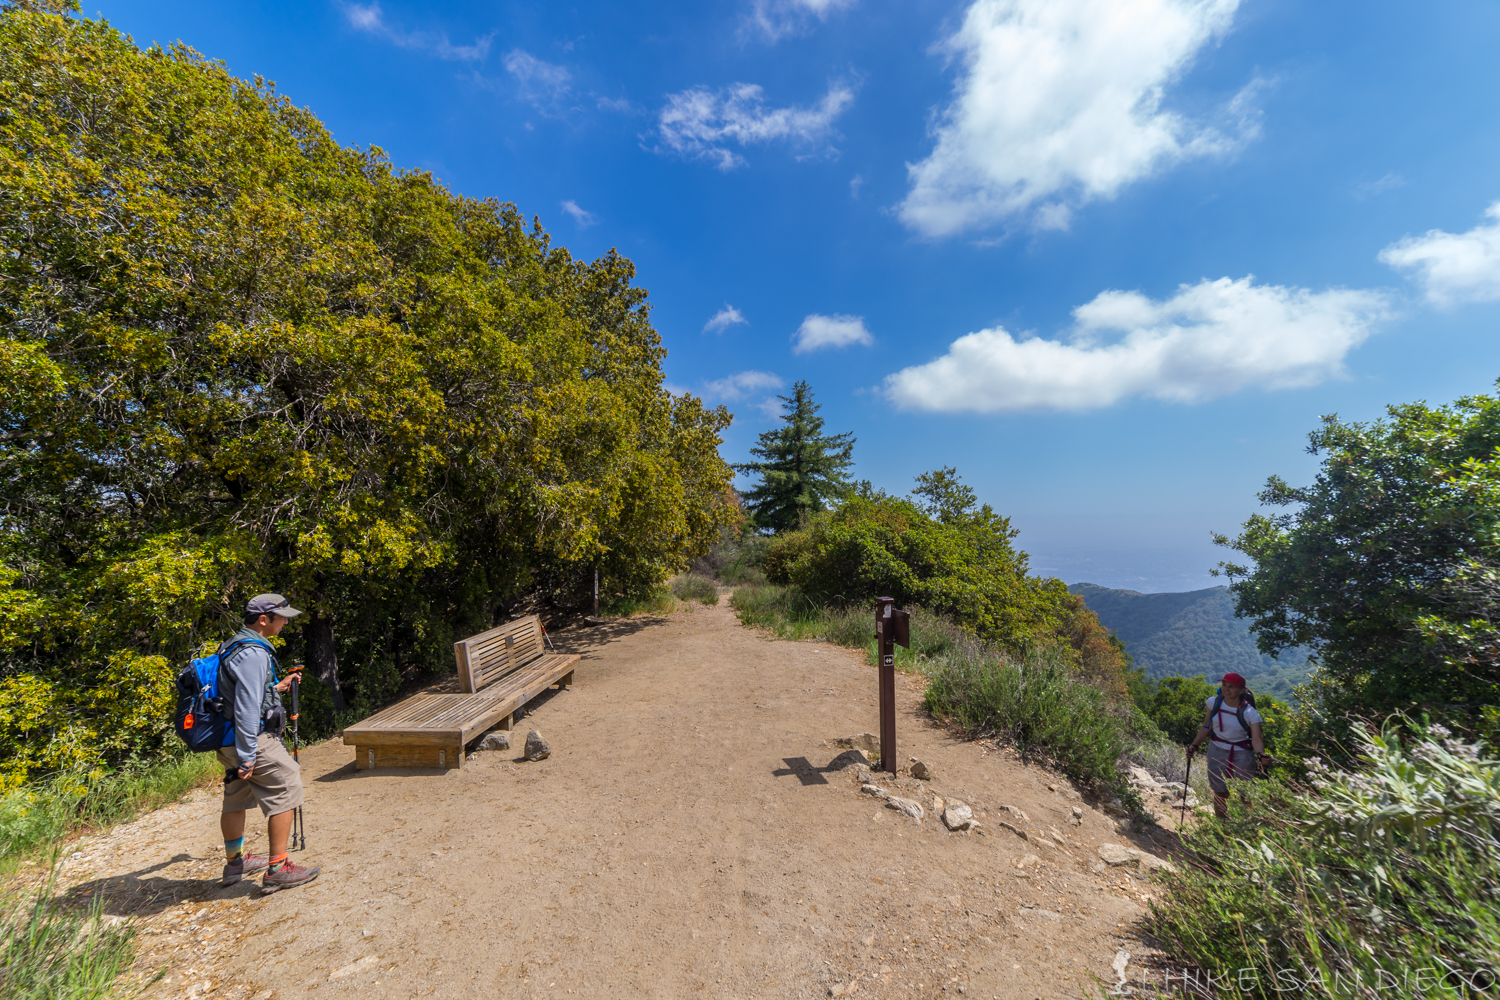
Manzanita Ridge / Winter Creek Trail Junction. Take the trail on the left side to continue back to Chantry Flats. The lady on the right is coming up the Mt Wilson / Sierra Madre Trail.
After starting your way back down the Upper Winter Creek Trail from the Manzanita Ridge / Winter Creek Trail Junction it should take you about another 2 miles before you hit the junction with the Lower Winter Creek Trail. This Trail will take you back down to the road that you orginally started the hike on and then you would need climb back up to Chantry Flats. We continued on down the Upper Winter Creek Trail to come out on top of Chantry Flats. As we got closer to the bottom of the trail we started to see a lot of pretty flowers and then as we came down the last mile you could hear music floating up the canyon from the Adams Pack Station. It sounded like a real party going on down there. A couple of our people made it down before we did ( we were to busy taking all these photos) and had a real fun time while they waited for us, check out the video.

Pretty flowers on the side of the trail on the way back down towards Chantry Flats from Mt Wilson.
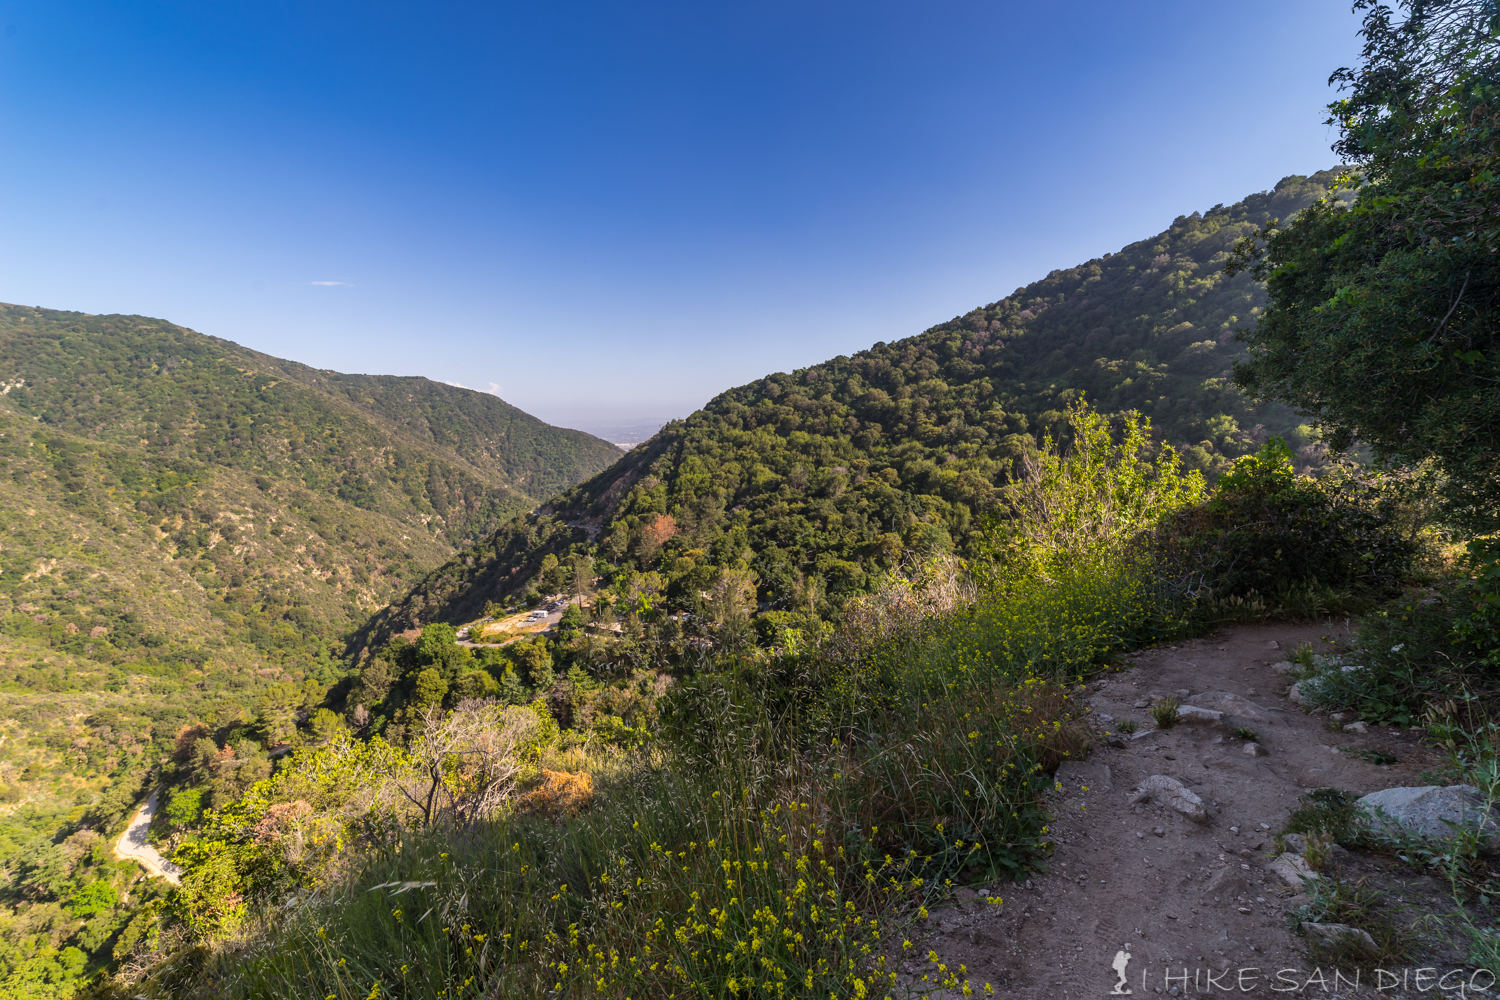
The end in sight, Chantry Flats as seen from Upper Winter Creek Trail.
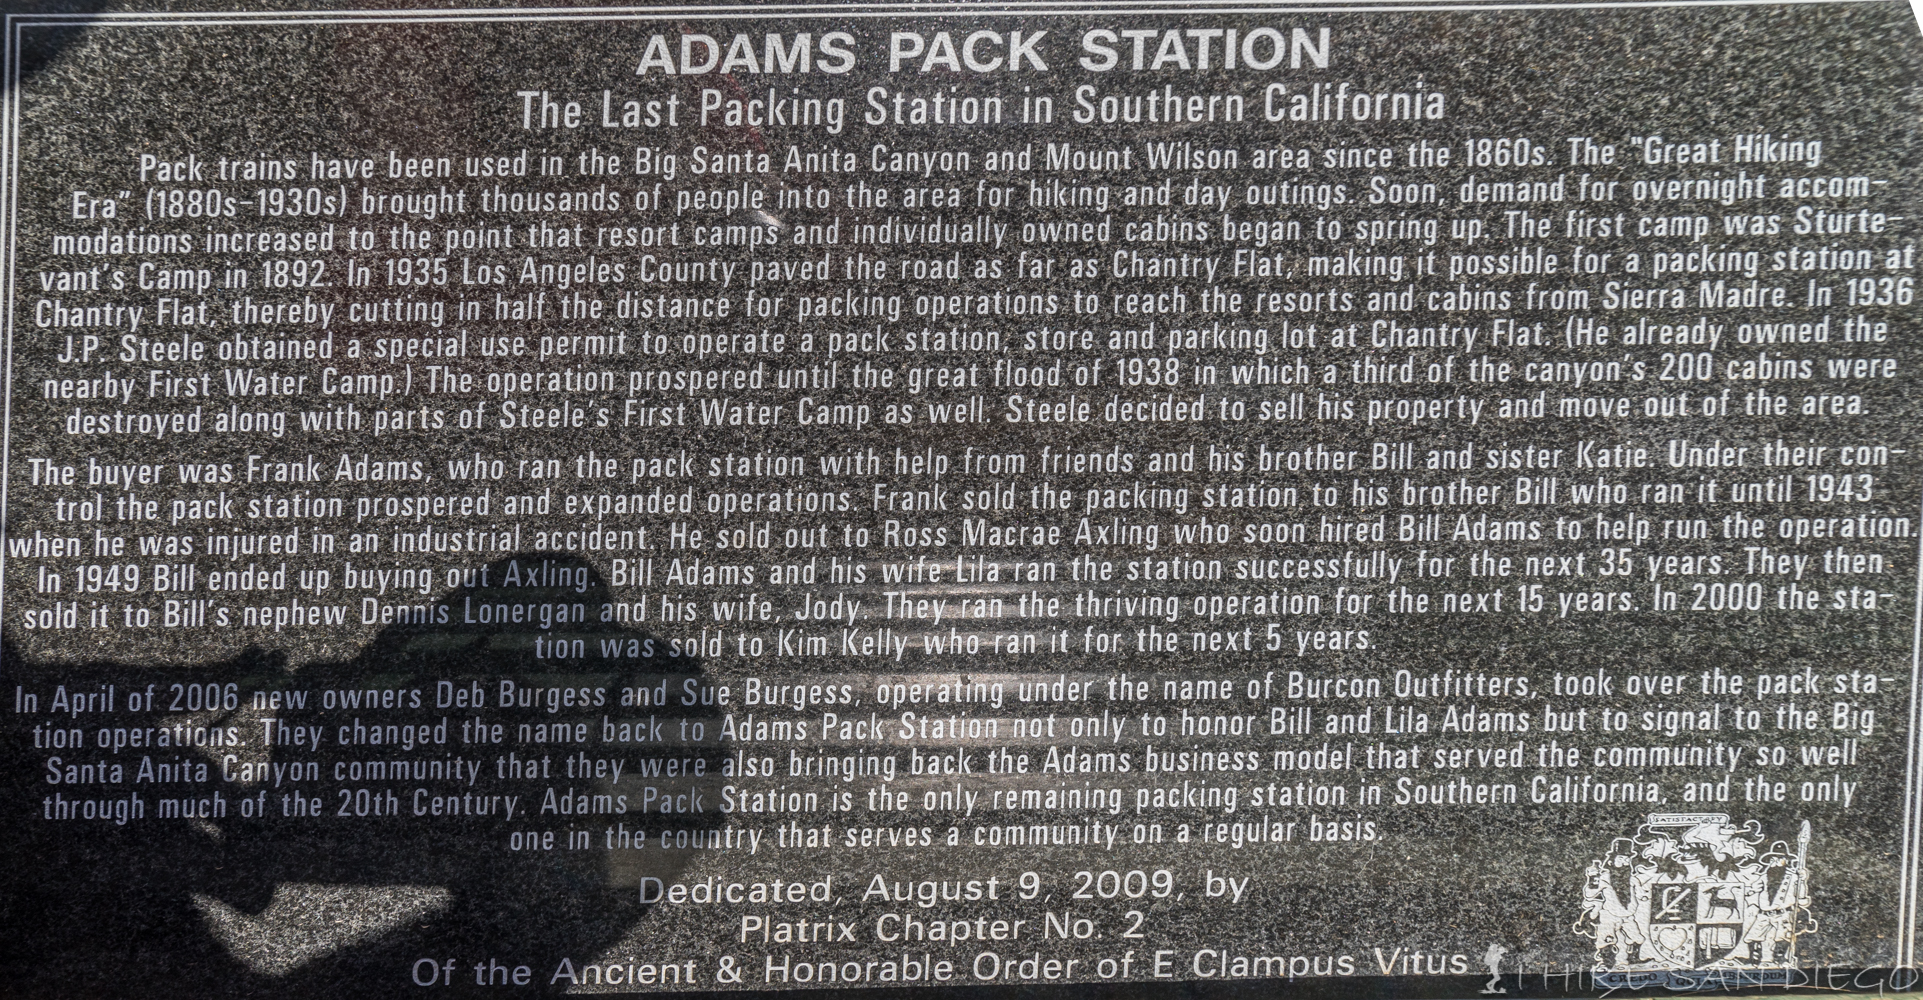
Historic Plaque at the Adams Packing Station at Chantry Flats.
Enjoy a video one our hikers made:
Weather forecast for the Chantry Flats to Mt Wilson Hike: