Holly Jim Trail to Santiago Peak
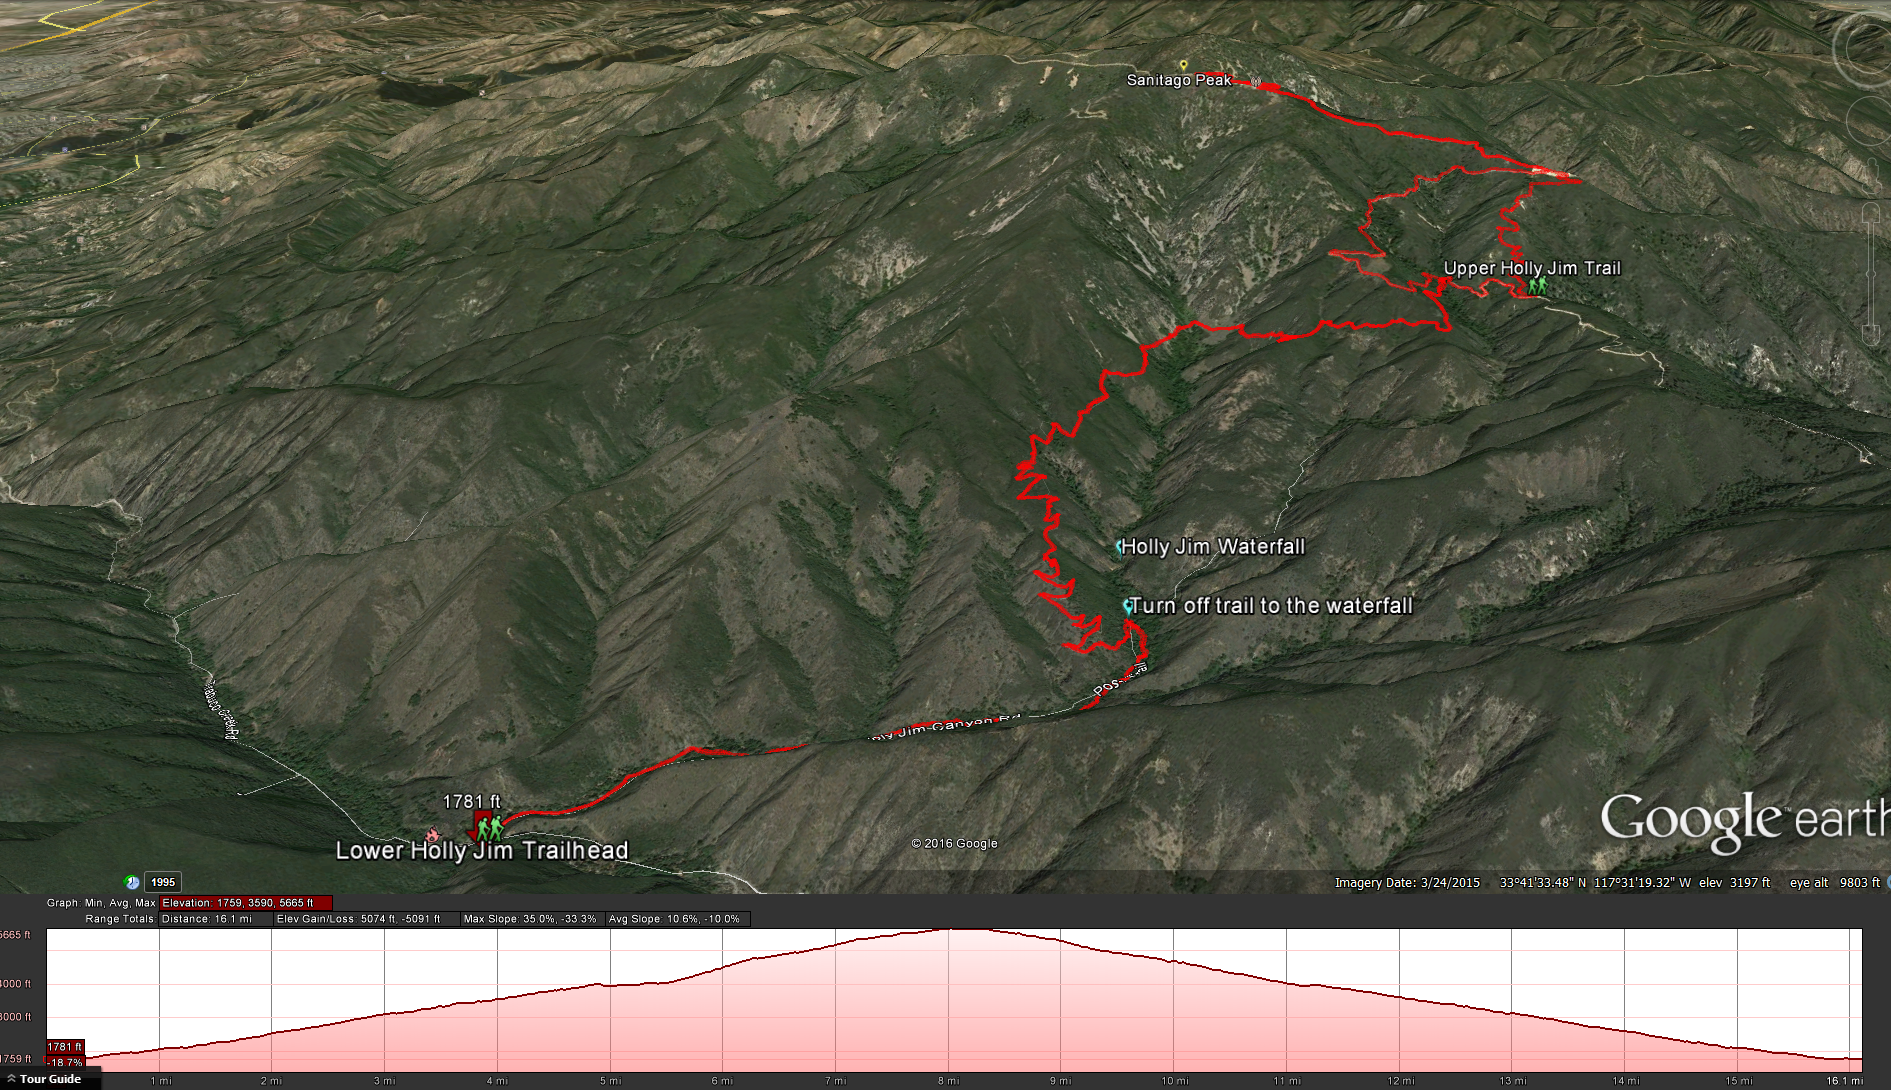
Distance : 15.5 miles Elevation Gain: 4000 feet. Time to complete: 8 hours. Difficulty: Moderately Strenuous
Holly Jim GPX FileDirections: Depending on where you are coming from, there are many ways to initally get to the trailhead from the freeway, since I’m coming from San Diego I’ll write this as if you are heading north on the 5. Take Oso Parkway east off of the 5. Follow Oso Pkwy for 2.5 miles and then turn left ( north ) onto Antonio Parkway. Follow Antonio Parkway for 5.9 miles before turning right onto Santa Margarita Parkway. Follow Santa Margarita Parkway for one block before turning left onto Plano Trabuco Road ( right across the street in the mall is a great place to go eat after the hike Wood Ranch BBQ and Grill). Follow Plano Trabuco Road for about 1.5 miles, it will become Trabuco Canyon Road as it makes a sharp left turn. At the bottom of the canyon you will turn right onto Trabuco Creek Road which is a dirt road. The dirt road starts off pretty nice but soon becomes a pot hole hazard. I would not suggest taking a car back on this road, you should be in a high clearnce vehicle. Follow the dirt road for about 4.6 miles until you get to the Holly Jim Trailhead. Make sure to hang your Adventure Pass in your car before starting your hike.
Permit: You do not need a permit for this hike but you will need an Adventure Pass. With all the legal rangling over the adventure pass recently it can be hard to decide where you need one and where you don’t but rest assured where you see “enhancements” to the trail head such as a porta potty that someone gets paid to come out and clean you will need an adventure pass. Personally I would just buy the $30 yearly pass, put it in your glove box and be done with it, or you can pick up a daily pass for $5.00.
Kid Friendly: This is a long hike that most kids are not going to have the patience for, but I would suggest the first 5 miles of the trail which is the lower half of the Holly Jim Trail, this is the most green with much of the trail being under tree cover. Once the lower Holly Jim Trail connects into the Main Divide Road you wont see shade again until the top. Also the waterfall at the bottom can be cool for kids to check out, as well as you.
Pet Friendly: Simular to kids I would suggest only the lower part of this trail, its shaded and really green (until summer time) and the only other traffic you need to worry about are mountain bikers. Once you get to the Main divide road you are going to be running into a lot of Off-Roaders.
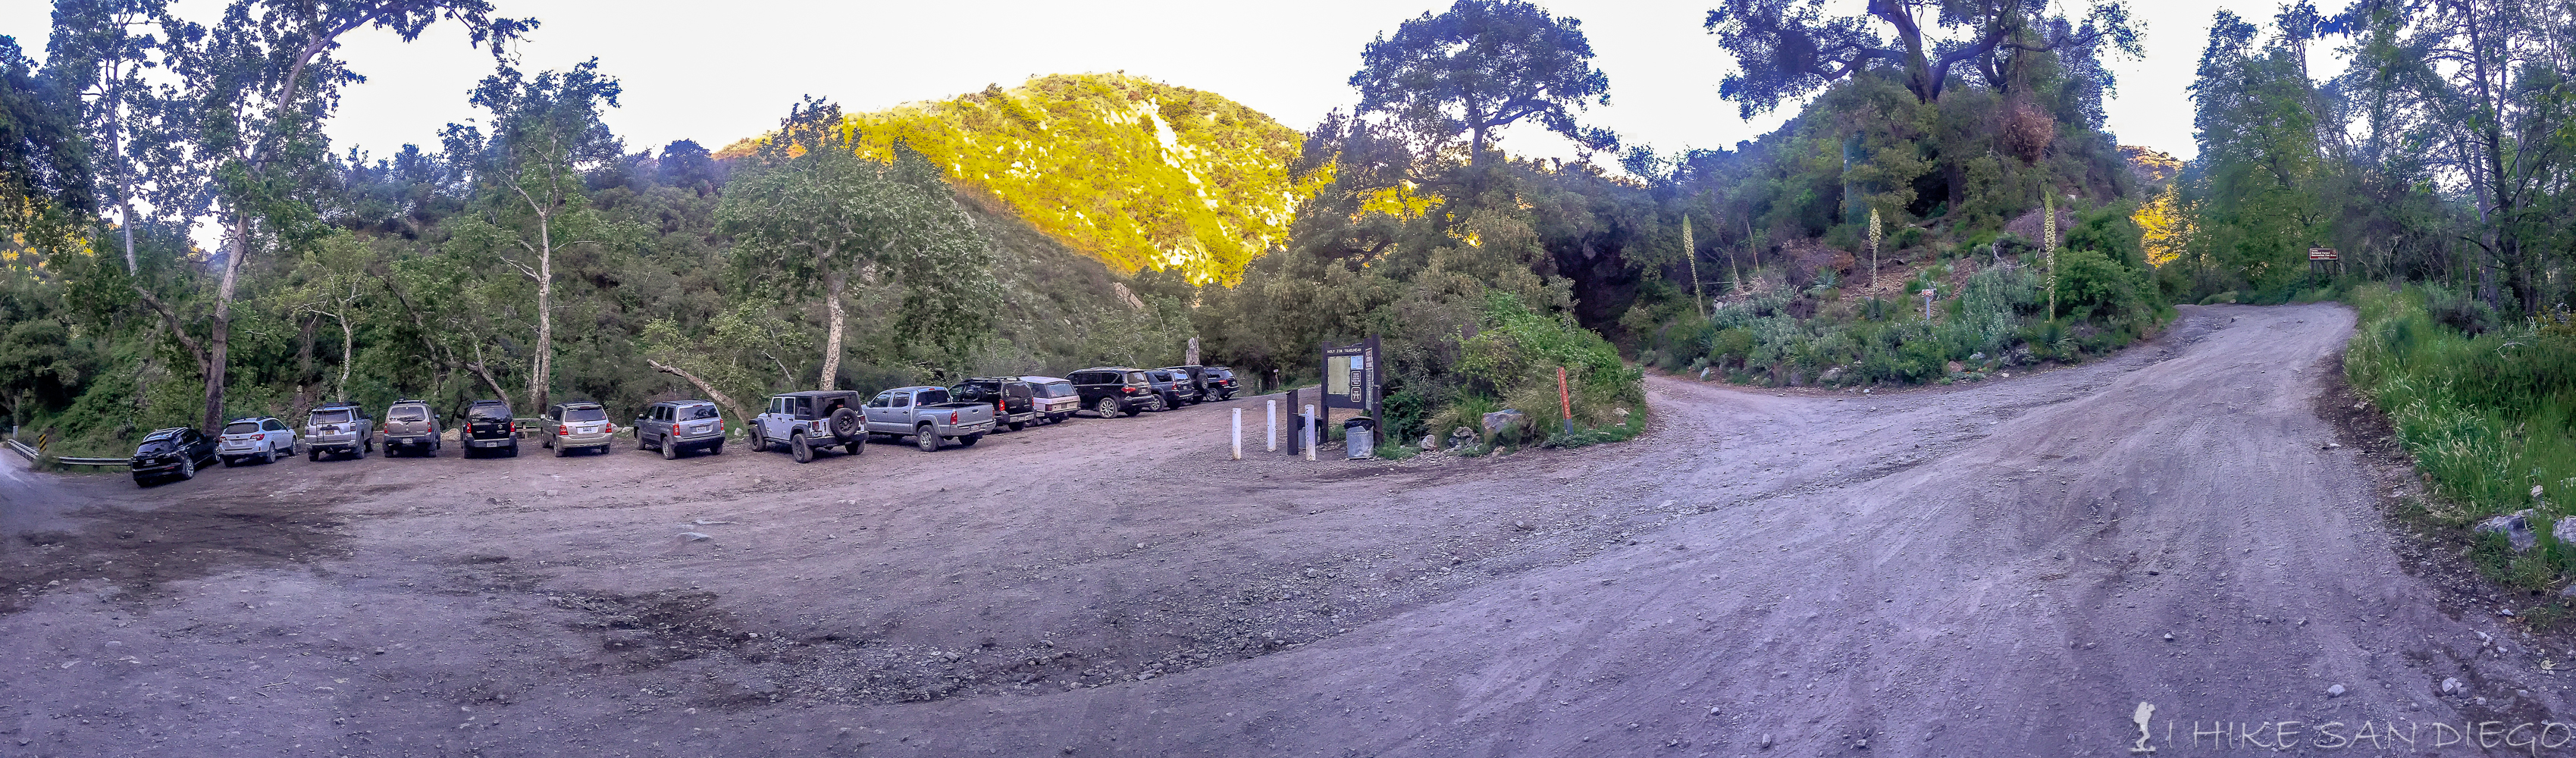
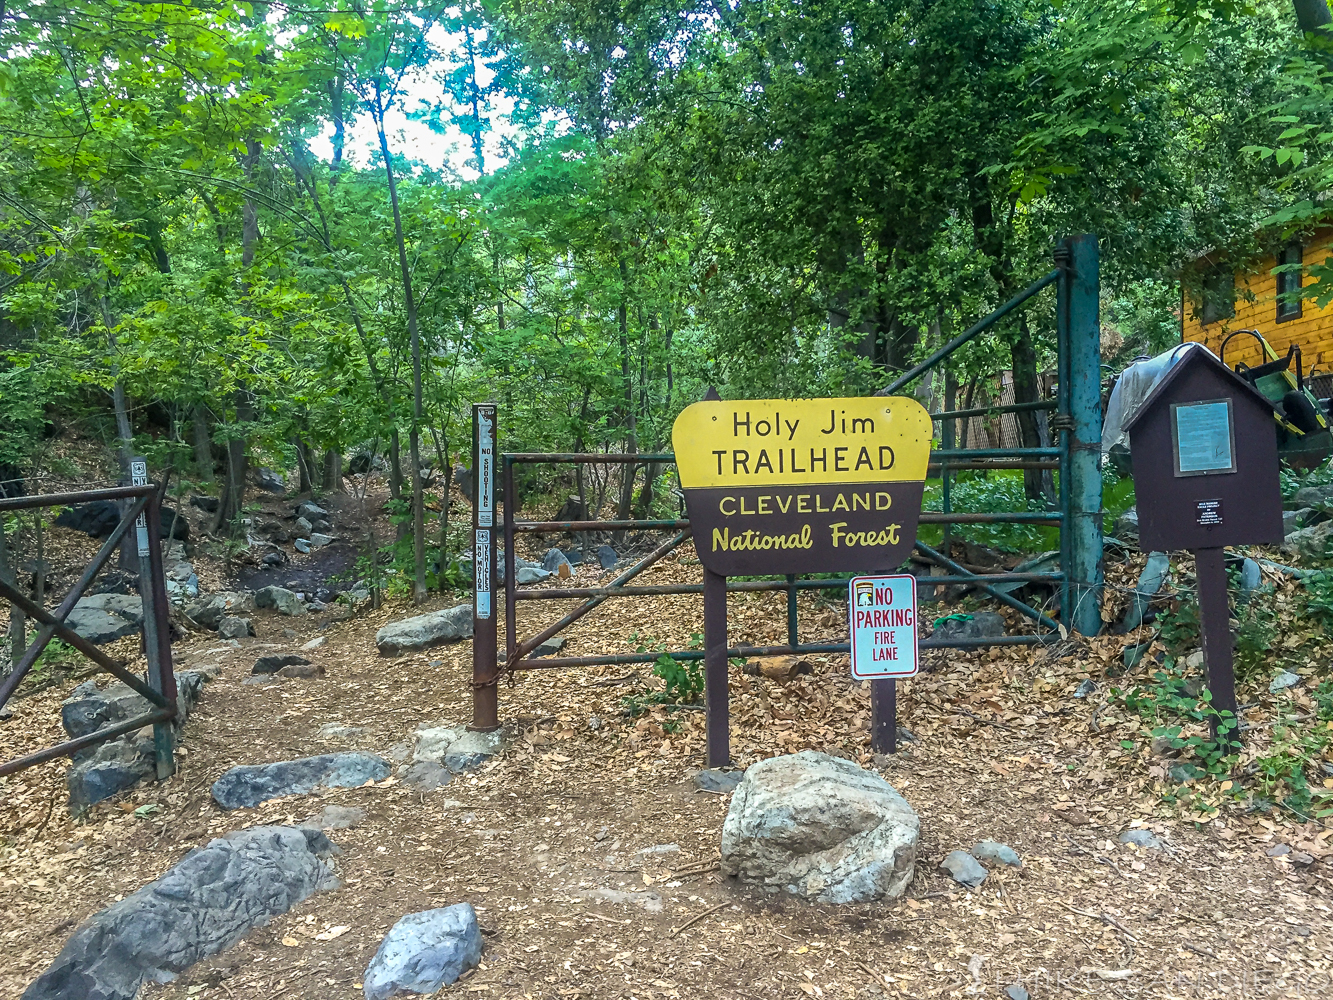
Holly Jim Trailhead
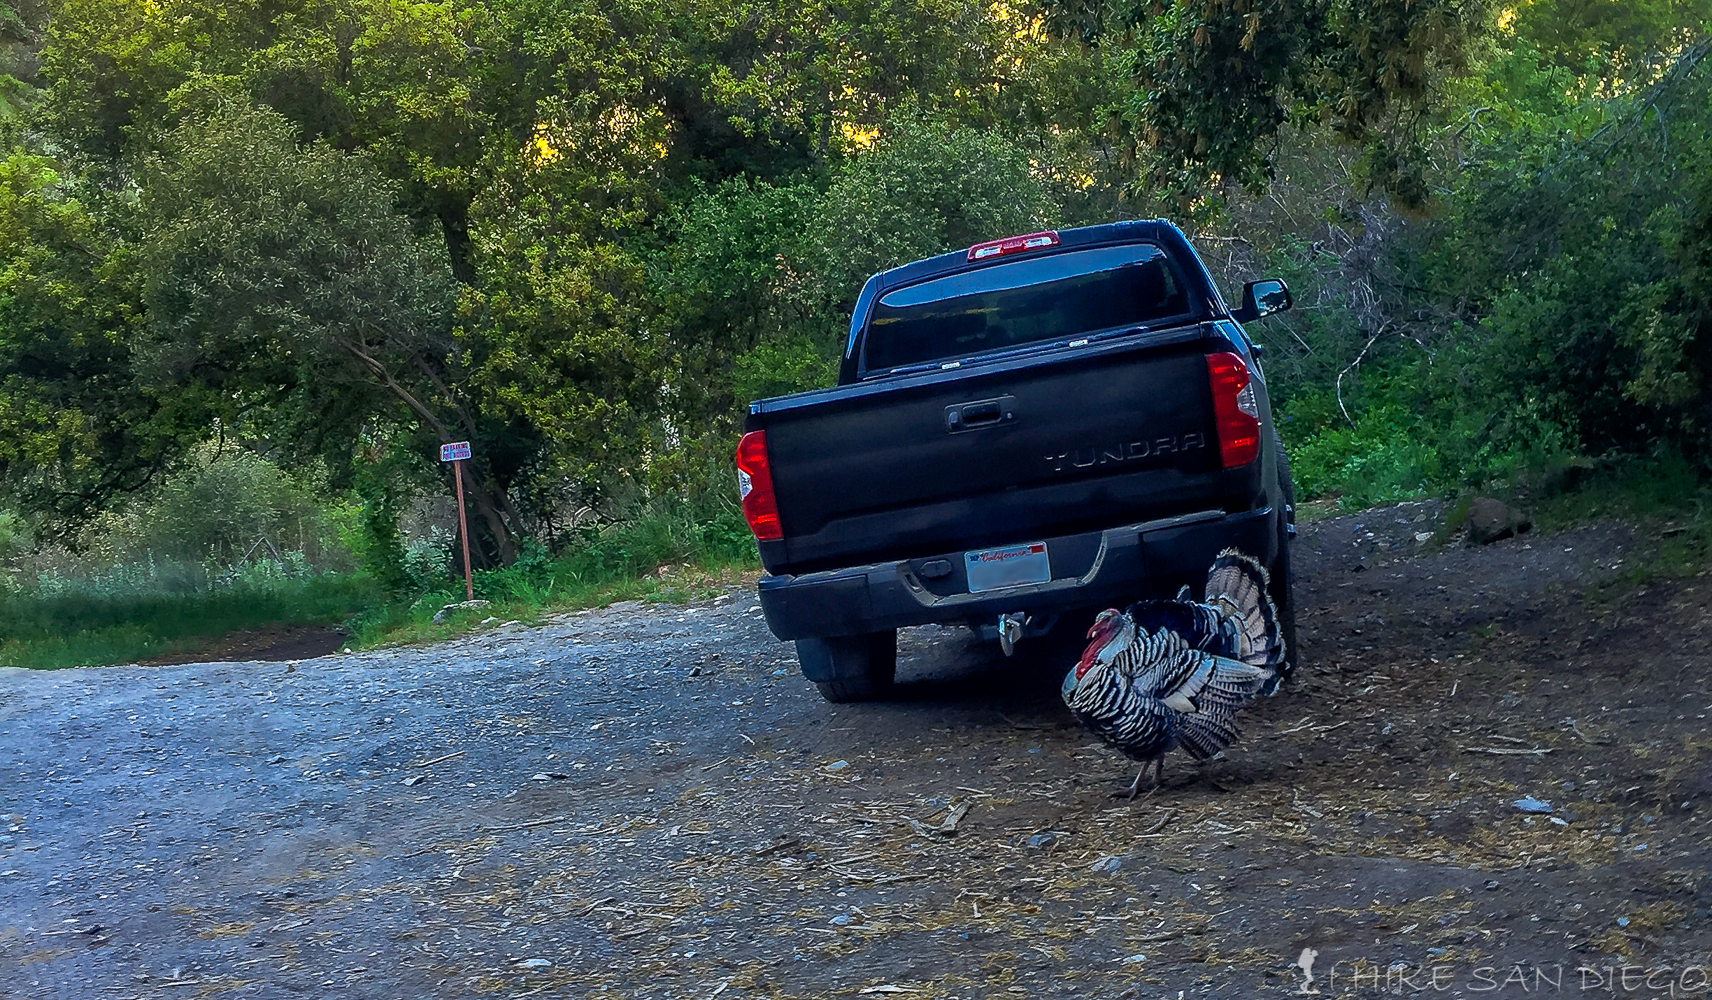
Holly Jim Trailhead Guard Turkey
You will start the hike from this Holly Jim Trailhead, there is a porta potty at the trailhead so take advantage of it while you can, although you may want to stop somewhere and use the bathroom before you even come out to the trailhead for better piece of mind. Follow the signs for the trail that heads out along a road on the left side of the trailhead, the other road is what all the off-roaders that you will run into later are taking. Along the way to the trailhead you will see many private residences which is where I think our trail-head guard turkey came from, he did not look wild and he was at the trail-head when we started and still there when we got back down.
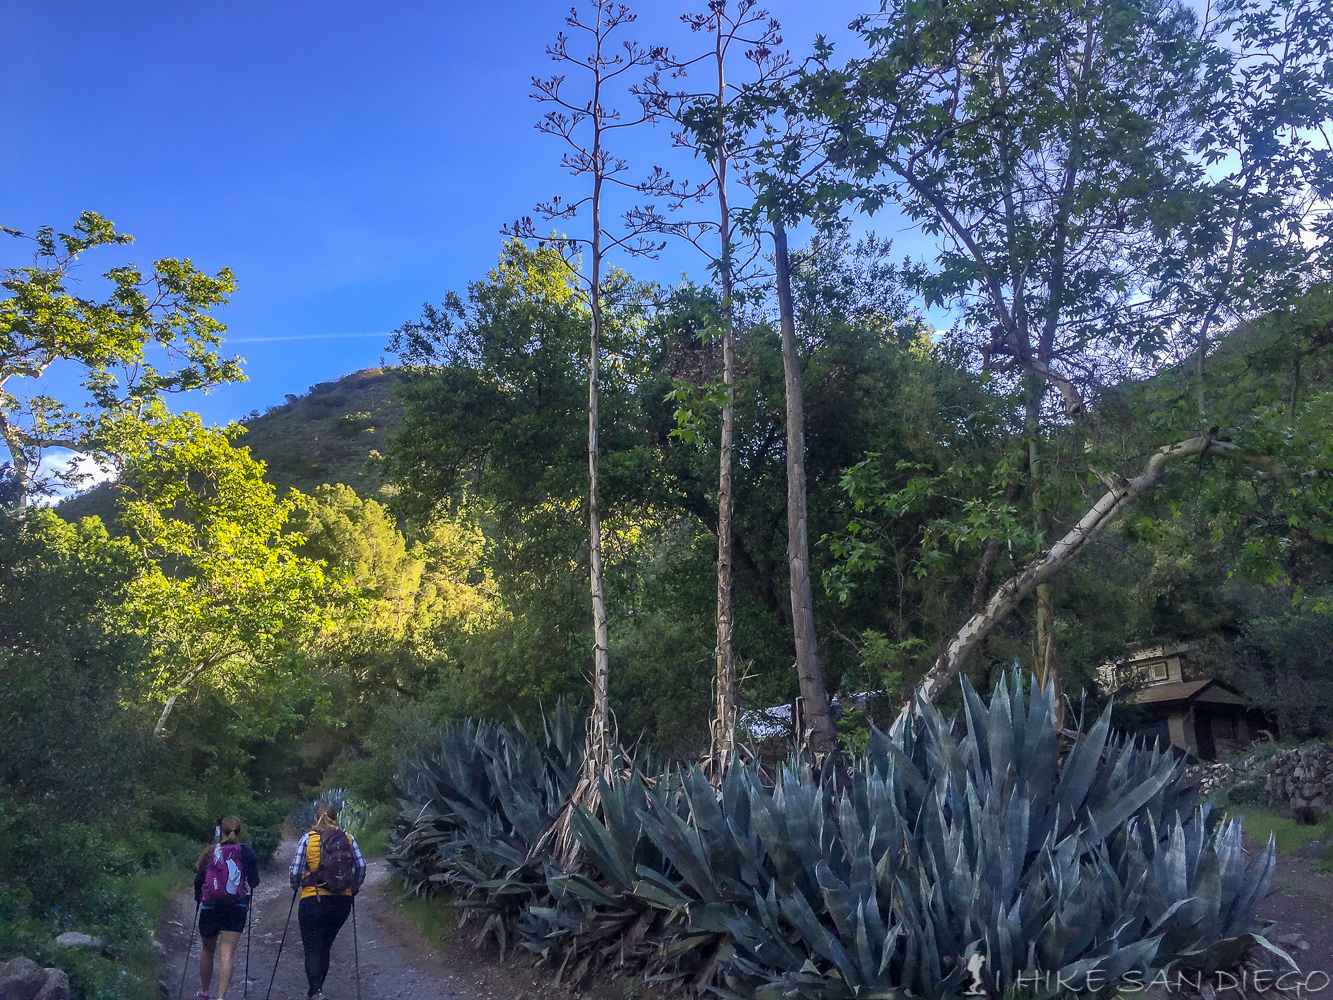
Hiking past some of the private residences along Holly Jim Canyon Road.
You will continue to follow the Holly Jim Canyon Road for about 1/2 mile or so before you reach the last house and the official beginning of the Holly Jim Trail. Its at this point that the mileage starts counting towards the mileage markers you will see along the way up the trail.
Official Holly Jim Trailhead
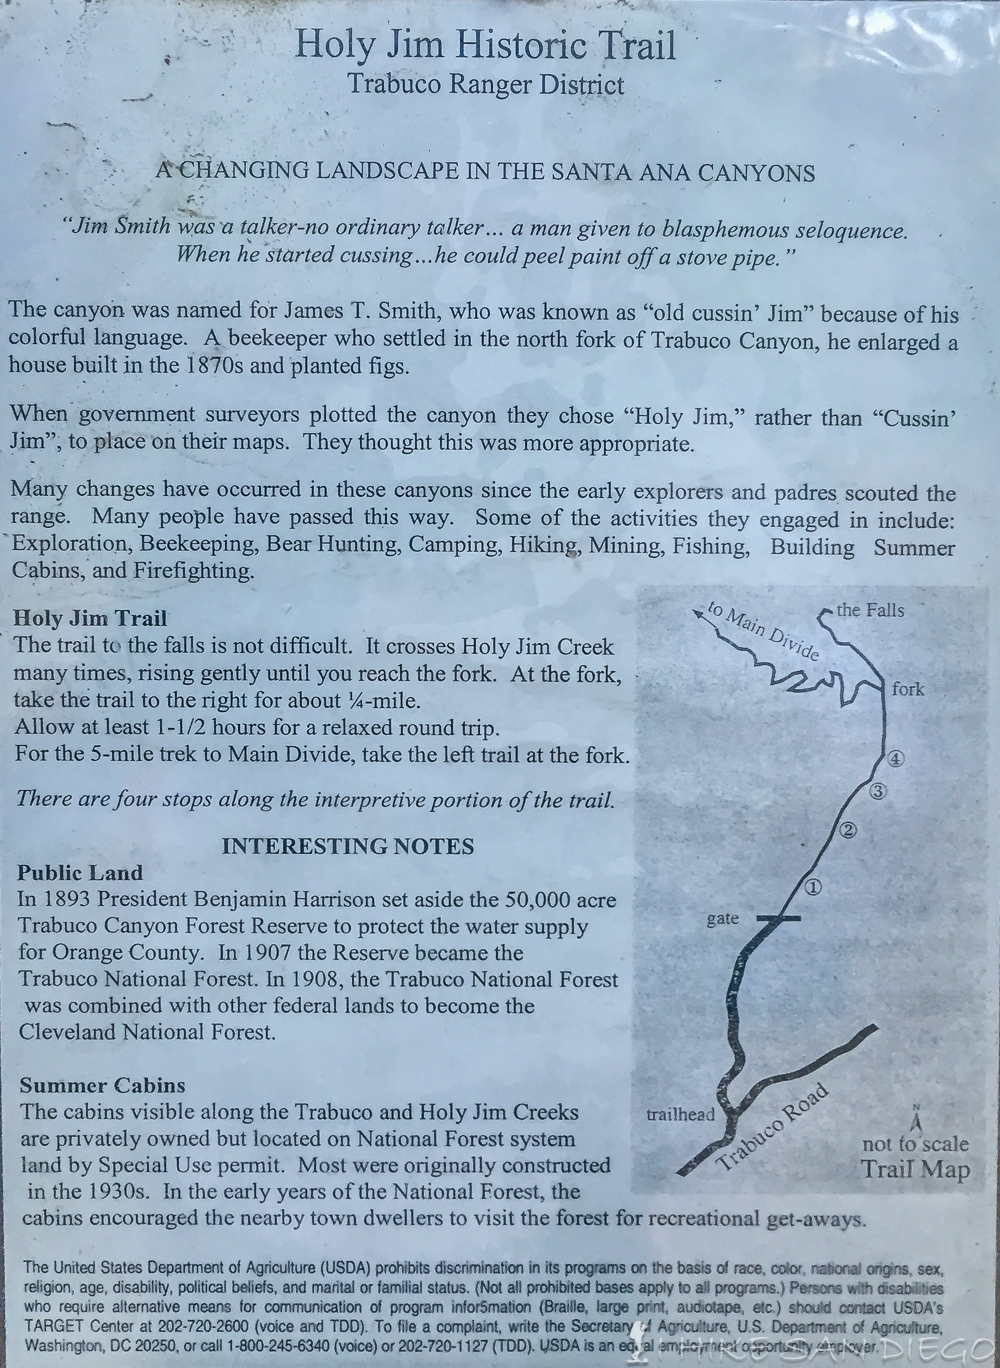
Holly Jim Trail Information
This is my favorite part of the trail, the first 5 miles. Depending on when you hike along the trail it can very green and a welcome change from hiking in most of San Diego where you will usually find no tree cover. After about 1.5 miles from starting the hike you will come to the point where the trail starts to climb going through a number of switch backs. This is also where you will find the trail for the waterfalls. The extra trail to the waterfalls is only about 1/4 a mile but I would suggest leaving it for when you come back down, it makes a good point to sit and relax after a long hike and great place to get some great pictures.
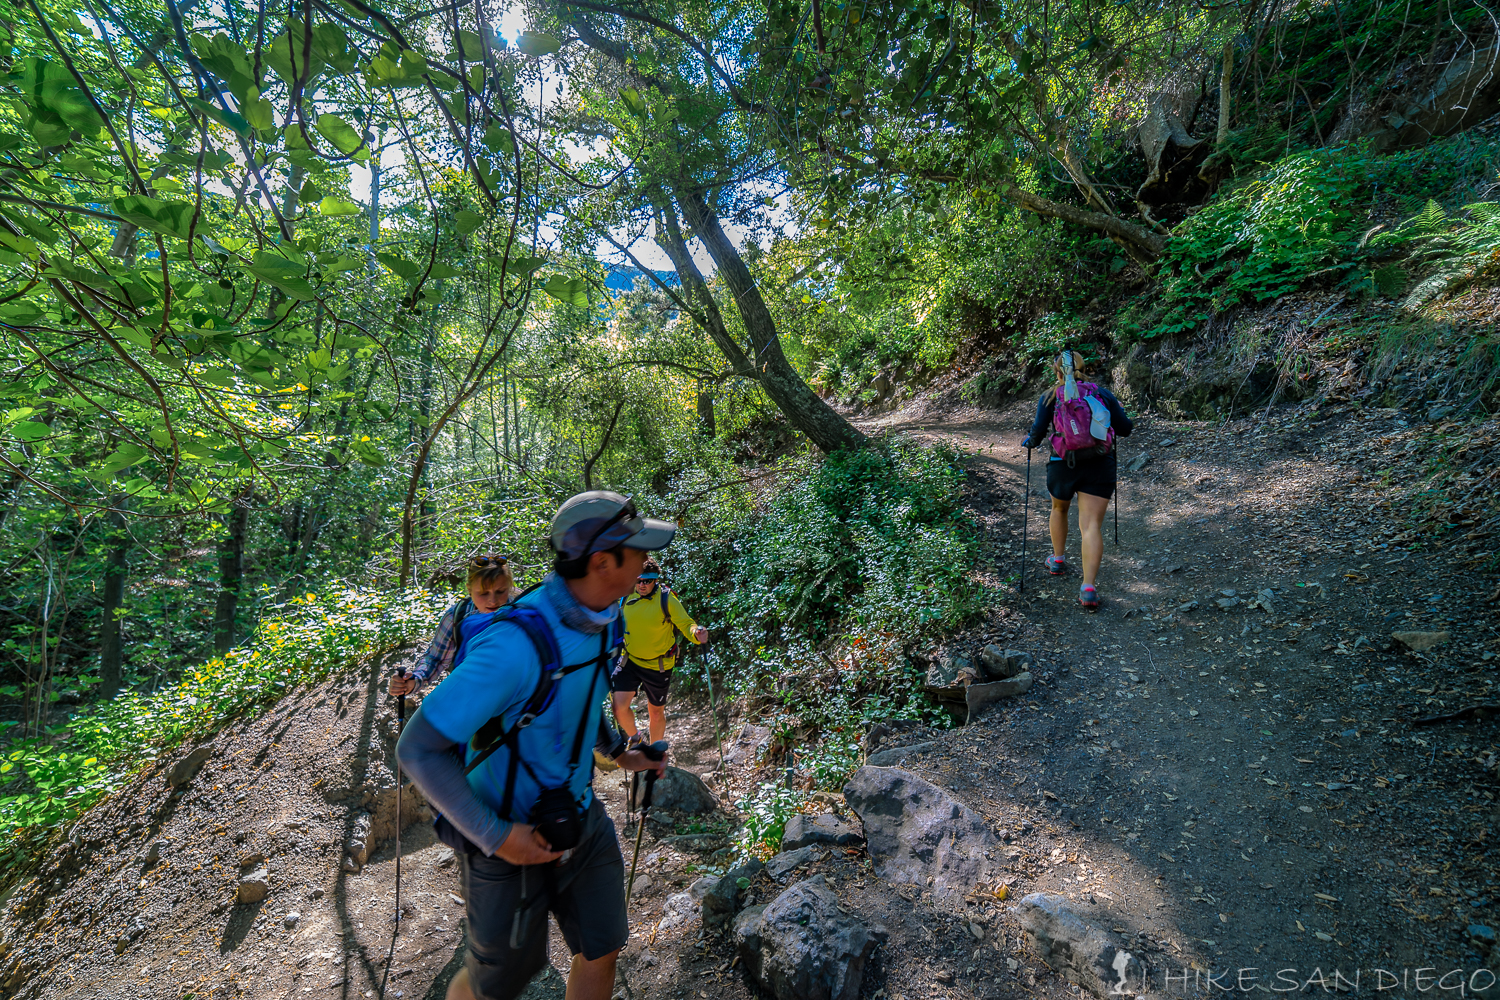
Heading up the switch backs on the lower Holly Jim Trail
You will continue to hike up in and out of the tree canopy as you head up lower Holly Jim Trail. There are many nice spots to stop and take in the views of the canyon along the way. This part of the trail is also pretty easy on the feet with an easy to follow path with a minimum amount of rocks.
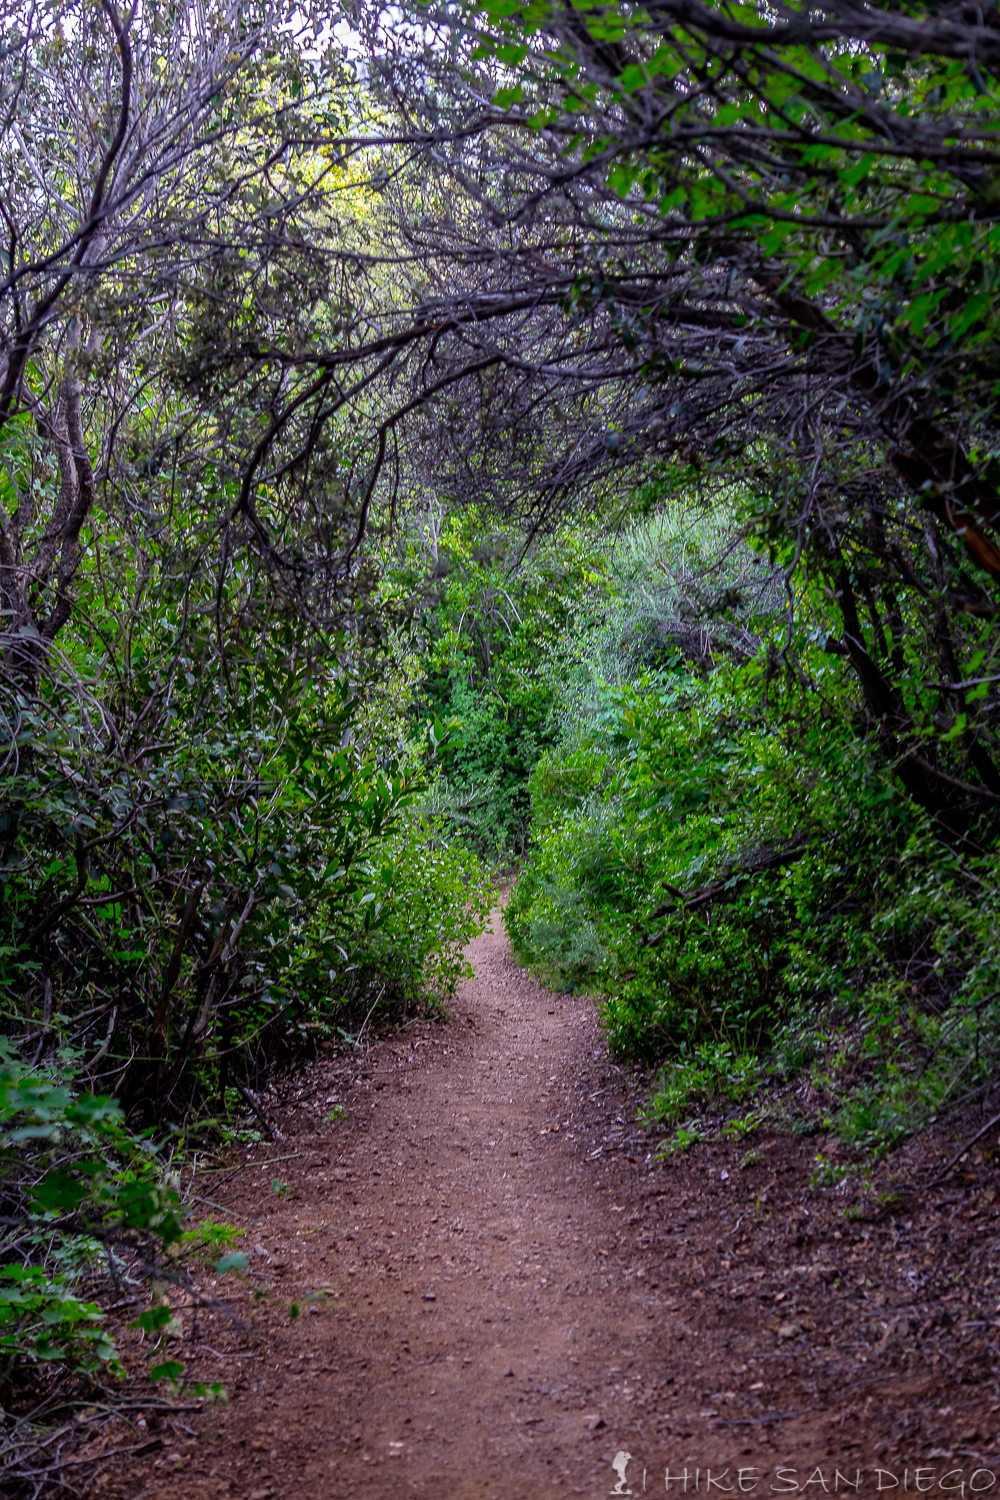
The lower Holly Jim Trail meandering its way through the bushs and trees on the way up.
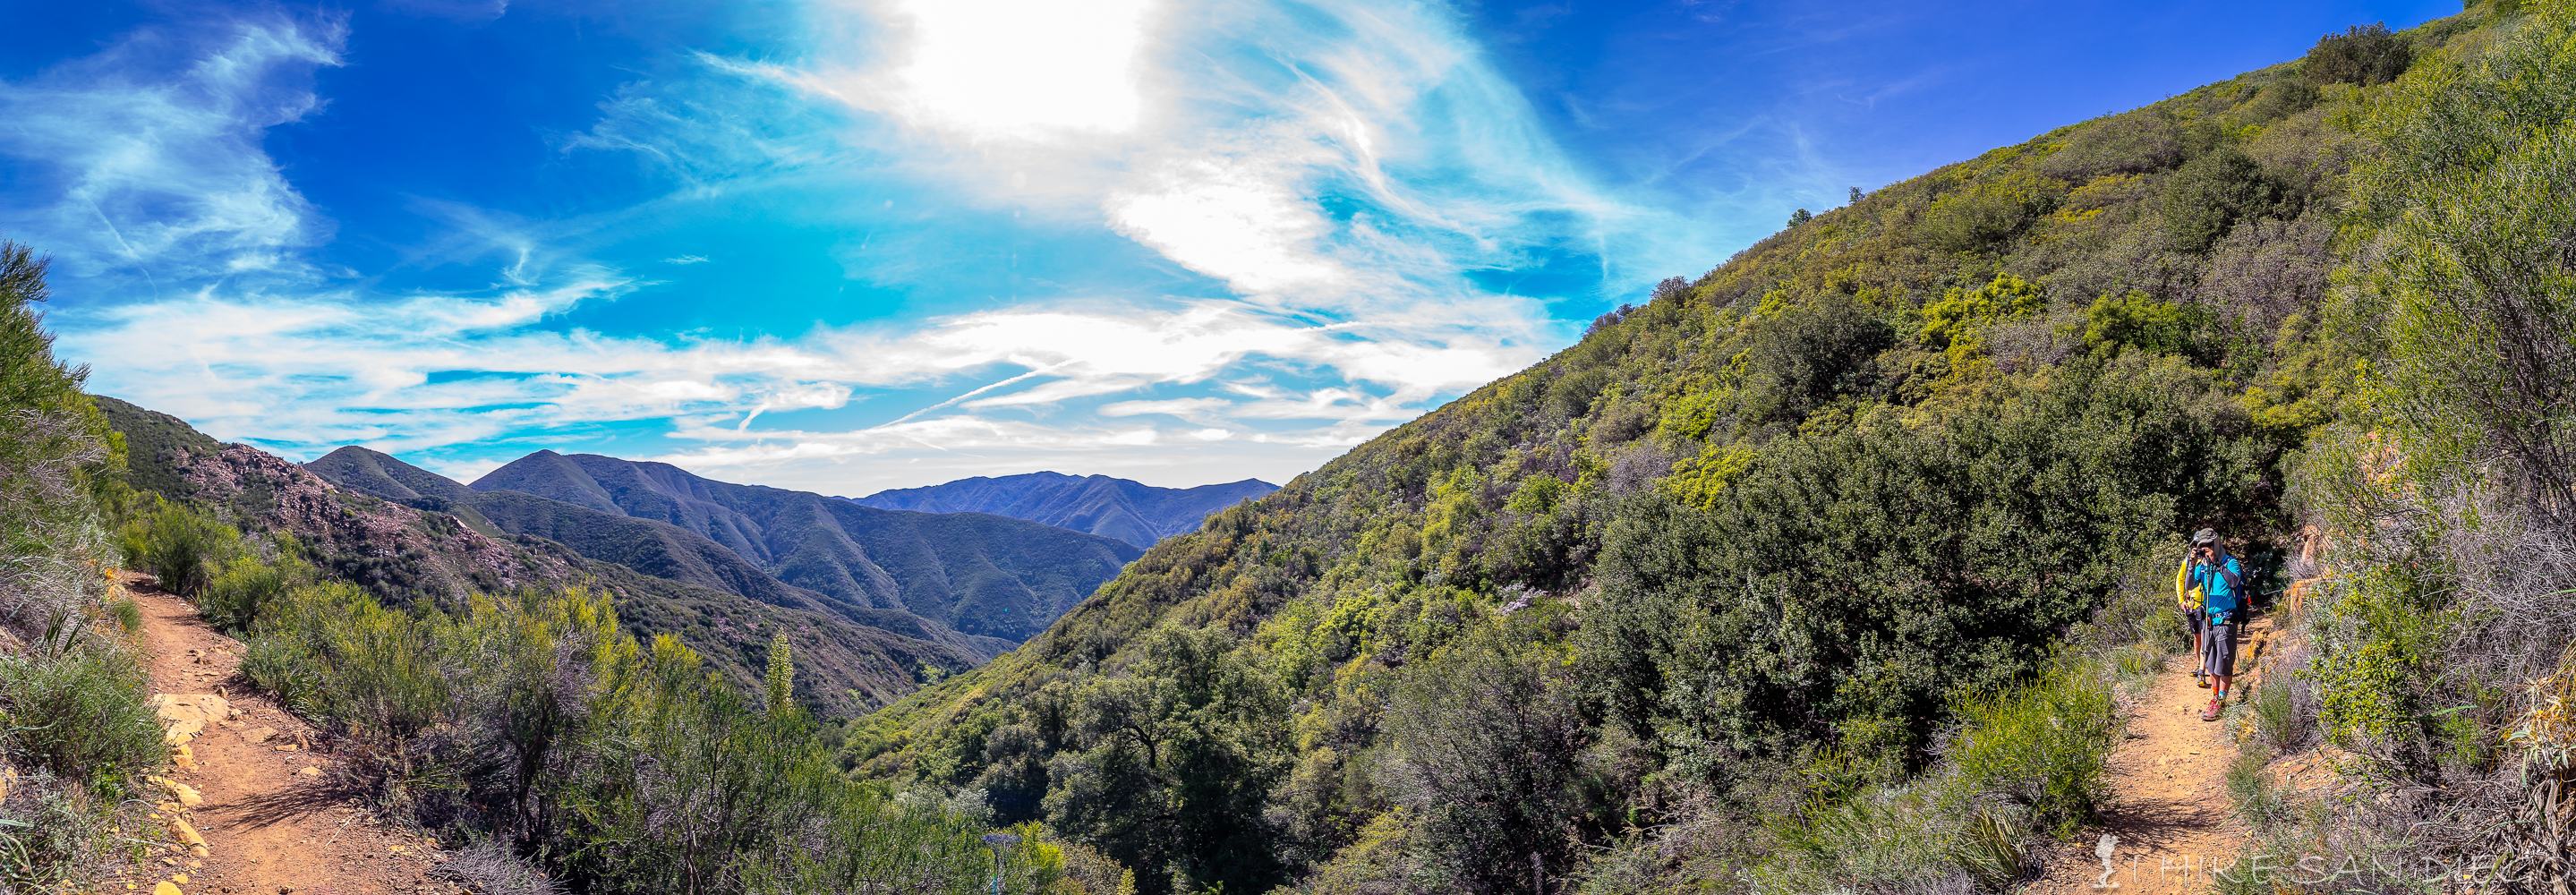
Looking back down into Holly Jim Canyon from the trail
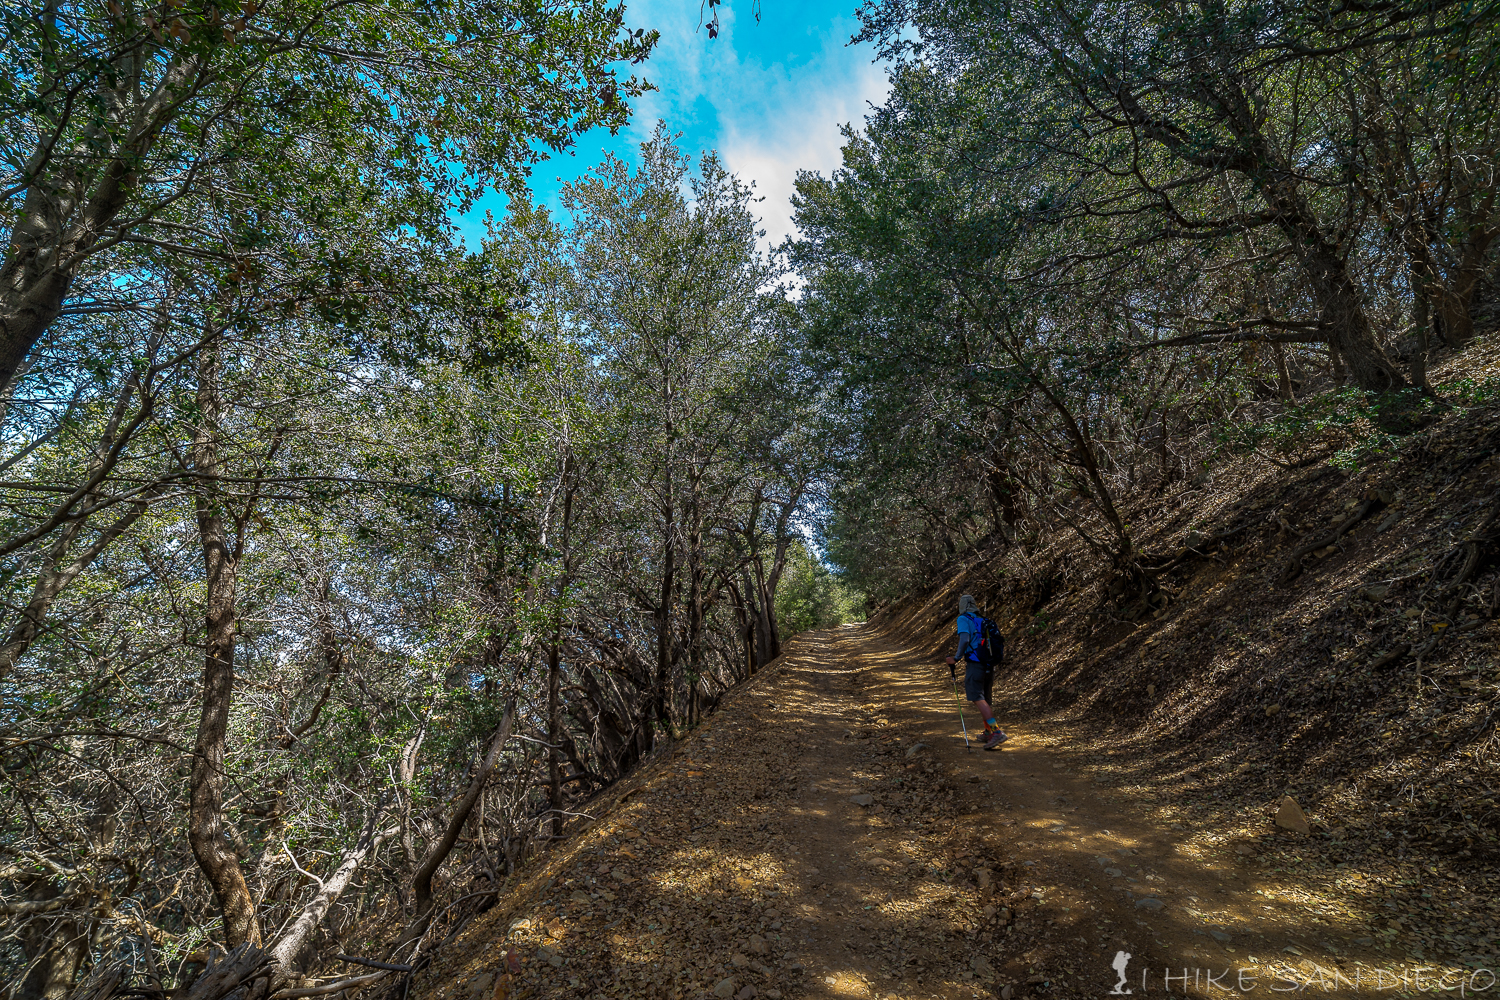
Eventually at around 5 miles into the hike you will make your way up to the Main Divide Road. Say good bye to the shade and comfortable trail for a while. Head right once you reach the road and make your way along the road for about 1/2 mile until you see the sign for the Upper Holly Jim Trail on your left. Take that trail and follow it for the next mile until it reconnects back into the Main Divide Road.
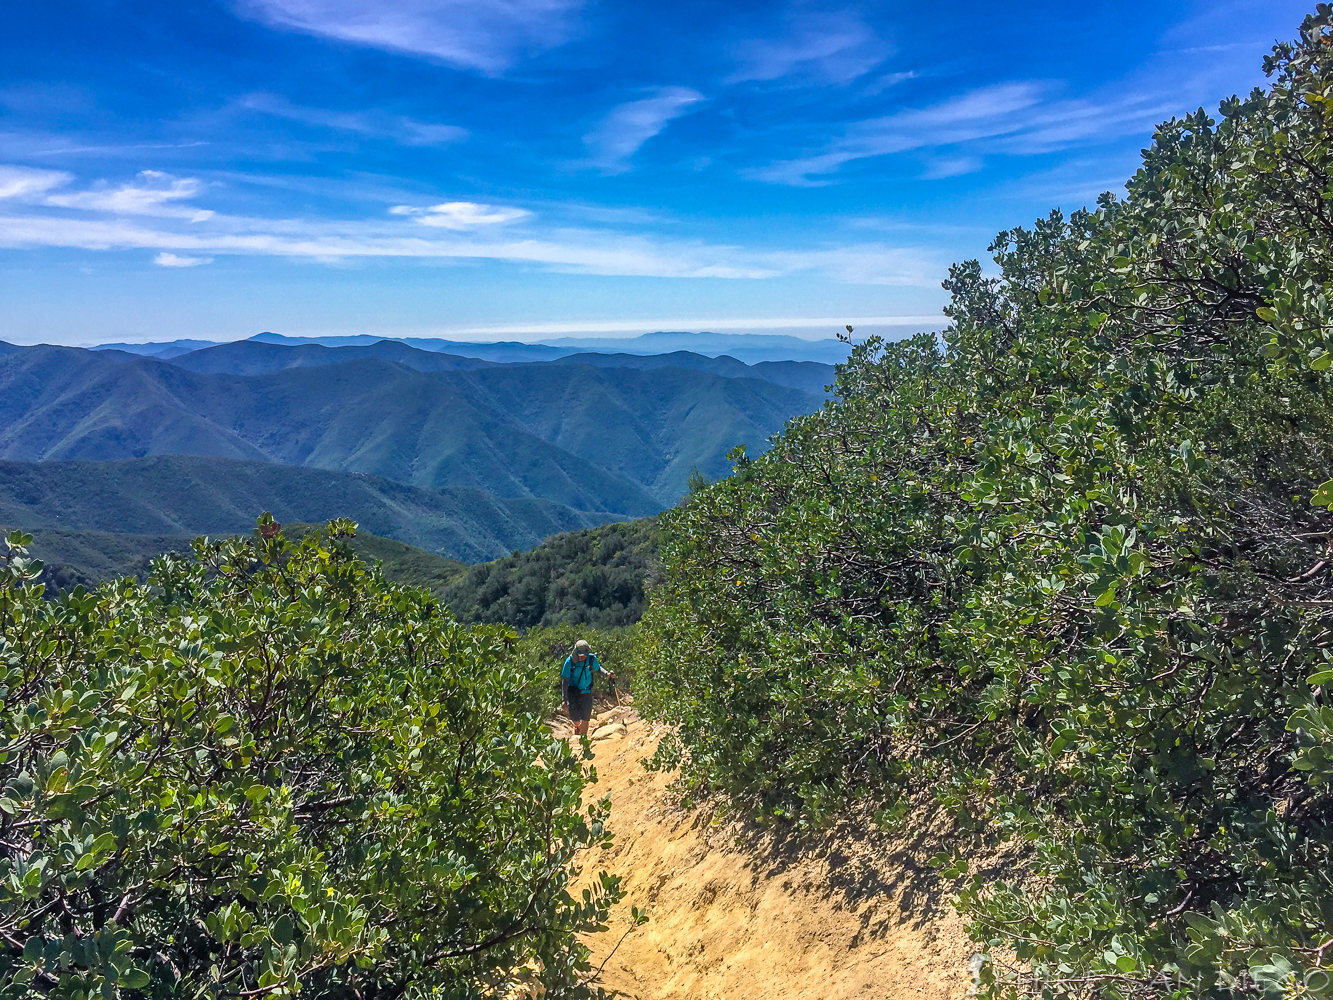
Hiking up the steeper Upper Holly Jim Trail
After you reconnect back onto the Main Divide Road follow it for the next 1.5 miles to the top of Santiago Peak. You will probably find that you have a lot of company along the road. Many time we found our selves moving as far to the side of the road as possible to let 4 x 4’s and motor bikes pass by as they made there way up to the peak. I would also keep you eyes open and ears sharp because this is about the area we almost stepped on a rattle snake. It seems every time I come across one I never hear it first, they usually tend to be silent unless agitated, luckily nothing happened and we just watched the snake make its way across the road and away from us.
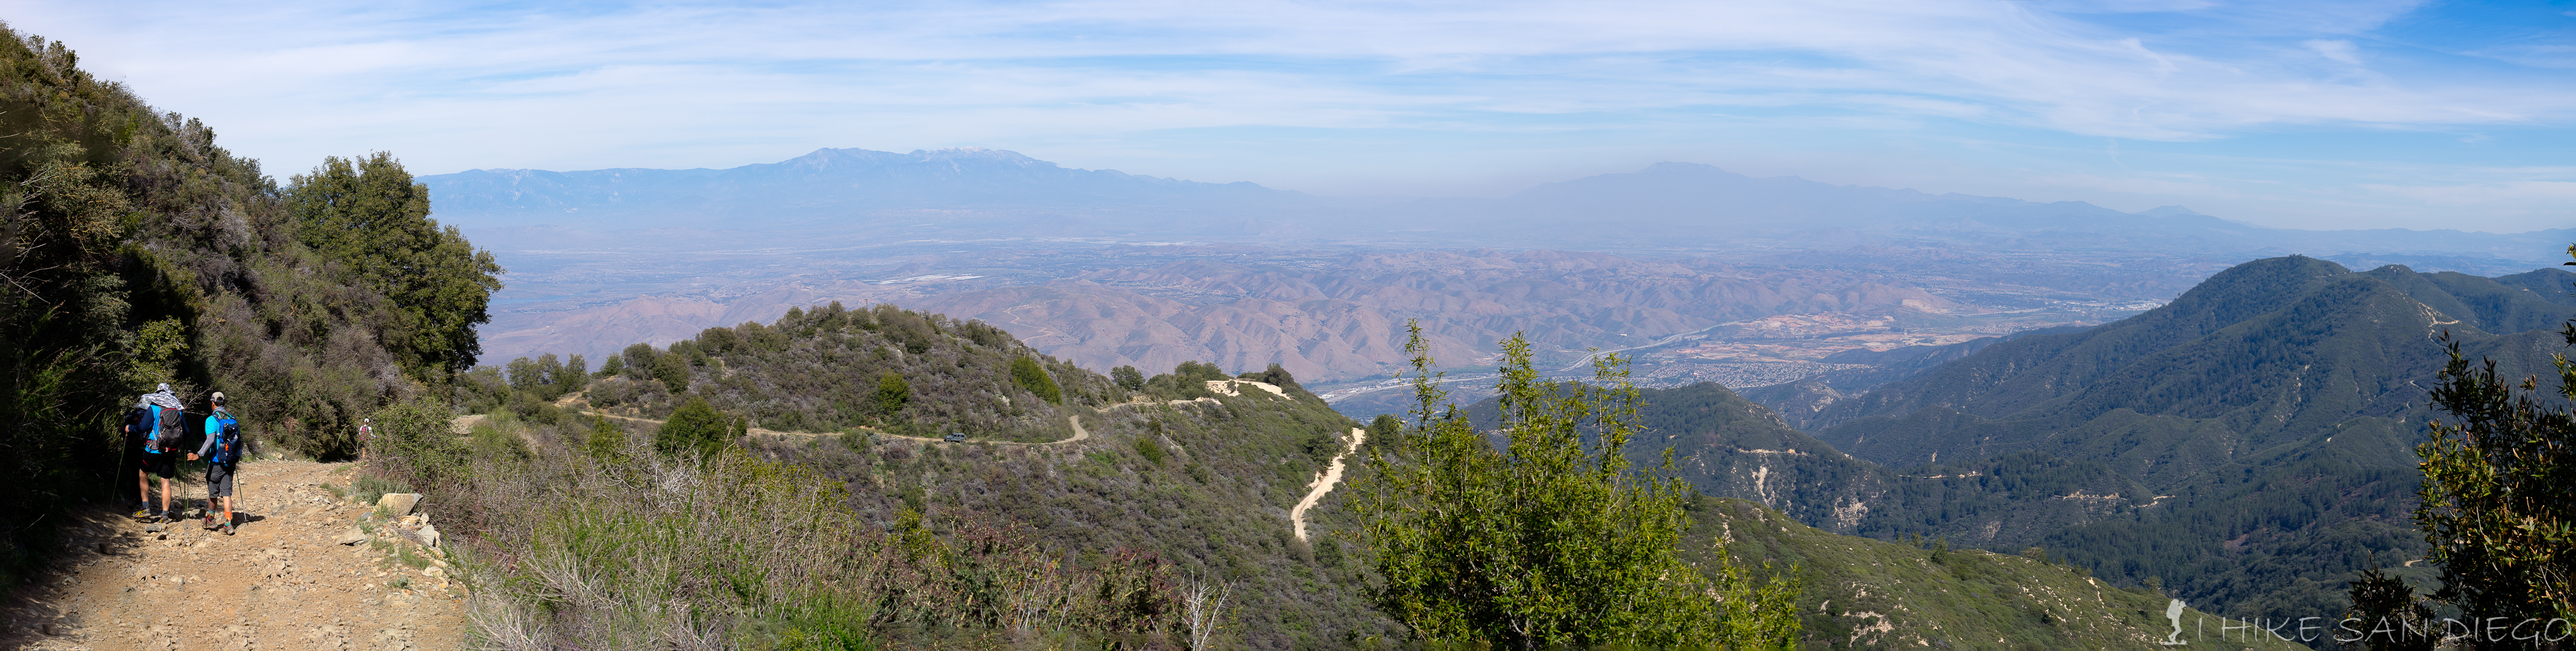
Looking down the Main Divide Road with San Gorgonio and Mt San Jacinto in the back ground.
Eventually as you reach the top you will start to see all the towers and antenna’s. You can find many areas for some shade at the top, either near one of the buildings or under some trees, but be warned there are some patch’s of Poodle Dog Bush at the top, you will probably smell its skunky aroma before you see it but it is a plant you definitely do not want to tangle with.
Some welcome shade just before the top of Santiago Peak
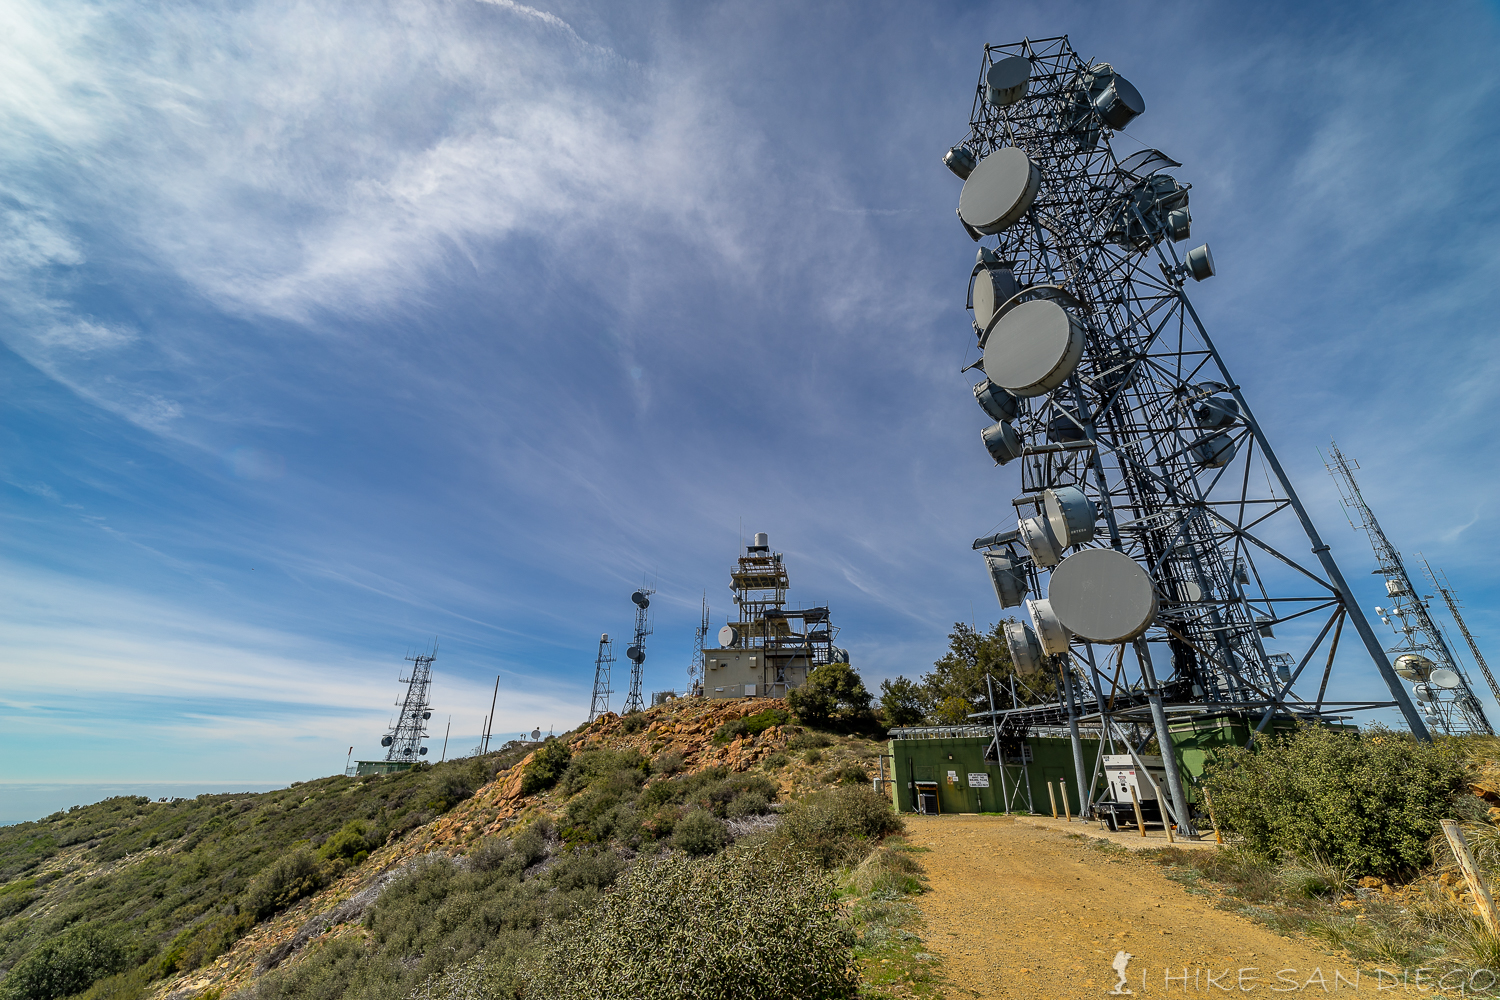
Santiago Peak with all the towers and antenna’s.

Poodle Dog Bush around some of the buildings at the peak
After resting and having some lunch explore around the top and take in some of the views. Looking out west you will see Catalina Island, although you may have too look for it through all the antenna’s.
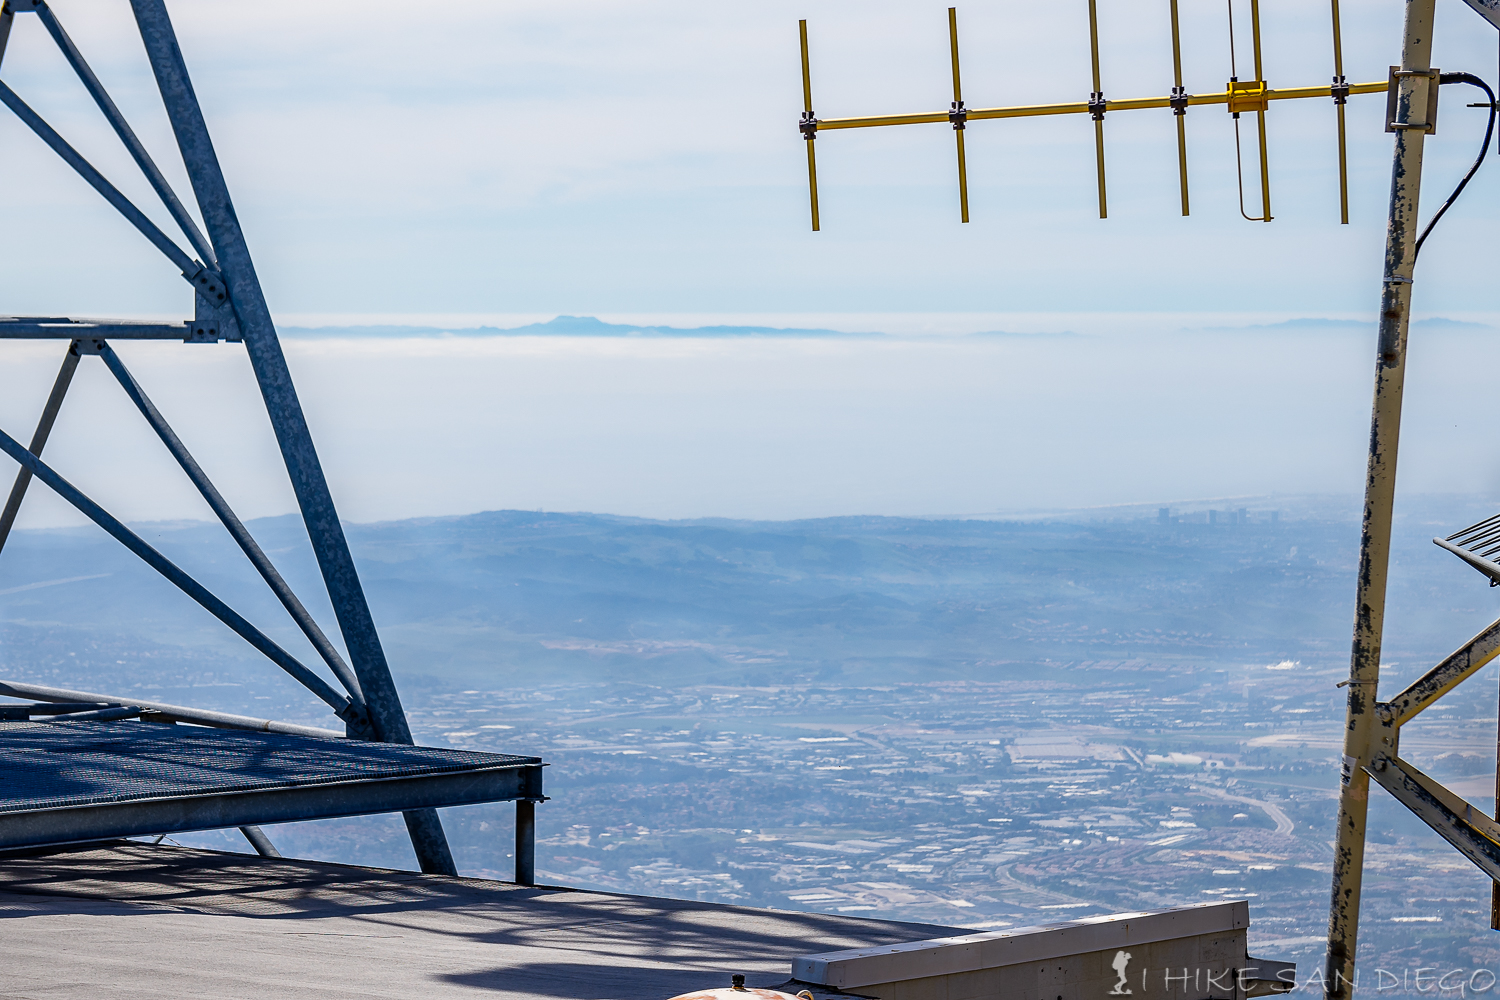
The top of Catilina Island peaking through the cloud cover below

Looking out east at the Inland Empire
After you are done exploring the top of Santiago Peak start making your way down. Keep your eyes open we completely missed the opening for Upper Holly Jim Trail and instead made our way down the Main Divide Road until we could meet up with the Lower Holly Jim Trail. Don’t forget to stop by the waterfalls at the bottom of the trail if you didn’t see them on the way up, depending on what season you are in there can be a lot of water or barely a trickle.
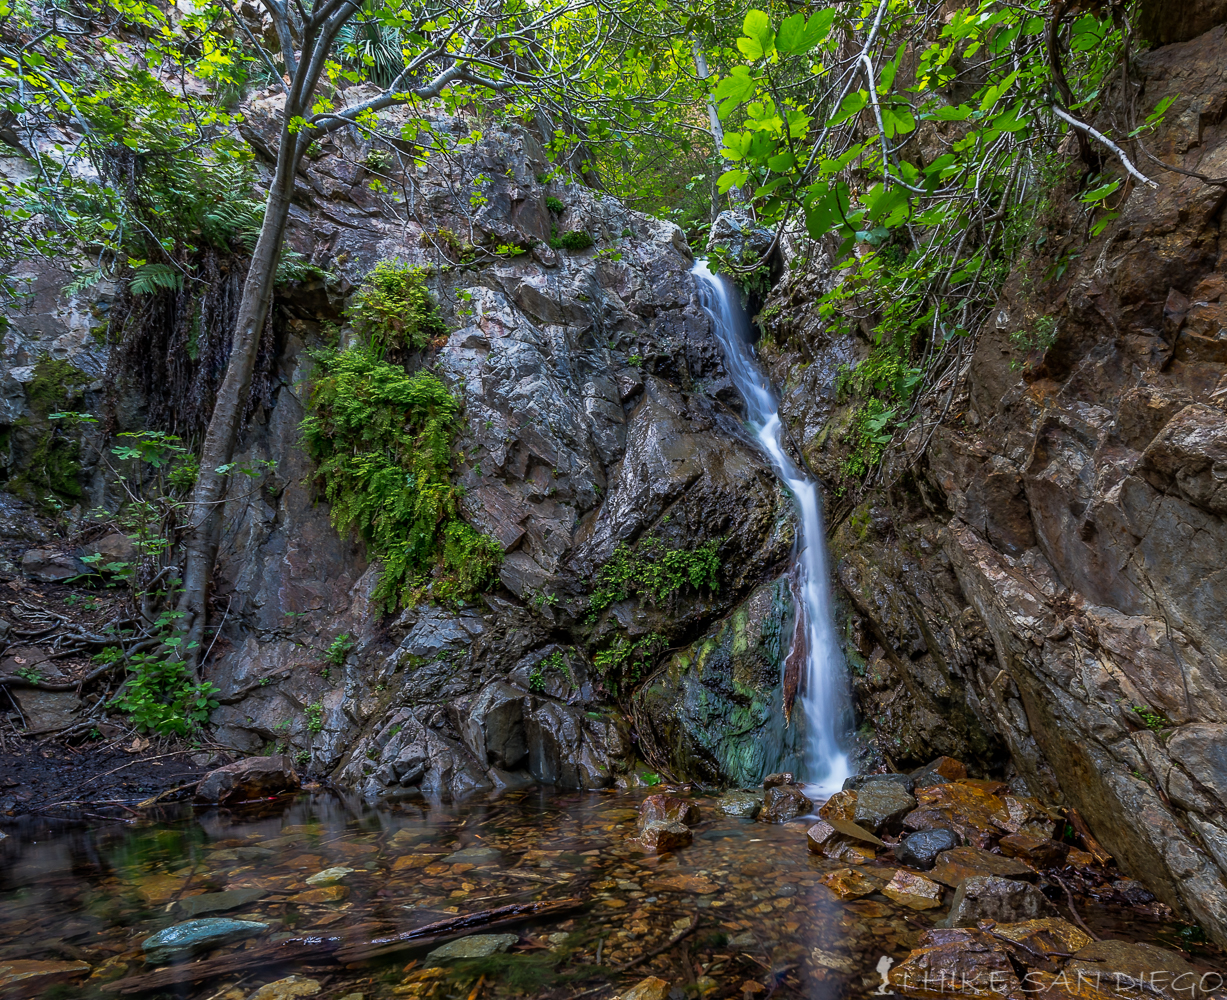
The waterfalls at Holly Jim Trail
Weather forecast for the Holly Jim Trail to Santiago Peak:
[forecast location="93453" caption="Weather for Holly Jim Trail to Santiago Peak Hike" measurement='F' todaylabel="Today" datelabel="(%%weekday%%)"highlow='%%high%%°/%%low%%°' numdays="5" iconset="Contemporary" cache="true" width="100%"]