The Rae Lakes Loop is a hike and backpacking adventure in the western side of the Sierras in Kings Canyon National Park. I had a great time hiking this adventure with a buddy recently, but before I share more about the hike I want to make sure you know all the specifics that you need to know in order to enjoy it as well.
Length of Hike :
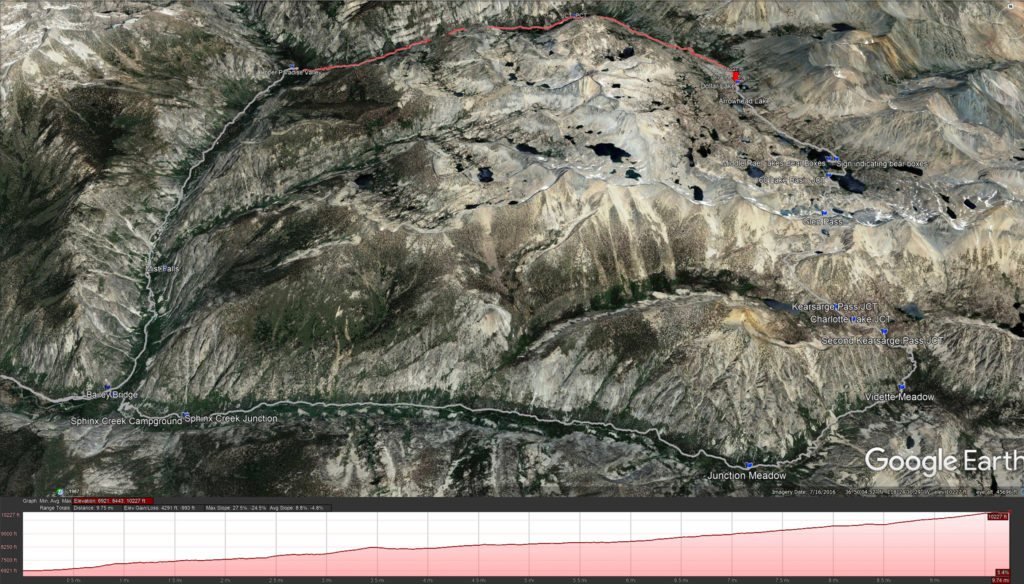
The National Park Service lists the hike as 41.4 miles long, my GPS listed my total mileage as 45.1 miles.
Duration of the Hike:
We divided up the hike into 4 days, truth be told I would have loved to add one more day to the hike and either spend it up at Rae Lakes or taking more time coming back down the valley along Bubbs Creek.
Hiking Elevation:
The hike starts at Roads End at an elevation of 5035 feet, depending on which way you go (Clockwise – more gradual) vs (Counter Clockwise – a steeper approach ) you will reach the highest elevation gain at Glen Pass 11,978 feet.
Camping Areas:
The Main Camping areas along this hike are:
Paradise Valley: Lower, Middle, and Upper Paradise Valley camping locations are limited to two nights only.
Rae Lakes : Camping is limited to one night only.
Charlotte Lake: Camping is limited to two nights only.
Bullfrog Lake: Camping is not allowed.
Vidette Meadows : I can not find any information on limits in this area.
Junction Meadows: I can not find any information on limits in this area.
Other camping spots. – we saw many small camping areas along the way, some that only accommodated 1 tent, some that accommodated more. I don’t think you will have a problem finding a nice flat spot to bed down for the night.
Distances Along the Rae Lakes Loop
I really liked this table for giving you an idea for mileage of the hike. My GPS device reported slightly more milage then this chart, but I like how it layed out for you in order to help plan your hikes as well.
copyed from the National Park Service
|
Miles from Road’s End via Paradise Clockwise Direction |
Miles from Road’s End via Bubbs Counter Clockwise Direction |
|
| Road’s End | 0 | 41.1 | |
| Paradise/ Bubbs Jct | 1.9 | 39.5 | |
| Mist Falls | 3.9 | 37.5 | |
| Lower Paradise | 5.7 | 35.7 | |
| Middle Paradise | 6.8 | 34.6 | |
| Upper Paradise | 10 | 31.3 | |
| Woods Creek Crossing | 15.7 | 25.7 | |
| Dollar Lake | 19.7 | 21.7 | |
| Rae Lakes | 22.7 | 18.7 | |
| Glen Pass | 24.6 | 16.8 | |
| Charlotte Lake Jct | 26.7 | 14.7 | |
| Vidette Meadow | 28.2 | 13.2 | |
| Junction Meadow | 31.1 | 10.3 | |
| Charlotte Creek | 33.9 | 7.5 | |
| Sphinx Junction | 37.5 | 4.1 | |
| Paradise / Bubbs Jct | 39.4 | 1.9 | |
| Roads End | 41.4 | 0.0 |
Permits Needed : A Wilderness Permit is needed for you to enjoy this adventure. When you decide to go will make all the difference on how easy it is to accquire.
As is stated on the National Park Services page for Rae Lakes Loop
“The Rae Lakes Loop is one of the most popular hikes in Sequoia and Kings Canyon, if not in the entire Sierra. If you are planning to do this hike during the summer, it is wise to make reservations, as trail-head quotas often fill up. Wilderness permits for the Rae Lakes Loop are issued at the Roads End station, 5.5 miles beyond Cedar Grove. Even if you have a reservation, you must still check in and pick up your permit prior to starting your trip.”
The Quota Season is differnt every year, in 2019 it ran from May 24th – through September 21st. Which is why we decided to go up on September 23rd and hike the 24th through the 27th. By going after the quota season all you have to do is show up at Roads End and write out a self issued permit for yourself, which is what we did. While this strategy makes it much easier to get on the trail it leaves you with a very short window in which to take advantage of it. In 2019 the road down into Cedar Grove closed for winter on November 12 at noon, and after driving down into Kings Canyon on that road I can understand why.
An approved Bear Canister is required on this trail.
Even though every major camp site, ie..Paradise Valley, Rae Lakes, Junction Meadows all had permanent bear boxs availble you should not assume that there will be room in these containers for you. You can pick up these bear containers at your local REI or Adventure 16 for sale or rental. REI rentals. Adventure 16 Rentals. These containers are also available for rental at the ranger station at Roads End.
Fees:
A Vehicle Pass is required to enter into Sequoia & Kings Canyon National Parks and will cost you $35 as of this writing. Make sure you hold onto this pass as you will more then likely enter the park through the Sequoia entrance but then will exit the Sequoia park as you drive into Kings Canyon area. Well guess what, your going to need that pass to enter back into Sequoia on your way back out. We found that out when my buddy had alreay thrown the pass that was taped to his windshield away only to need it as we were heading home, luckily it was a fee free day on our way thorugh ( or the ranger was just being understanding ).
Cell Phone Coverage:
A Blessing and a Curse. We lost all cellphone coverage before we even entered Sequoia, almost an hour before we made it to Cedar Grove. It was great not knowing what was going on in the world for almost a week, but if you need to contact anyone your only option down at Cedar Grove are the 2 pay phones near Cedar Grove Lodge, if you are staying at the lodge there is WIFI for guests, Free public WiFi is offered by the park at two visitor centers: Kings Canyon Visitor Center in Grant Grove Village, and Foothills Visitor Center near the Sequoia park entrance, but that is not going to help you once your down at Cedar Grove.
Water:
There is water everywhere on this trail, or almost everywhere. For the most part you will not need to stock up on water and can get away with just carrying a liter of water and some way of filtering water while on the trail. The only exception to this in my experience was as we were going clockwise on the trail about 1/2 way up Glen Pass you will no longer see any fresh water sources, you will see a small lake at the bottom of the pass on the eastern side but it does not look easy to access, after that we did not see fresh water again until Bull Frog Lake. Knowing that my suggestion to you would be to fill up with what you think you will need for water for 5-6 miles going clockwise at least 1/2 way up Glen Pass and if you are going counter clockwise near Bull Frog Lake. You can find water at Charlotte Lake but that will add several miles to your hike just to get water.
I also enjoyed carrying two different filters for this hike. One pump for filtering while on the trail, and one gravity feed system for getting water in camp. Having the gravity feed system made camp life much more enjoyable, as we could fill up a bag with 3-5 liters and get water as we needed it rather then going to the stream every time we needed water.
The Adventure:
Almost every year lately my buddy and I have at least one grand hiking adventure, we both love getting out in nature and getting away from everyday life, luckily we both have understanding wives. This year we had been talking on and off about what we wanted to do, we would both love to do the JMT or at least part of it, but only have so much time to play with. We had both read about this hike and the more we talked about it the more we liked the idea. We planned on going a day or two after the quota season ended so we didn’t need to screw around with that, not to mention that past experience has shown us the wisdom of waiting until the end of summer when mosquito’s have started to calm down some. So towards the end of September in 2019 we drove the 7 hours from San Diego up to Kings Canyon National Park to embark on our adventure.
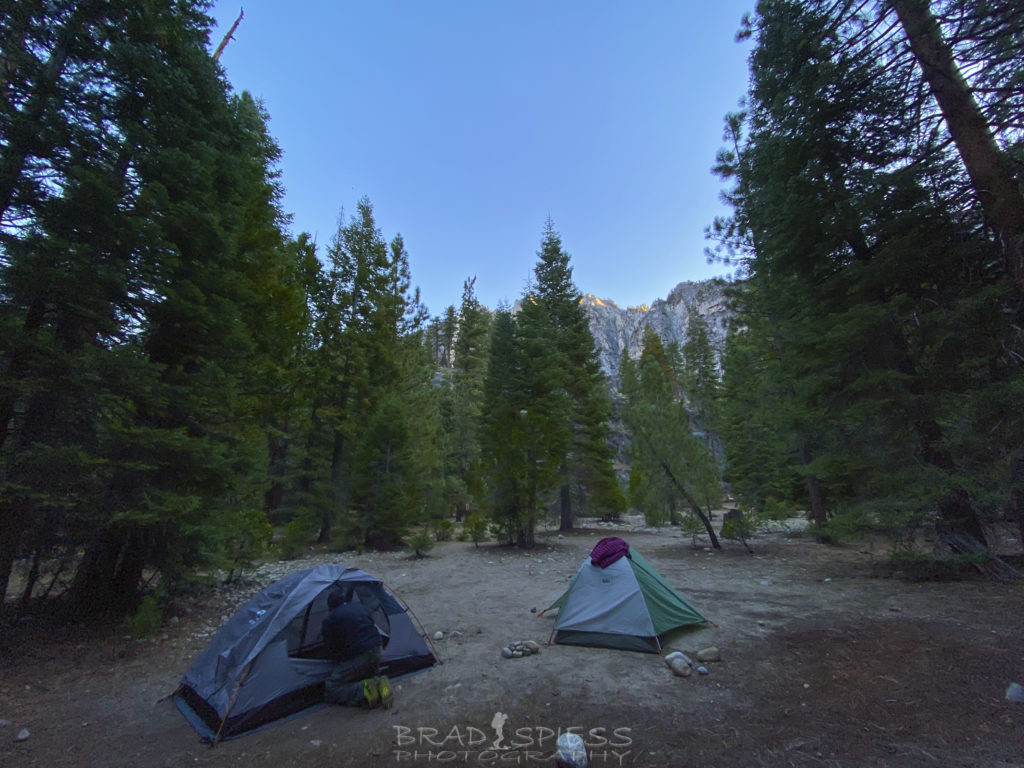
Some of the campgrounds start to close down at this time of year but we were still able to take advantage of the campsite right next to the Cedar Grove Lodge so that getting some real food before and after the hike was easy as were the showers near the lodge. We arrived, set up our camp site and then headed over to the lodge to get some grub, after we just chilled out by the river while enjoying a beer. The next morning we took advantage of the lodge again after we had packed up camp to get some breakfast in us before we hit the trail.
When you arrive at Roads End your first inclination is to park near the Roads End station but this parking area is supposed to be only for day hikers, you need to drive a little further around the bend to get to the overnight parking area and bear boxes that are supplied for anything that you need to store from your vehicle while hiking.
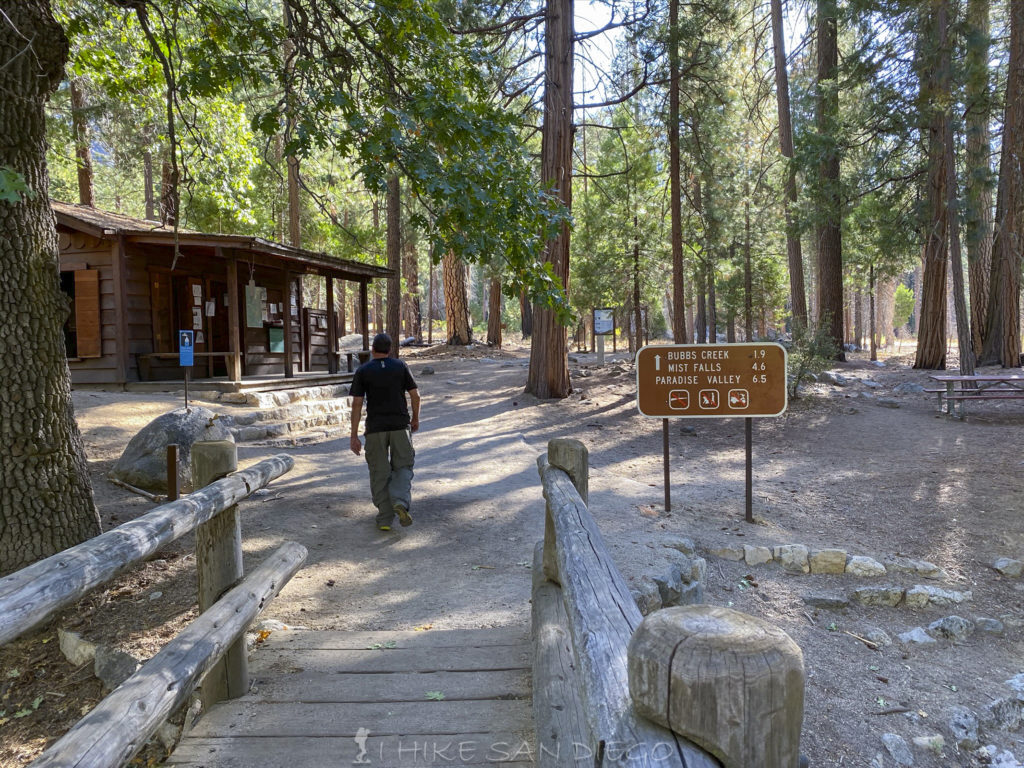
Roads End Ranger Station were you will need to fill out your self issued permit after quota season
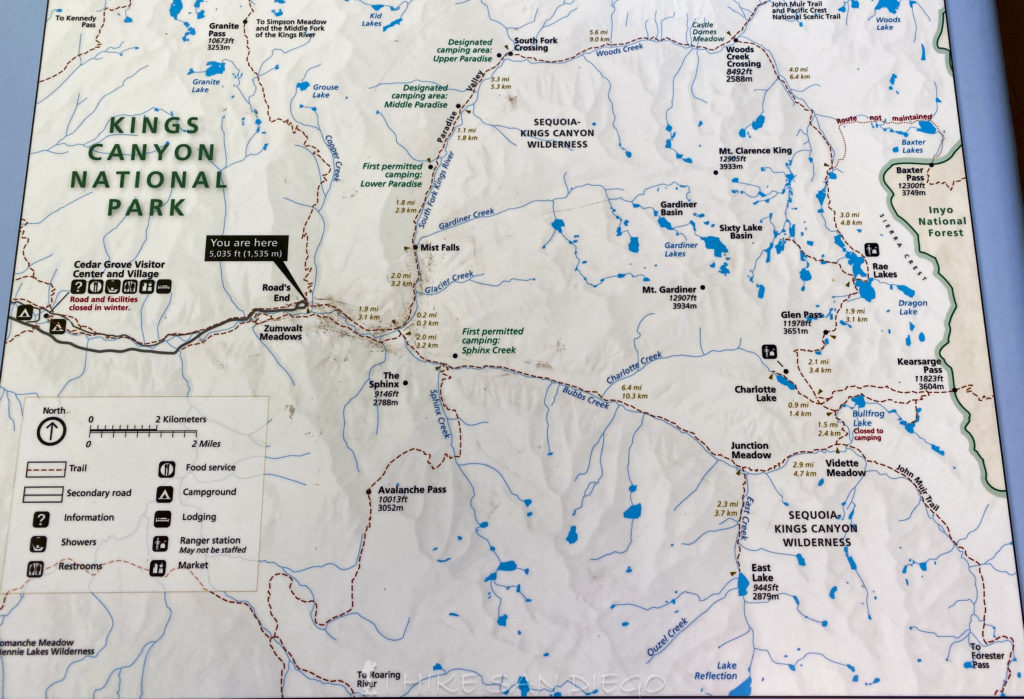
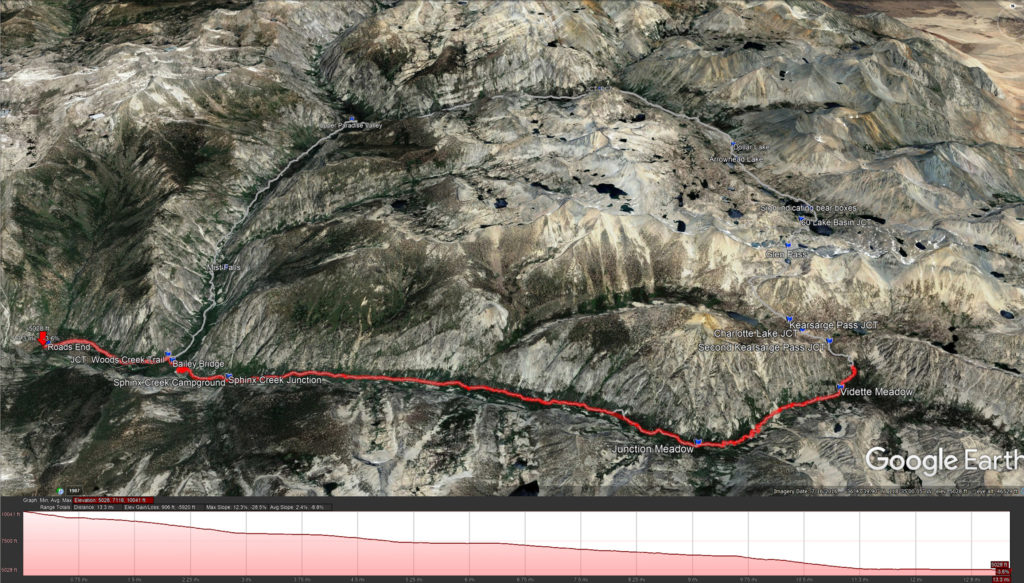
NPS Map of Rae Lakes Loop
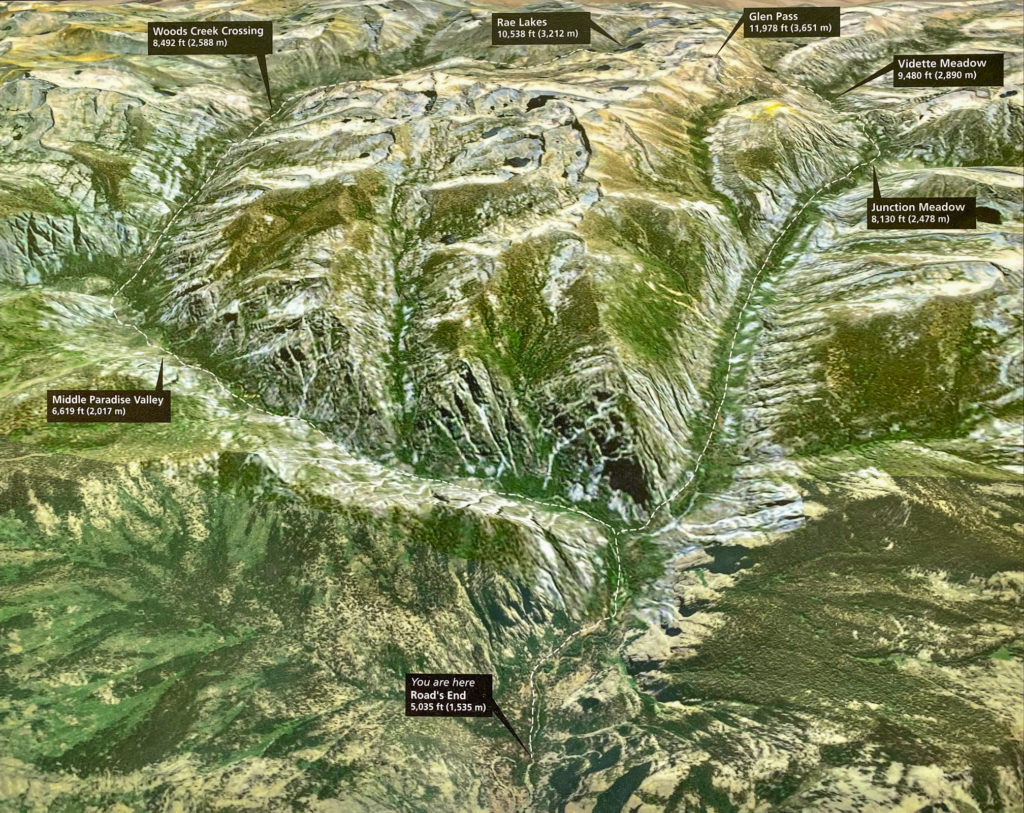
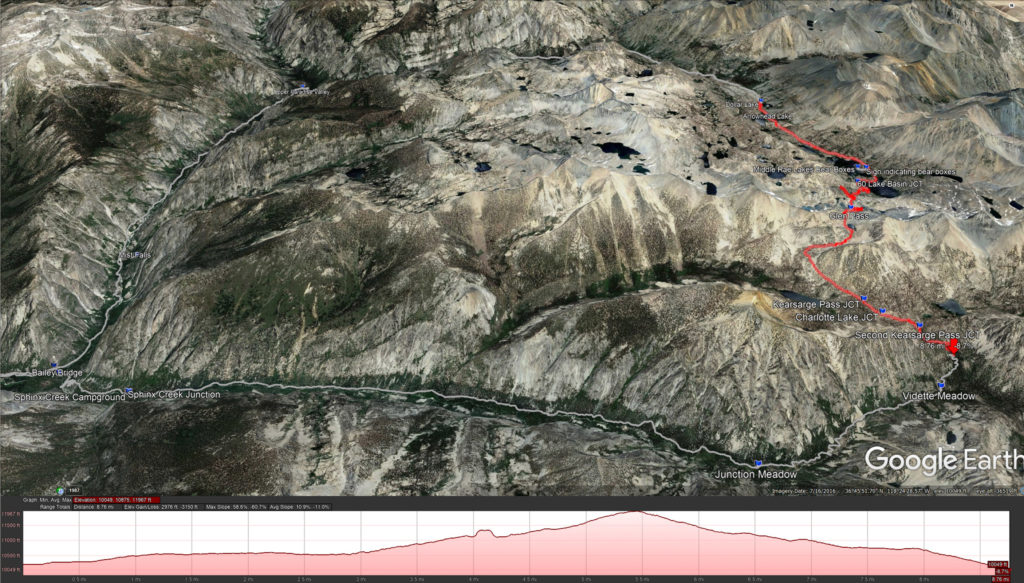
A 3D representation of the Rae Lakes Loop
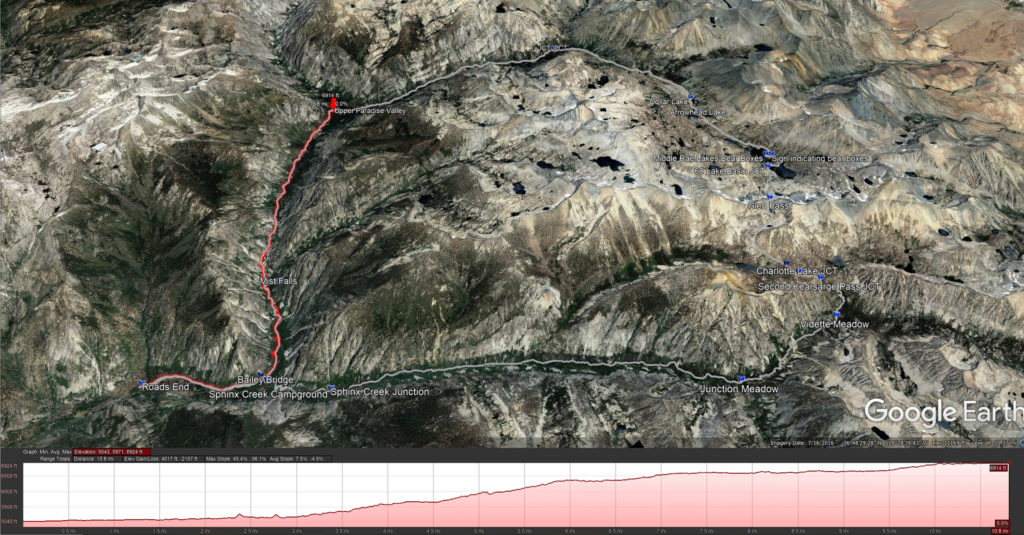
The 1st day on the trail, going from Roads End to Upper Paradise Valley
The 1st day on the trail, going from Roads End to Upper Paradise Valley
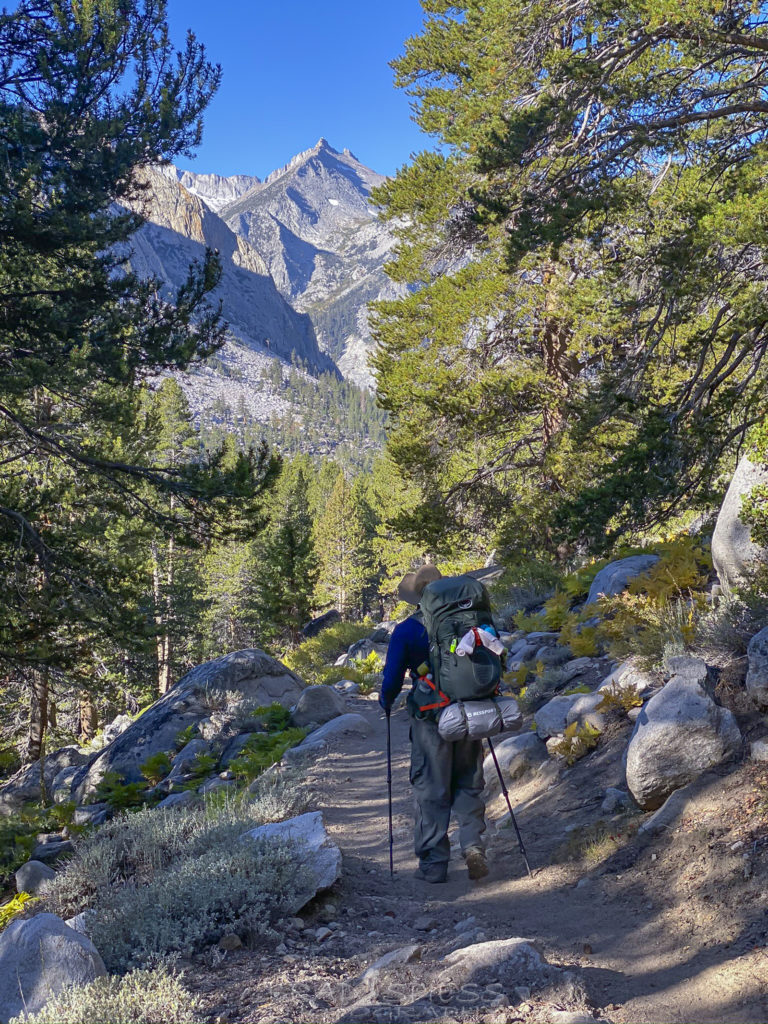
Day 1. Roads End to Upper Paradise Valley. Listed as 10 Miles on the NPS site, my GPS device gave me a total of 11.53 Miles, but I tend to find that most GPS devices can get a little confused when in deep canyons.
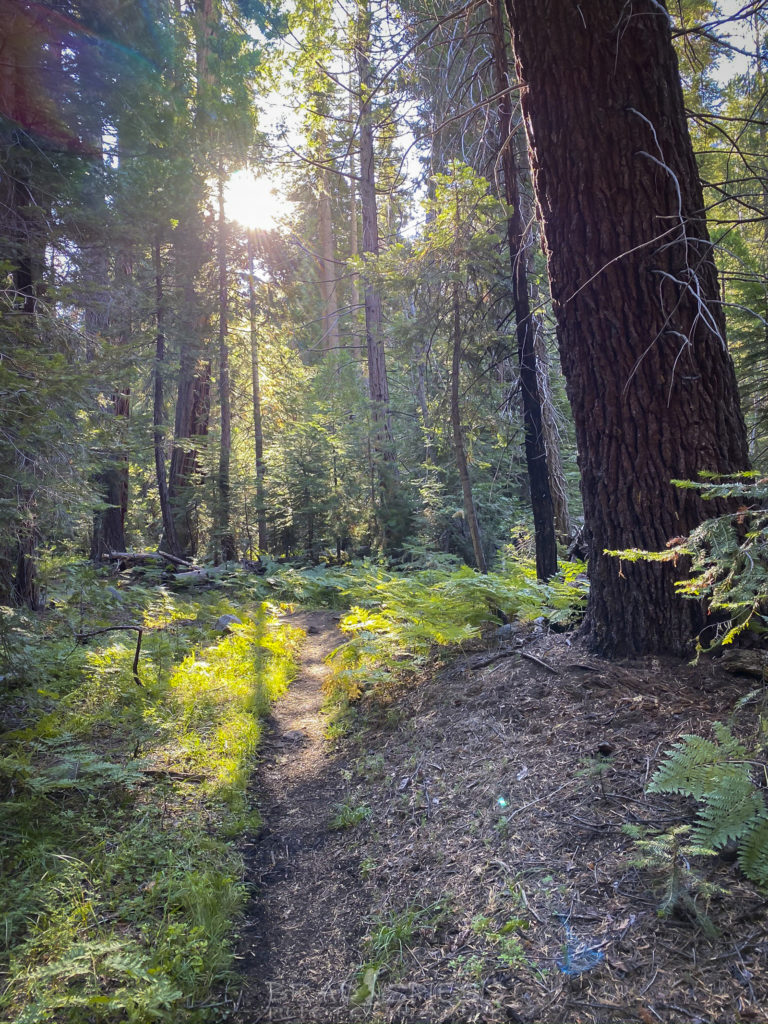
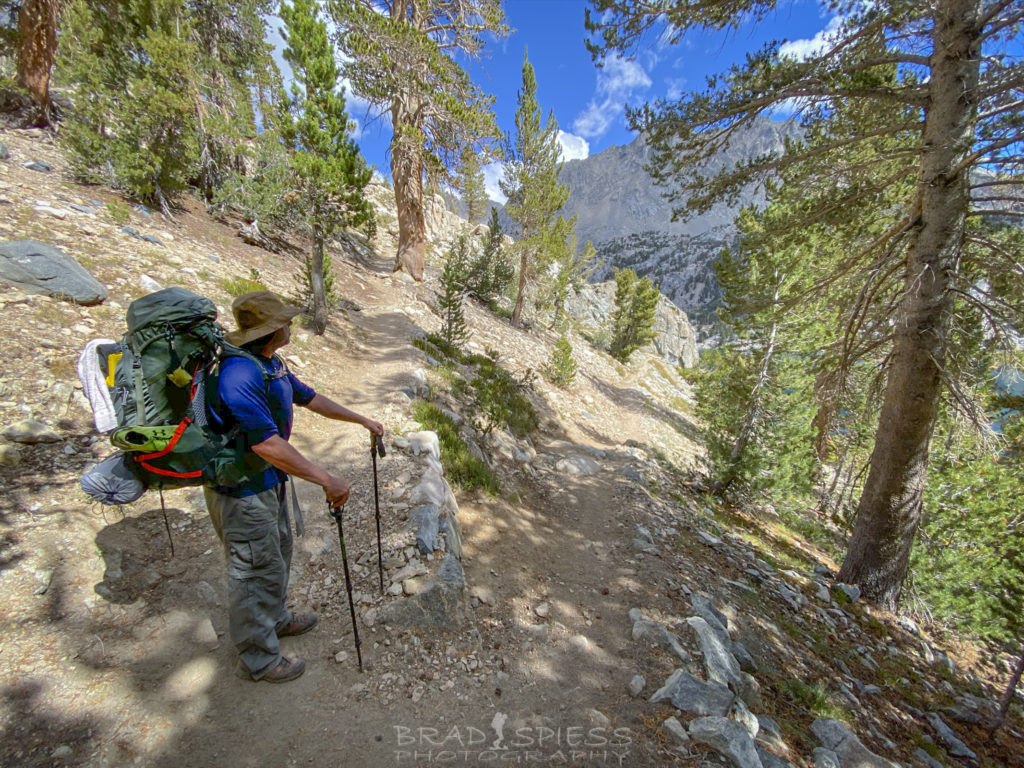
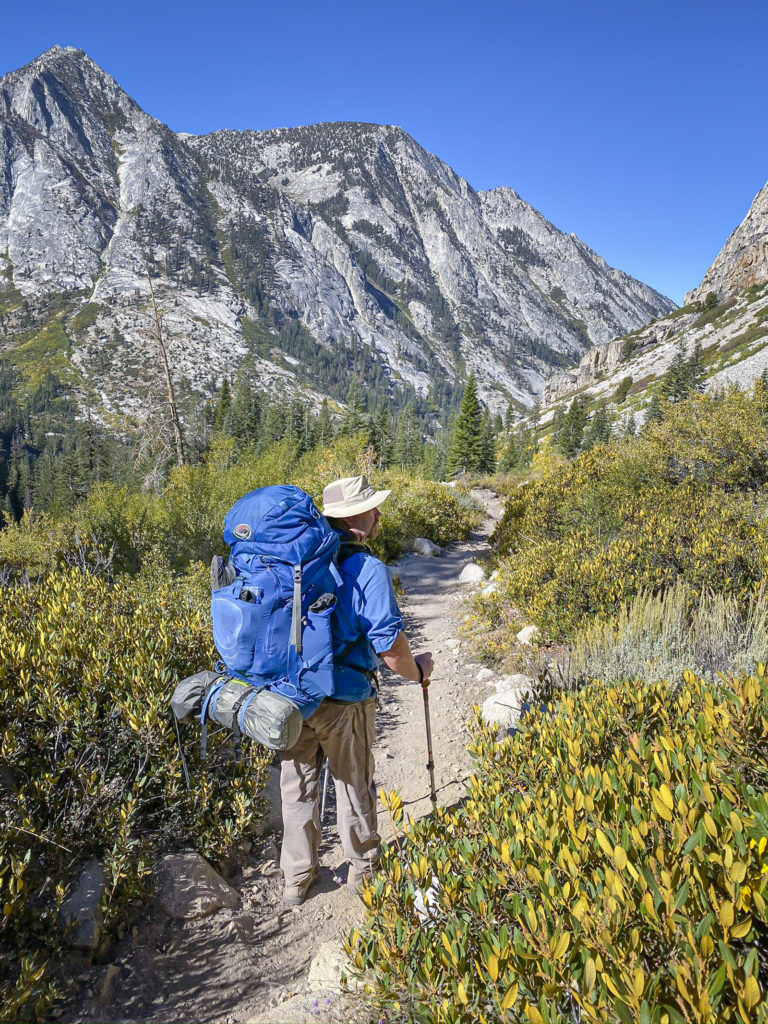
The first 1.9 miles of this hike are pretty easy going. This is a good time to start using your mosquito head net if you brought one, although I think what was buggging us more that day where nats, but the netting really helped make the hiking more bearable without having to wave the bugs out of your face every couple of seconds, although I would suggest that if you use one of these that you also us a wide brim hat as it helps keep the netting away from your face making it much more comfortable. The first 1.9 miles of this hike is pretty flat and on a sandy trail that you will tend to walk on the fringes of in order to make the going easier. Its pretty open and in the summer time you may find this to be a much warmer section of the trail.
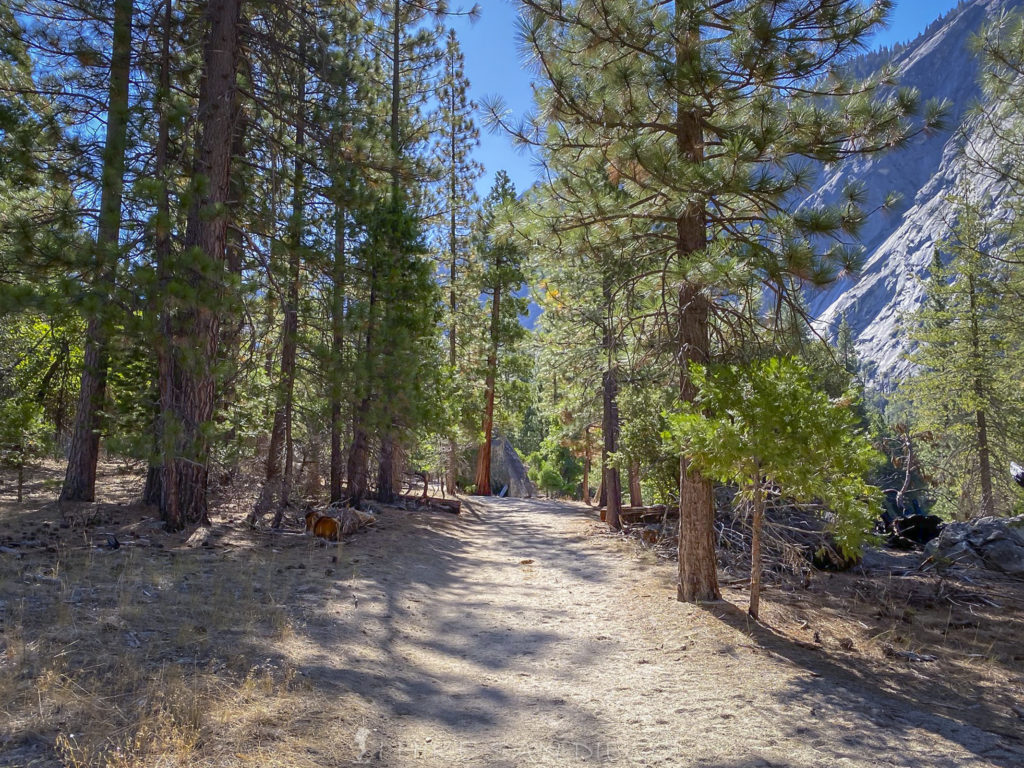
The beginning of the hike on the sandy trail
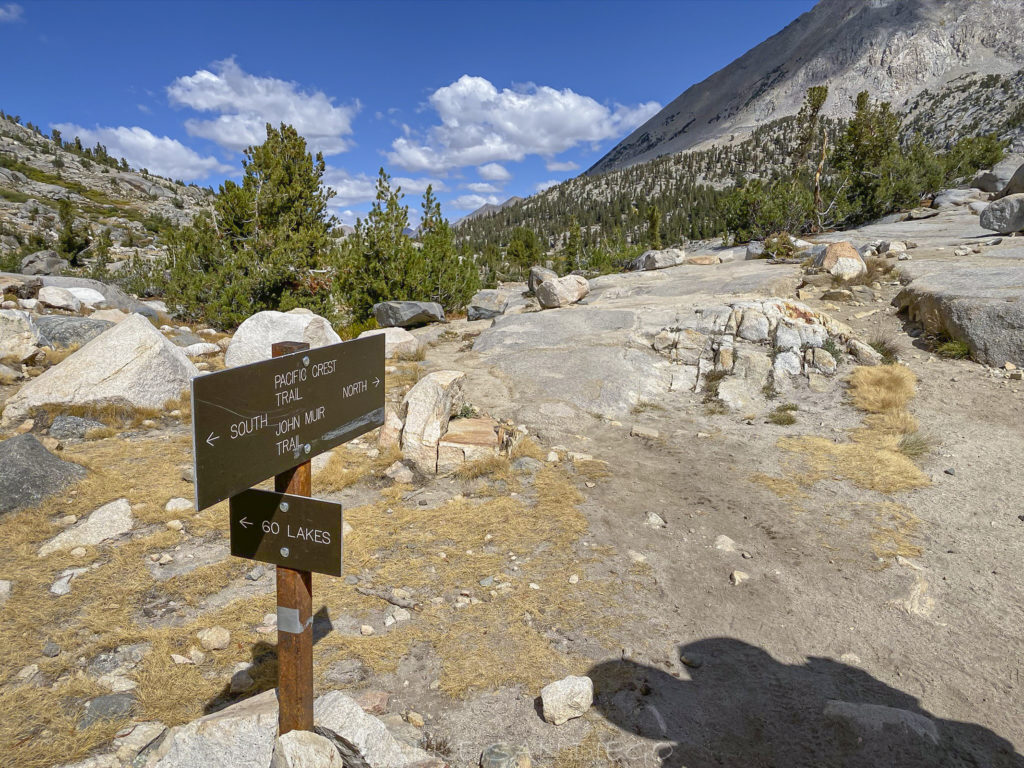
After the first 1.9 miles you will come to a junction in the trail, heading left to go on the clockwise adventure of Rae Lakes Loop, and heading right to go on the counterclockwise loop of Rae Lakes which happens to be the way you will be coming back in a couple of days as you finish your clockwise direction.
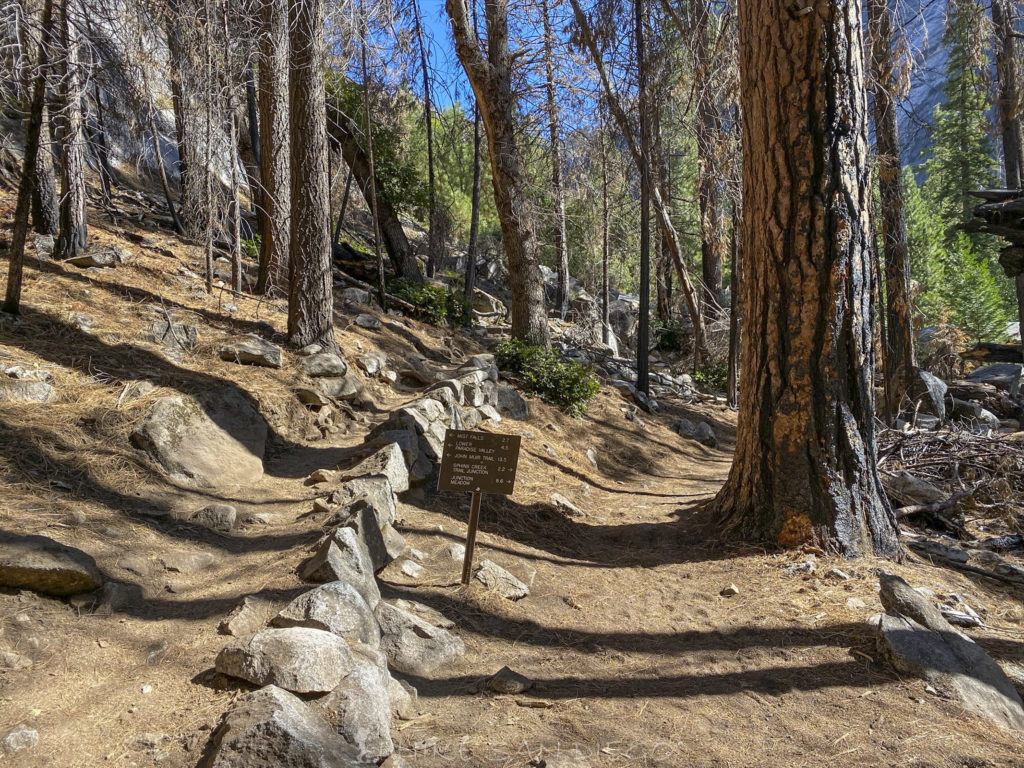
The first trail junction you come to on the Rae Lakes Loop. Heading left for Paradise Valley and heading right for Junction Meadow.
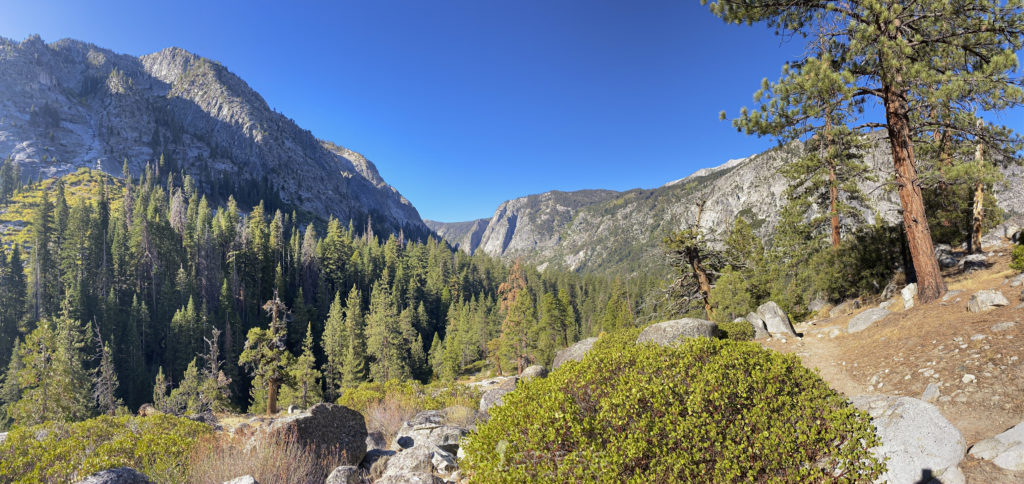
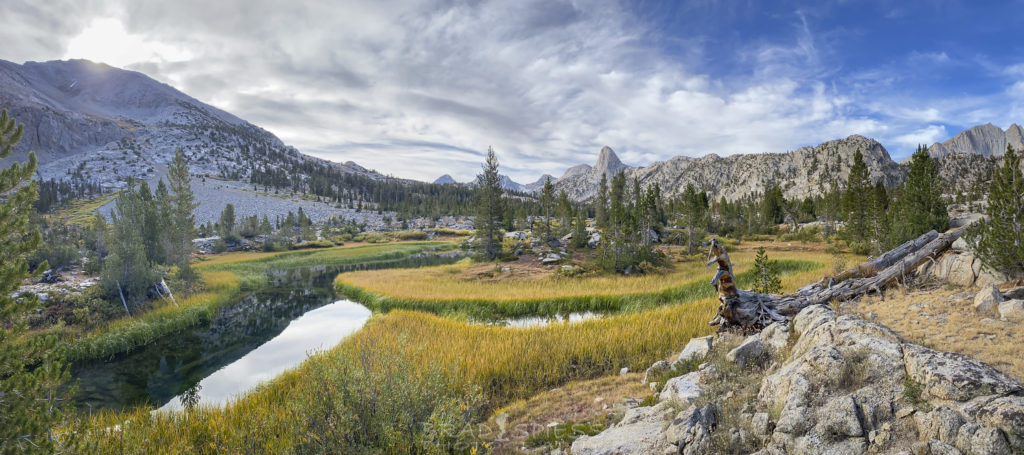
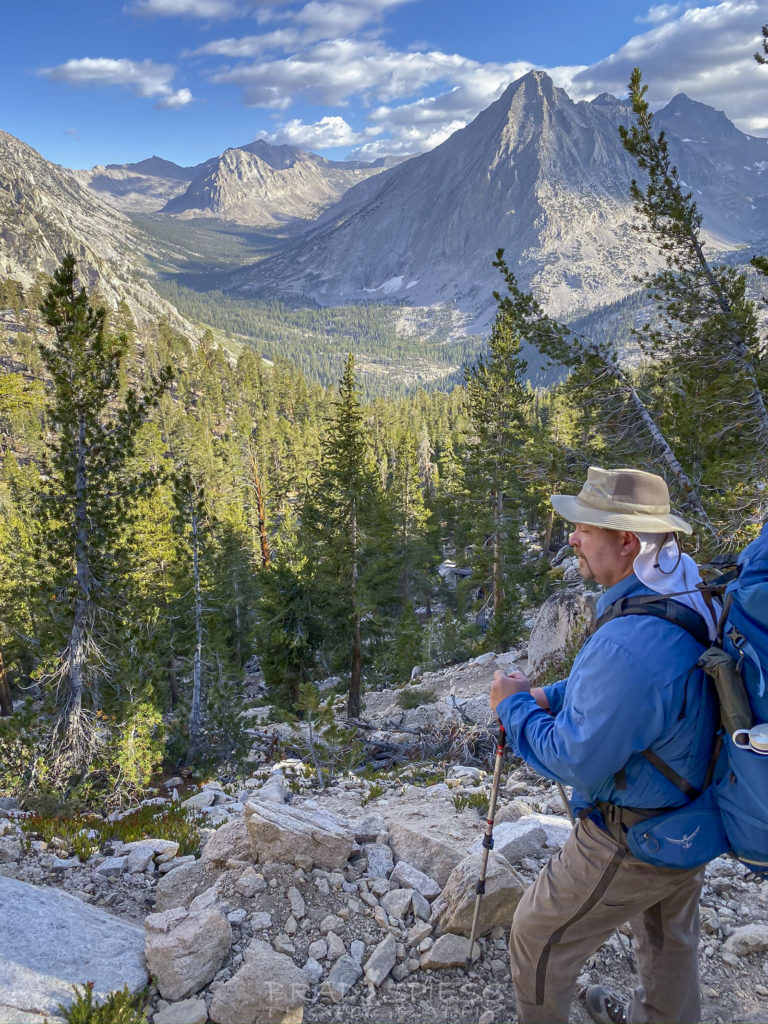
As you head left to go onto the clockwise direction of the Rae Lakes Loop you will follow the west side of the Kings River as you make your way up to one of the 3 camping areas in Paradise Valley. The sound of rushing water and the many glimpses of the Kings River as it makes its way downstream are a welcome change from the begining of the hike. There are many chances to stop and take in the tranquil beauty but I would recomend your lunch spot or long rest to be at Mist Falls, about 4.7 miles into the hike. As you are heading up the valley take a chance to look behind you for one of the best views of the Shyinx, a prominent feature on the south side of Kings Canyon, more than 4,000ft above the canyon floor. I don’t see the resemblence to a shyinx, but there is not doubt that it is a distinct feature of the valley showing the obvious signs of the glacial carving that made up this valley.
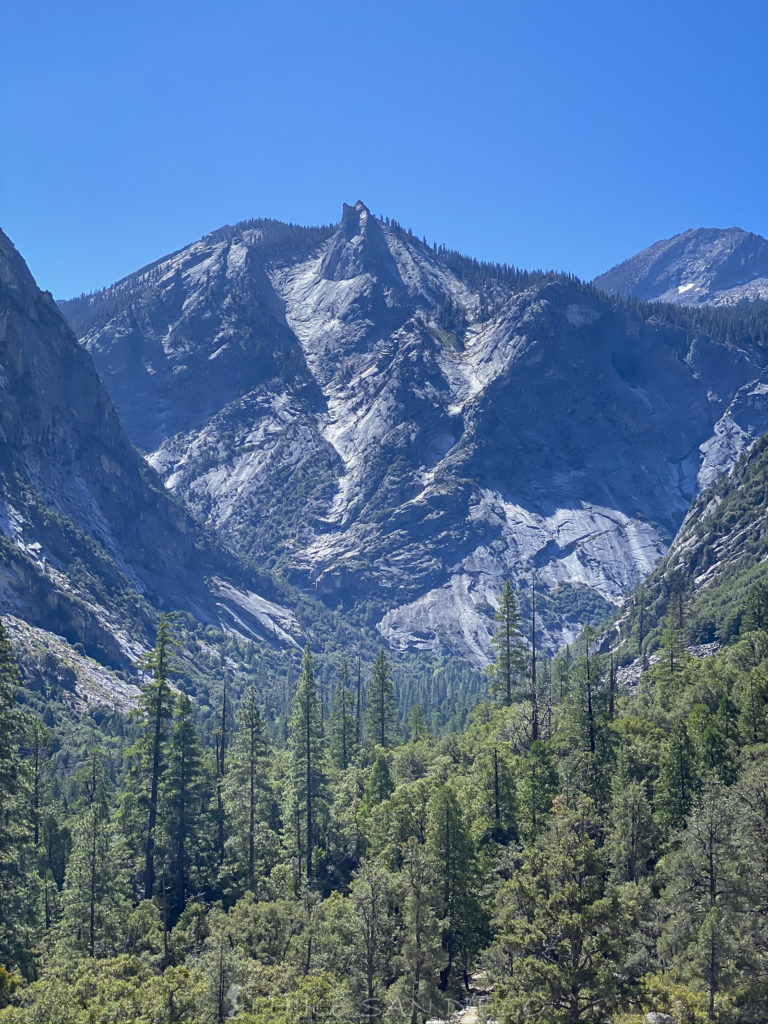
Looking back at the Shynix looming high above the valley floor in Kings Canyon
We took many opportunitys to stop and check out the river below as it flucuated between ragging white water and mellow flowing river before we hit Mist Falls. I have to say that having water being such a prominent feature of this hike is pretty cool, you will miss the sound of rushing water when you hit the stretches of silence as the trail takes you away from the river.
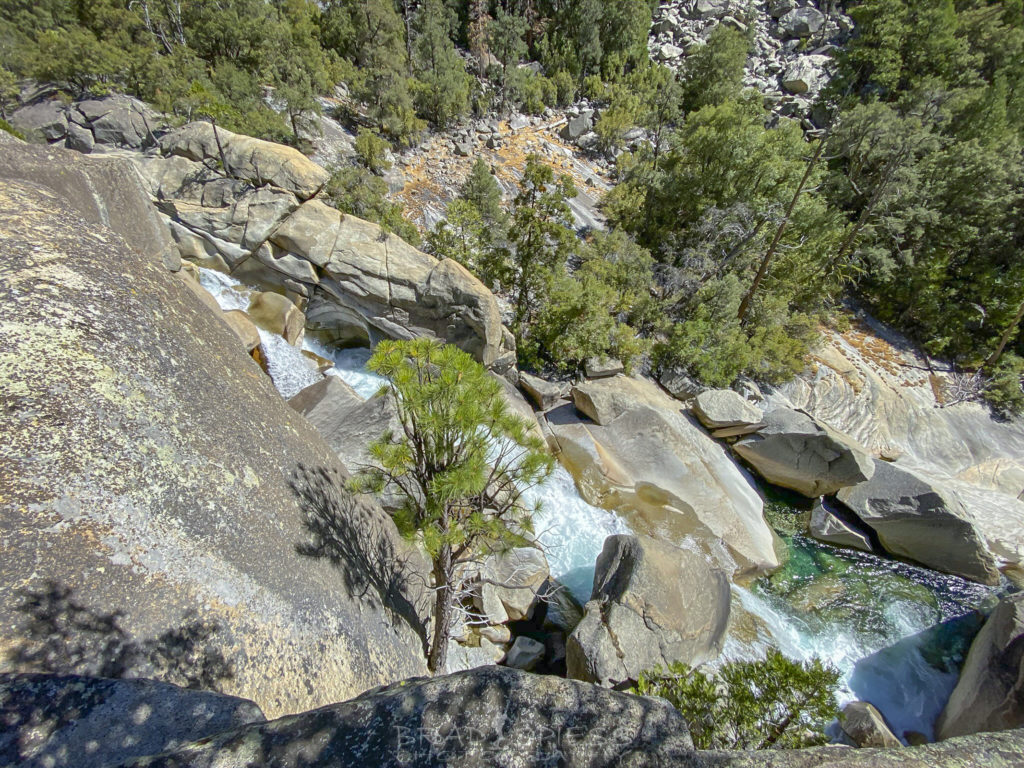
Looking down at Kings River from the trail on our way to Mist Falls and finally Upper Paradise Valley.
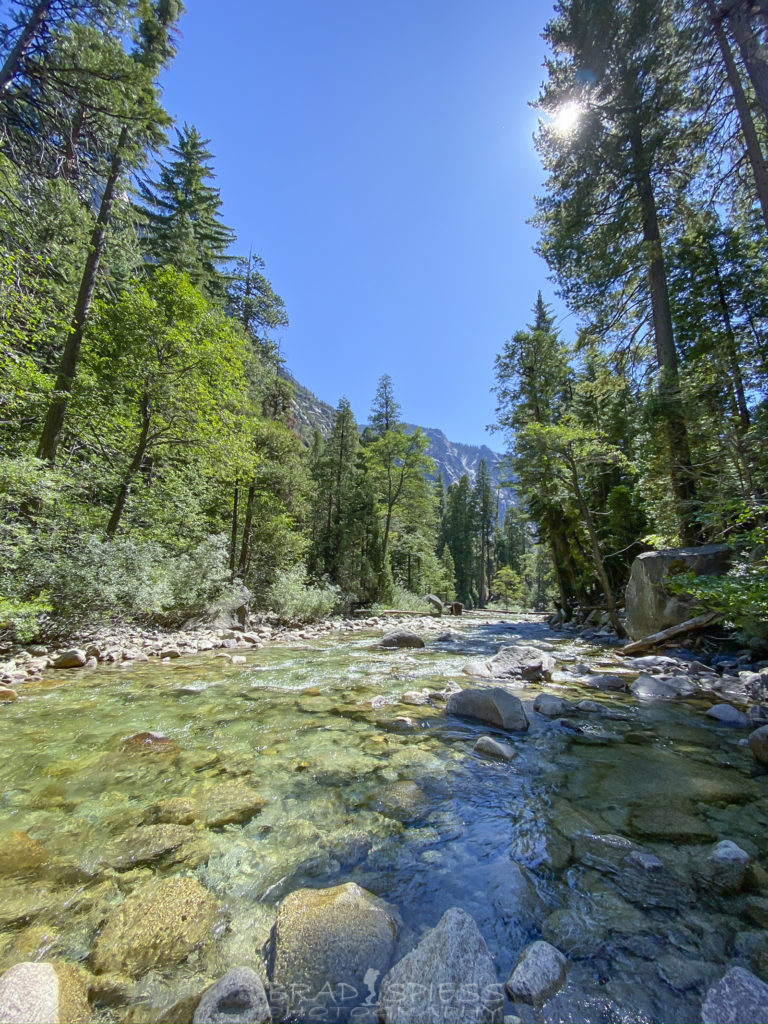
Checking out one of the more mellow areas of the Kings River on the Rae Lakes Loop
We eventully hit Mist Falls and sat down for a little lunch before moving on. Going so late in the season there is not as much water going over the falls but that was ok it gave us plenty of areas to sit and relax as we enjoyed the falls. I did wonder almost the whole hike what this area would look like in the spring since there was still so much water this late in the season, but buddy reminded me that last winter was one of the largest snow packs in California’s history measuring in at 202 percent of what was considered normal, maybe that explained all the water but I would ponder that spring time must be specatular in this canyon ( if you could get back here).
Mist Falls in Kings Canyon National Park
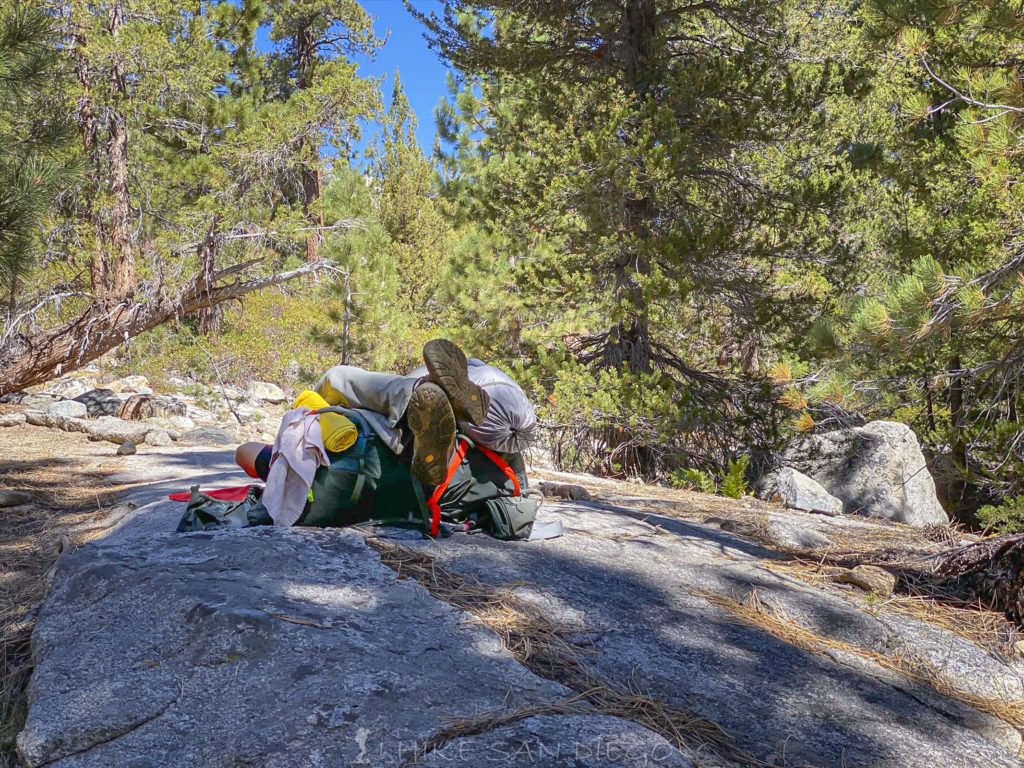
Eventually we had enough and got back on the trail, even though it is extremely releaxing to sit by the river we couldnt do that all day, we still had a ways to go. The trail seems to be a never ending trail of granite steps as you head out of the area and continue to make your way up towards Paradise Valley, with Lower Paradise Valley being another 1.8 miles. Lower Paradise Valley campsite is the first place you can start camping on this trail, but it would be to your advantage to push on to Upper Paradise Valley in order to make the next day a shorter hike. It was tempting to just stop at Lower Pardise or Middle Paradise Valley, but we solidered on until we reached Upper Paradise Valley. I don’t recall when we got into camp but if it seemed to follow the schedule we set for the rest of the trail where it seeemed like we would get into camp around 6pm, or we would set that as our time limit, falling short of our goals on some days but still making it to a camp. It seemed like 6pm was the magic number to give us enough time to set up camp, gather some water, and fix dinner before it started to get dark, at which point we would always crash right afterwords.
Taking a breather on the trail, gazing up at the trees and towering granite cliffs surrounding us.
Changing falls colors on the Rae Lakes Loop as we near Middle Paradise Valley
2nd Day of Hike going from Upper Paradise Valley to Dollar Lake
Day 2: Upper Paradise Valley to Dollar Lake. 9.7 Miles and evlevation gain of 3300 feet.
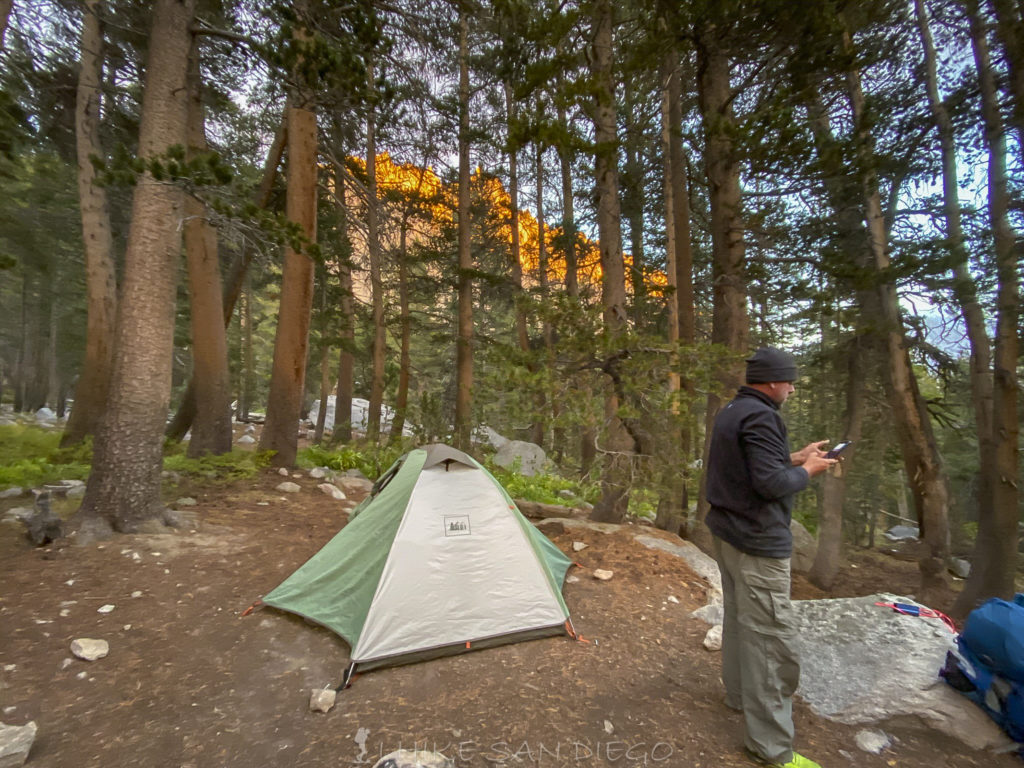
Sunrise always wakes me up, so it was that the soft hues of dawn woke me up around 6:30am, at which point we got up and started gettting ready for the day. It amazed me that almost every day we woke up around 6:30 and still did not get on the trail until close to 9am. It wasnt like we were screwing around, but getting up, taking care of your toilet needs, making breakfast, breaking down camp, arranging your backpack and getting your food ready for the day and maybe one more time taking care of toilet needs before getting on the trail seemed to be about the same length of time each day.
Early morning at camp in Upper Paradise Valley

Another Perspective seeing the sun just starting to kiss the tops of the surrounding mountains during sunrise.
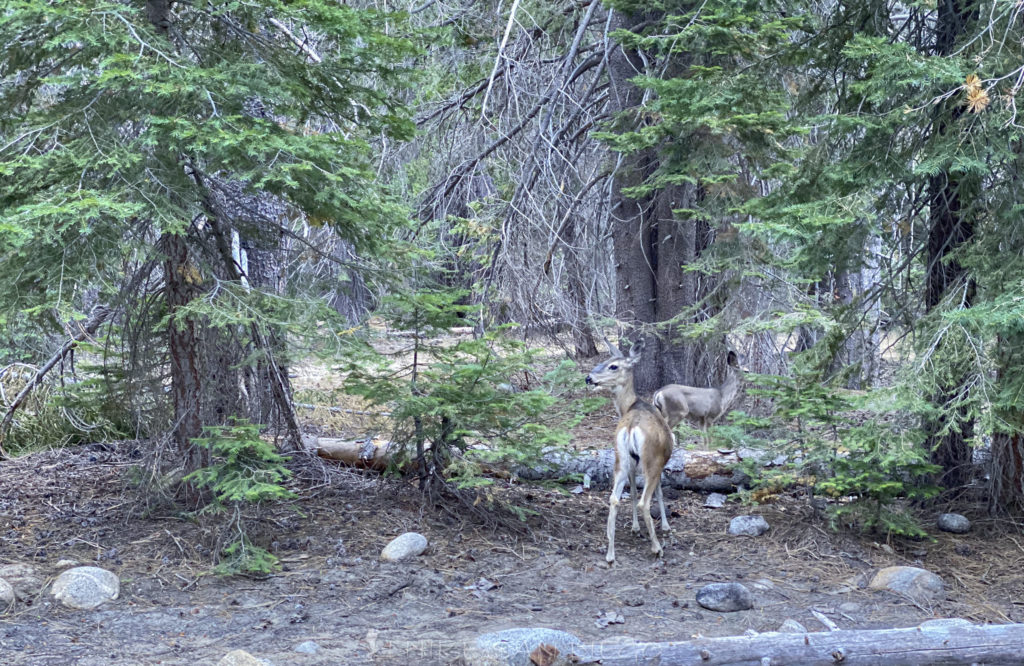
Family of deer coming through camp as we eat breakfast
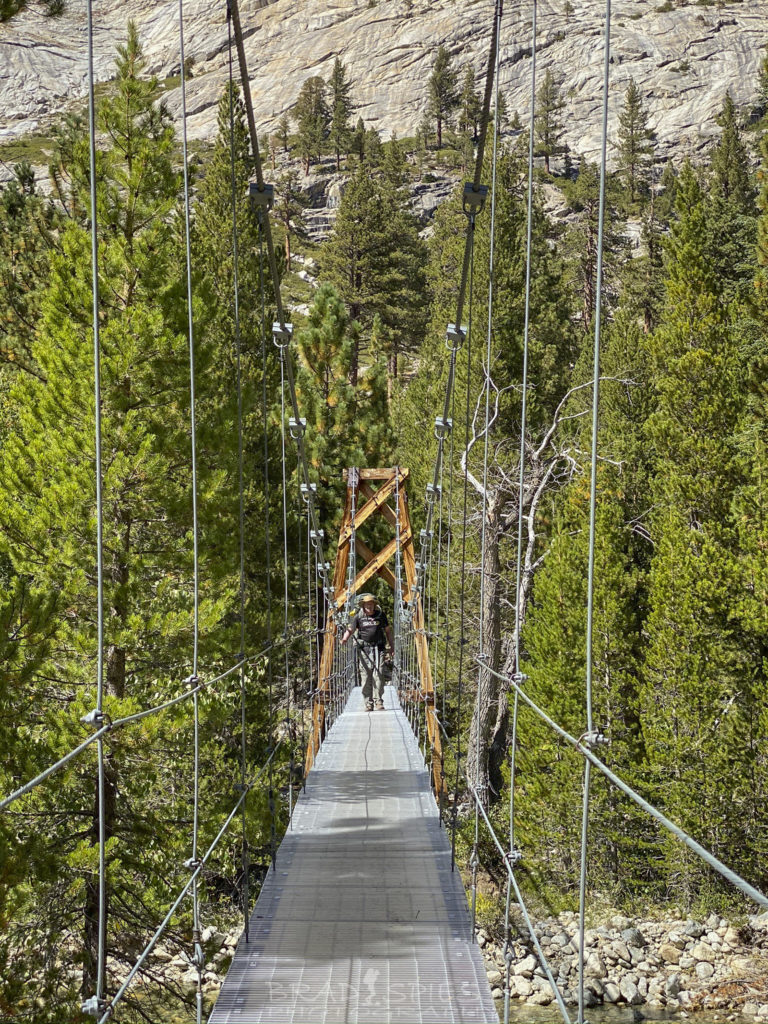
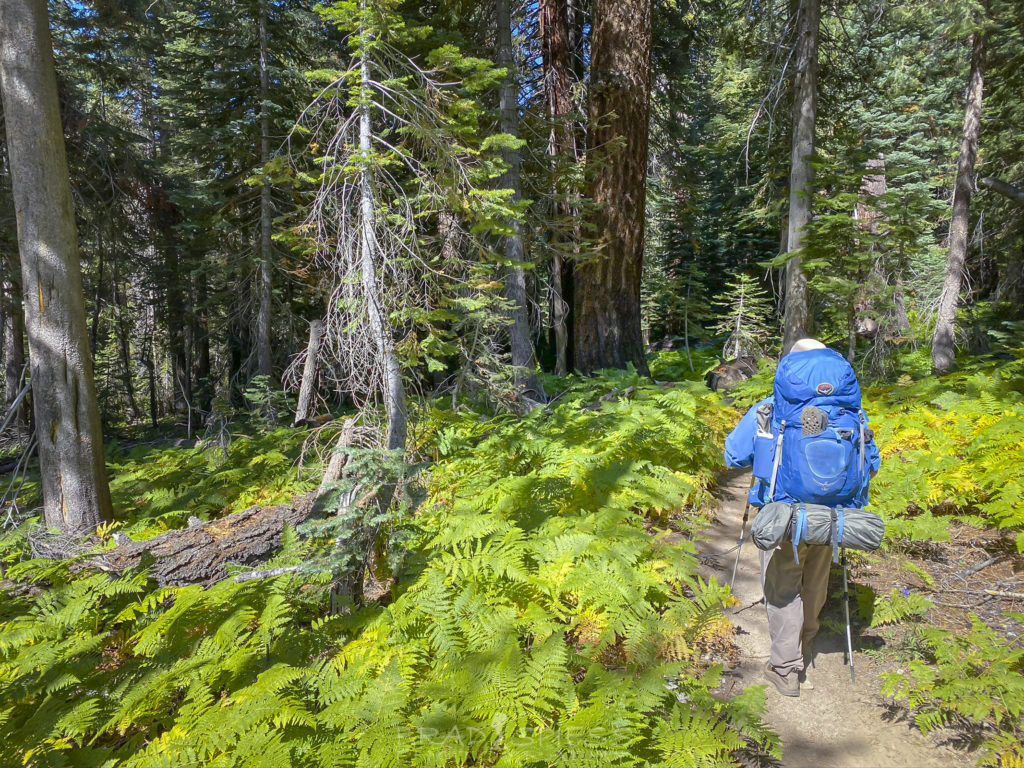
The bridge at Upper Paradise Valley was washed out in 2017 which is why its usually a good idea to bring some water shoes in order to ford the stream, but at this time of year the water was not to high and we found a tree that crossed the stream south of the bridge as we started the trail, in fact I never needed the water shoes I brought along and just ended up using them as camp shoes the whole time. Gaining 3300 feet of elevation in 9.7 miles is quite a slog and the first part of the trail went quickly, gaining only about 1600 over the 5.7 mile stretch between Upper Paradise Valley and the Woods Creek Crossing. It started off in a damp firn covered forest but quicklky started to rise as it followed the north bank of Woods Creek.
Starting day 2 on the damp fern covered forest as we left Upper Paradise Valley

Morning light illuminating the surrounding cliffs as we left Upper Paradise Valley
Looking back towards Upper Paradise Valley as we made our way towards Woods Creek Crossing

Looking up the valley towards Woods Creek Crossing
Eventually around lunch time we made it Woods Creek Crossing. I was a little ahead of my buddy, so that by the time I unloaded my backpack and gathered some water and made it back as he was just making it there and colapsing on rock for a break. I have to reiterate how much I liked having that gravity system with me on the hike. This stop was a perfect opportunity to fill the system up and hang it from a tree, filling both our water bladders and not having to waste time pumping. We relaxed on some flat rocks for about 20-30 minutes before getting back on the trail. This was a popular spot for people to relax on the trail and several people were taking advantage of the pool of water under the bridge to swim and cool off. Now that we were getting up higher in elevation the next 4 miles and 1700 feet of elevation seemed a little harder not to mention I discovered the importance of putting your backpack on in a certain order as the last mile or so sucked as my sternum strap was all the way up against my neck. I figured out after that that I needed to start with the waist belt first, then the shoulder strap adjustments and finally the upper pack adjustments. I started loosening up all my adjustments when I took my pack off so I could start off fresh every time and that helped the pack fit perfectly every time. We had orgionlly planned on making it to Rae Lakes for the night which would have added another couple of miles onto the hike for the day but Dollar Lake lined up with our 6pm stop time and honestly we were exhausted by that point and just looking for and excuse to stop. There are not to many camp sites around the lake, with most of them positioned on the northern edge of the lake and one more big spot on western side as the trail leaves the lake.
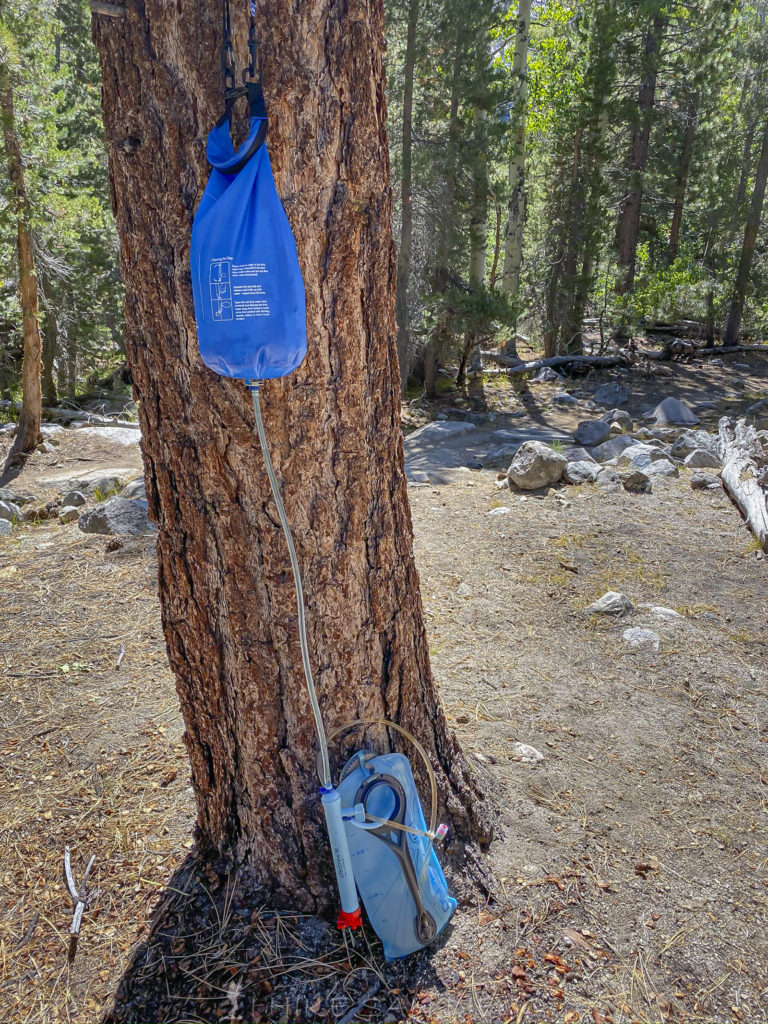
Using the gravity system to fill up our water bladders as we relaxed
My buddy taking a siesta on the flat rocks near Woods Creek Crossing after our 5.7 mile slog
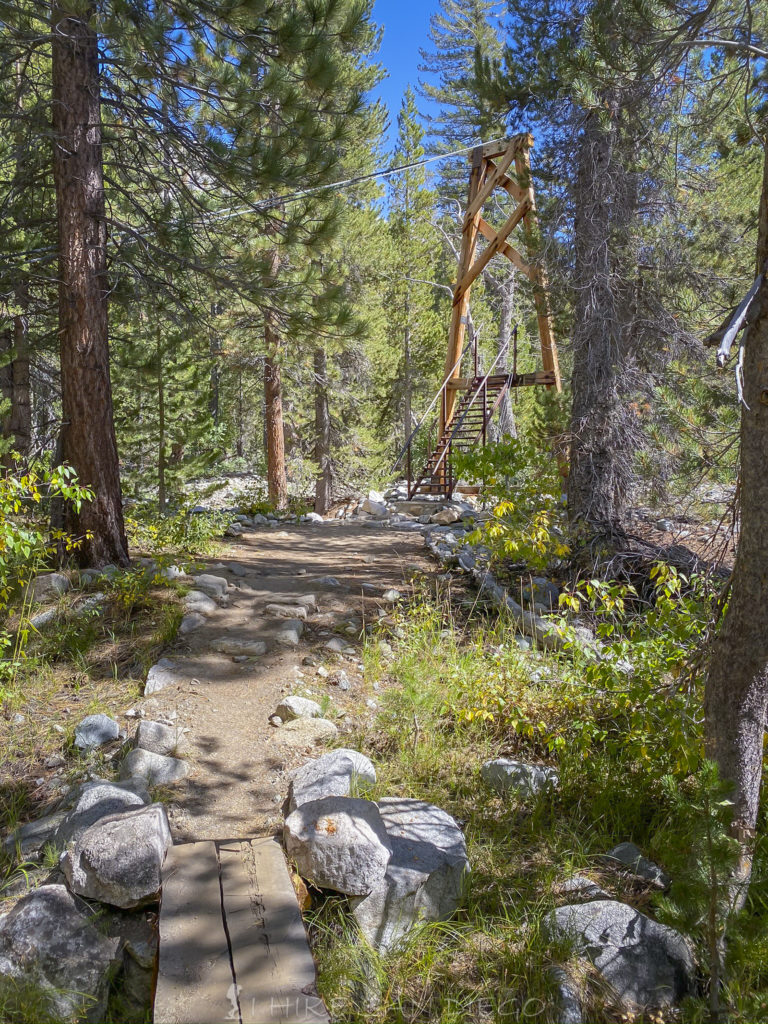
The trail to the bridge for Woods Creek Crossing
Crossing the bridge at Woods Creek Crossing on the Rae Lakes Loop
I brought two cameras with me on this adventure. I brought my Sony A6500 with a Sigma 16mm F1.4 lens for capturing the Milky Way and a 55-210 zoom lens for hopefully capturing a bear, I have yet to see a bear in the wild. The 2nd camera I brought was my new Iphone 11 Pro I picked up the day before we left. I was looking forward to testing it on the trail and used it for all the pictures in this post ( except the Milky Way ). Its funny the way life works. As I started this site years ago I was using my iphone as one of my camera but wanted better images which led me down the rabbit hole of photography when I picked up a Sony A7ii camera. As I’ve improved my photography I also picked up a Sony A6500 for a smaller set up for hiking, and while this is a much smaller and lighter set up I really enjoyed having the range of the Iphone 11 Pro, going from ultra wide at the equivelent of 13mm to a more zoomed in range at the equivalent of 52mm. The ultra wide isnt the sharpest in the corners and not as good in low light as the middle lens at the equivalent of 26mm but is fun for pulling in the surrounding landscape.
The Ultra wide 13 mm equivalent on the Iphone 11 Pro
The middle lens or 26 mm equivalent on the Iphone 11 Pro
The zoom lens or 52 mm equivalent on the Iphone 11 Pro
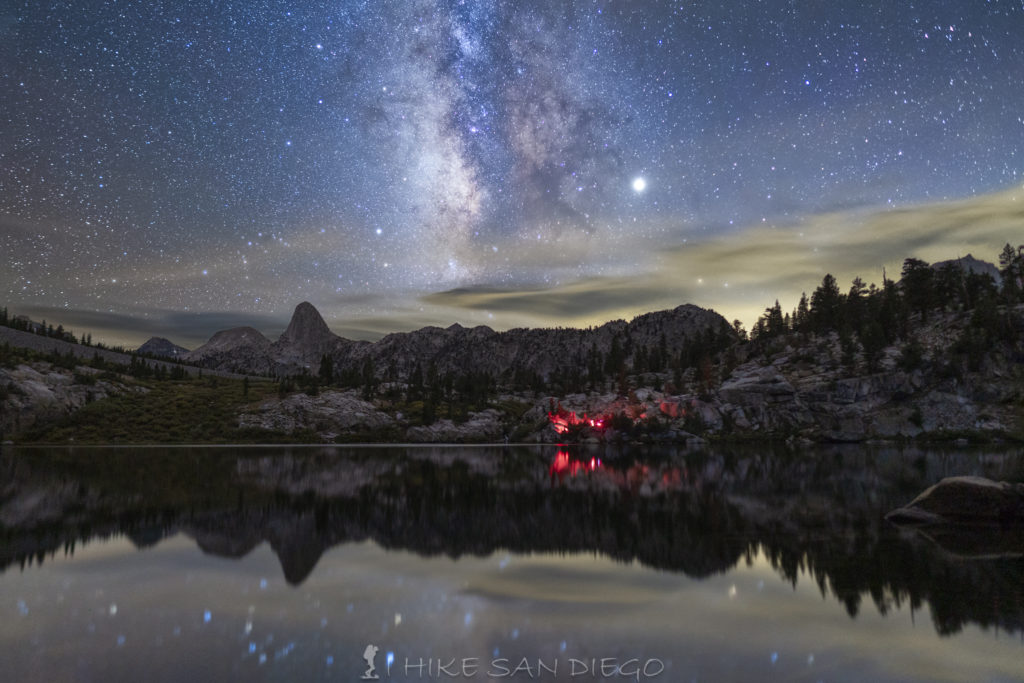
The Milky Way rising over Dollar Lake captured using the Sony A6500 and Sigma 16 mm F1.4
Day 3: Hiking from Dollar Lake to Vidette Meadow
Day 3: Dollar Lake to Vidette Meadows ( although we stopped about 1/2 mile from it ) 8.5 miles, Close to 1800 feet of elevation gain and 2000 feet of elevation loss.
The night before I was so tired that all I did was stare up at the beautiful sunset as I was eating my dinner, this morning I did not waste the opportunity to grab some pics of the sunrise at the lake before making breakfast. We broke down camp and got ready, knowing that today was going to be quite a hard slog going up Glen Pass close to 12,000 feet before coming down towards Junction Meadows ( which was our orginal destination and would have added at least another hour to the hike ).

Using the ultra wide lens for a sunrise photo at Dollar Lake.
Using the zoom lens for a sunrise photo at Dollar Lake
Starting the hike as we head around Dollar Lake
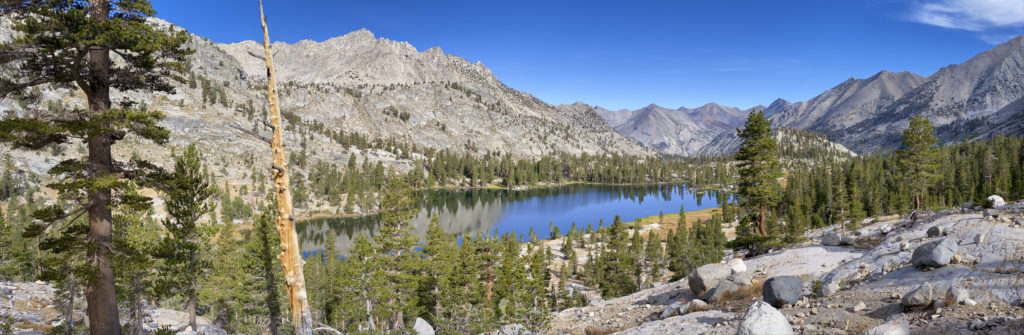
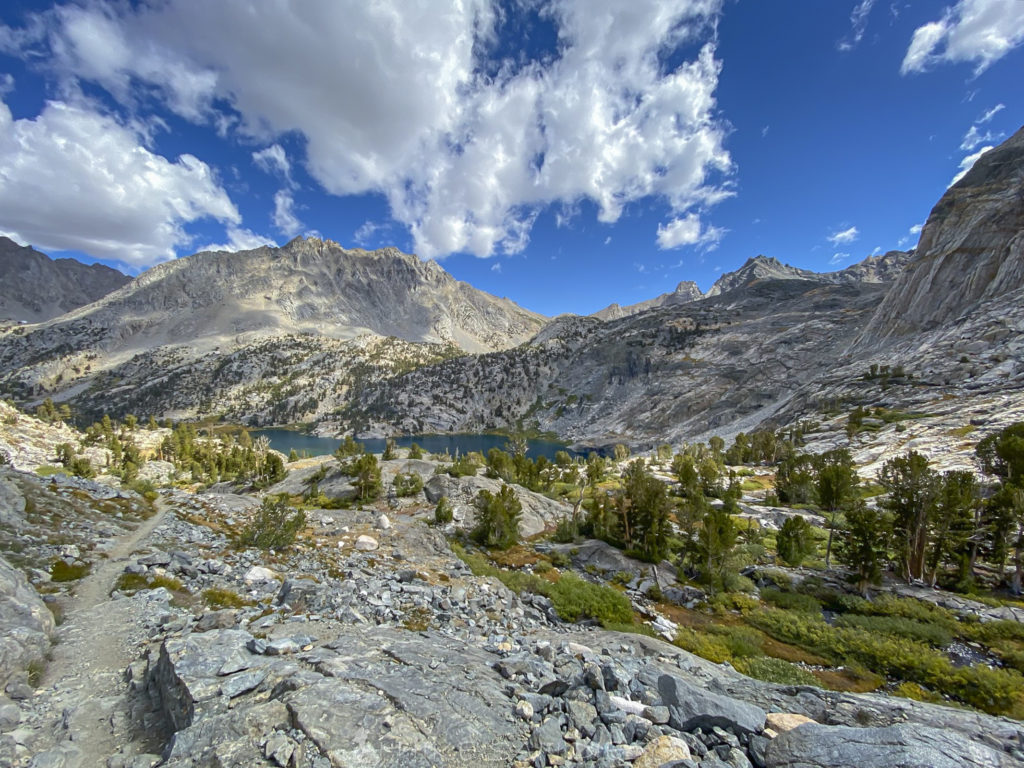
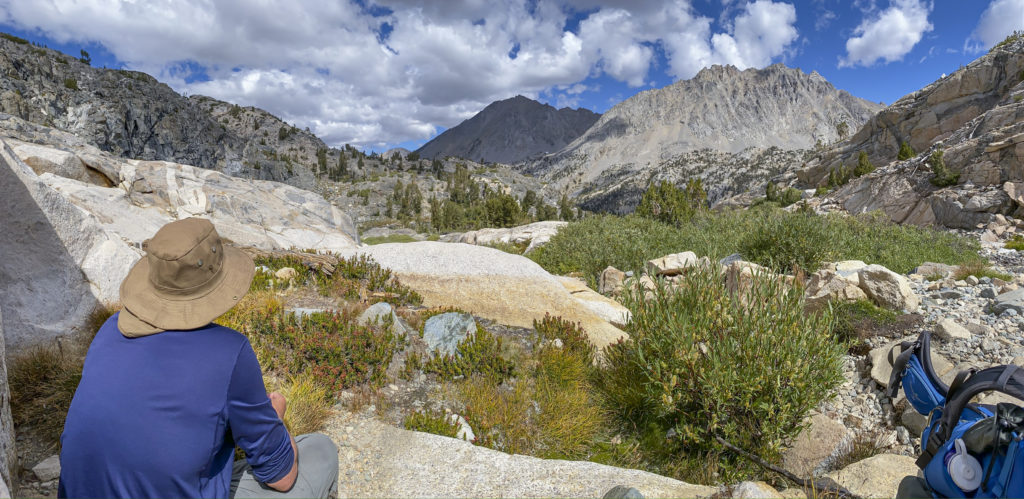
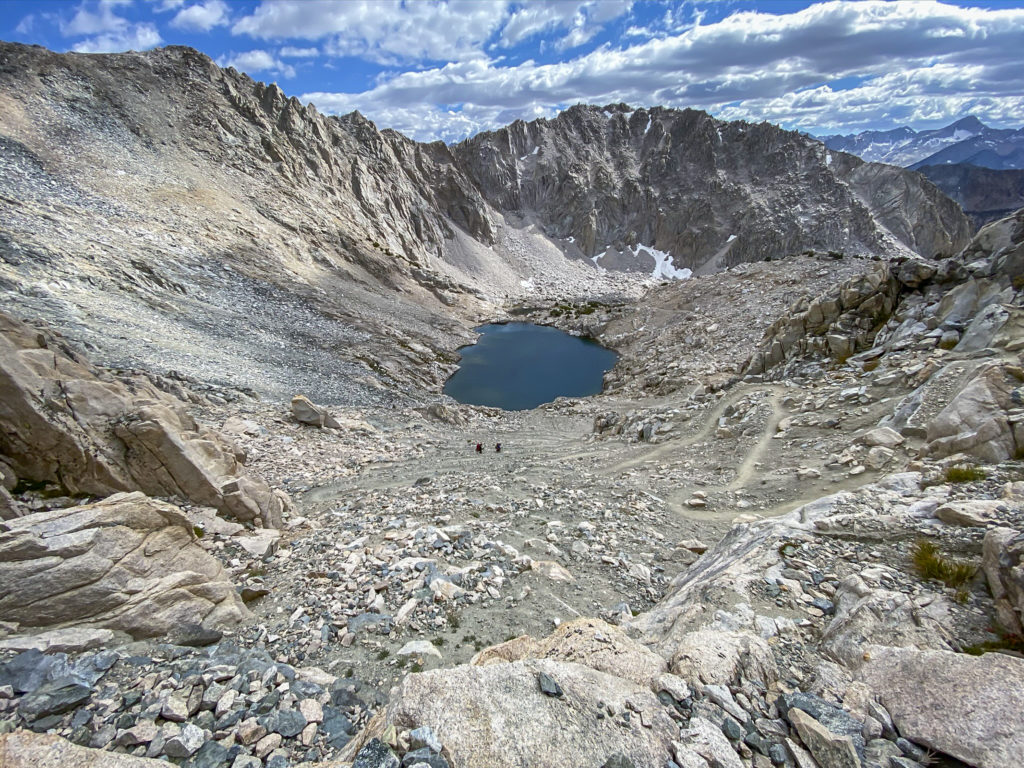
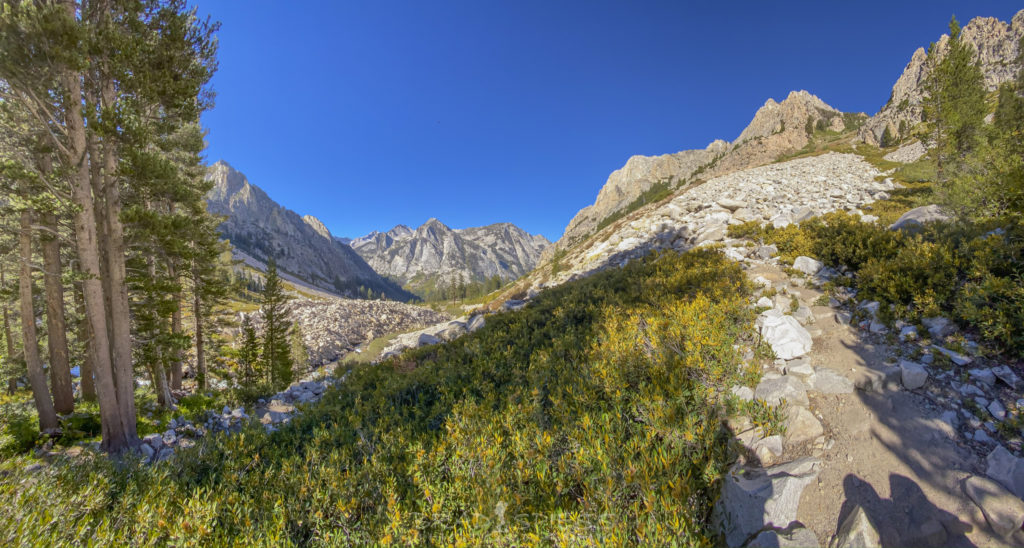
In a very short time after starting the hike you will be crossing a stream which at this time of year was easy to cross and in about 1/2 mile after starting the hike you will start passing by Arrowhead Lake. After about 1.5 miles you will start passing Lower Rae Lake and then Middle Rae Lake 0.5 miles latter. Seeing all the spots for camping around this area and the beauty of the area made me feel like I would love an extra day in this spot. There is a ranger station on the left side of the trail as you pass by Middle Rae Lakes but I its hidden well enough that I never saw it and only really noticed it in Google Earth after really looking for it. I always find myself expoloring more in the morning when I have more energy and I don’t feel the need to get to a camp as being imperative, Rae Lakes was no acception but we didnt screw around to much. We took our big break at 3 miles from Dollar Lake, just before we connected up with the junction to head up Glen Pass making sure we had the energy for the slog ahead of us.
Stream and meadow above Dollar Lake
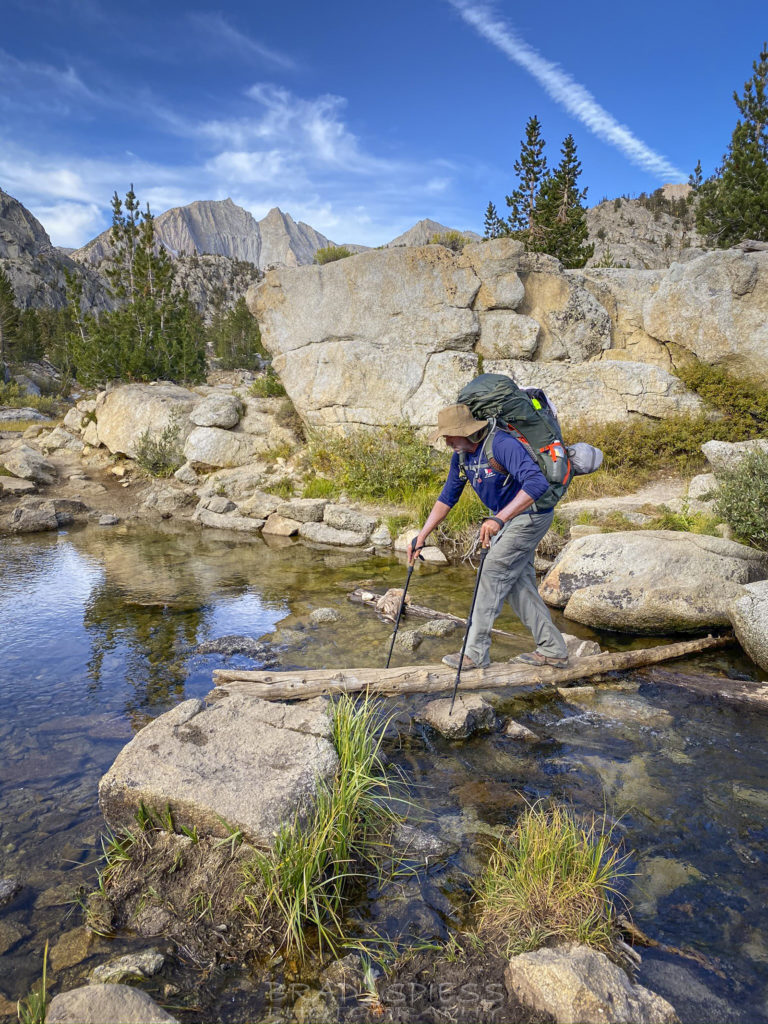
Taking advantage of the late season for an easy stream crossing
Looking down at Arrowhead Lake on the Rae Lakes Loop
Our first glimpse of Lower Rae Lakes
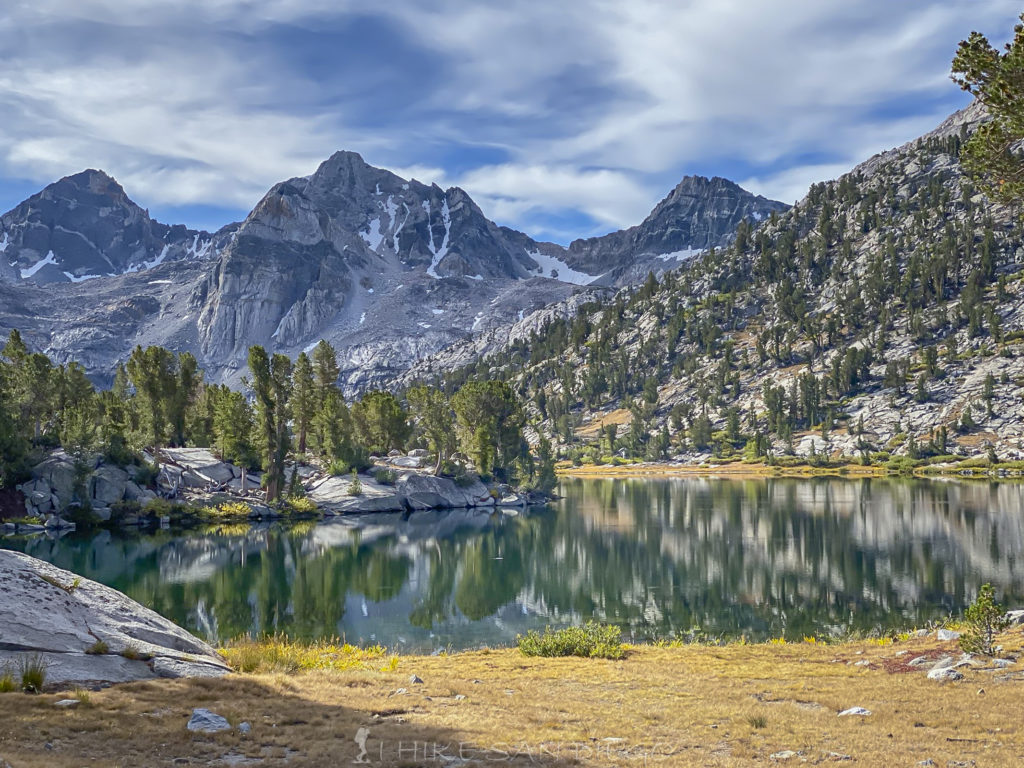
Another View of Lower Rae Lakes
Middle Rae Lakes
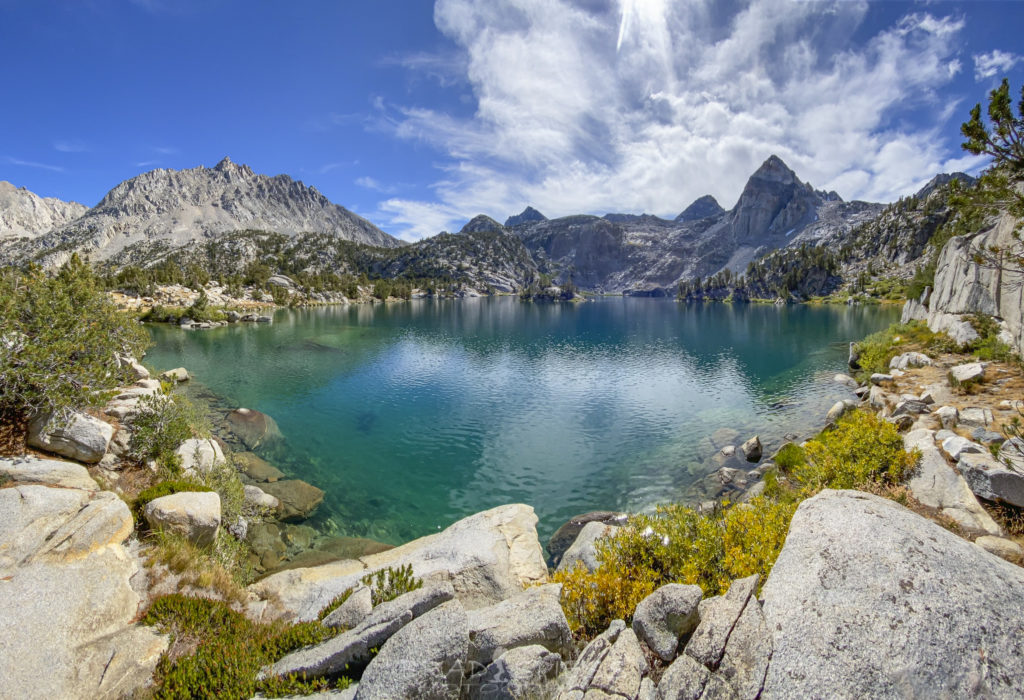
Upper Rae Lakes
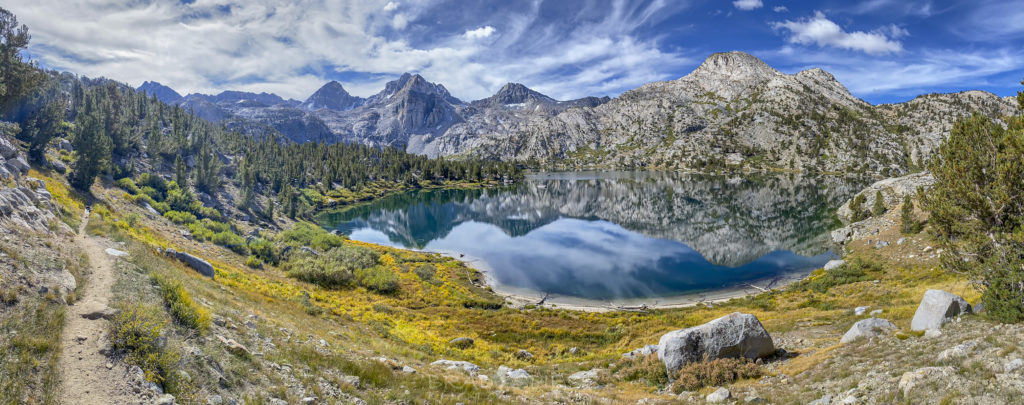
We took 20 minutes or so to rest and relax at Upper Rae Lakes and talked to some hikers that were on their 16th day of the John Muir Trail ( JMT), the looked tired and ready for the end, we ran into them a couple more times on the trail. As you cross the last of the land bridge between Upper and Middle Rae Lakes you will take a left on the trail at the junction and head south along the trail, skirting the western side of Upper Rae Lakes and starting to climb, the trail that goes to the right heads up to the 60 lakes region above Rae Lakes. You start to climb fast on this part of the trail and you will ascend about 900 feet of elevation in the next 1.5 miles as you climb the rocky terrain and leave the tree line far below you. This is the point were you should refill your water as you will not see anything close to the trail for about another 5 miles.
The trail junction on the other side of the Upper Rae Lakes Land Bridge
Pausing for a break on the switch backs as we head up towards Glenn Pass out of Upper Rae Lakes
Looking down at Upper Rae Lakes
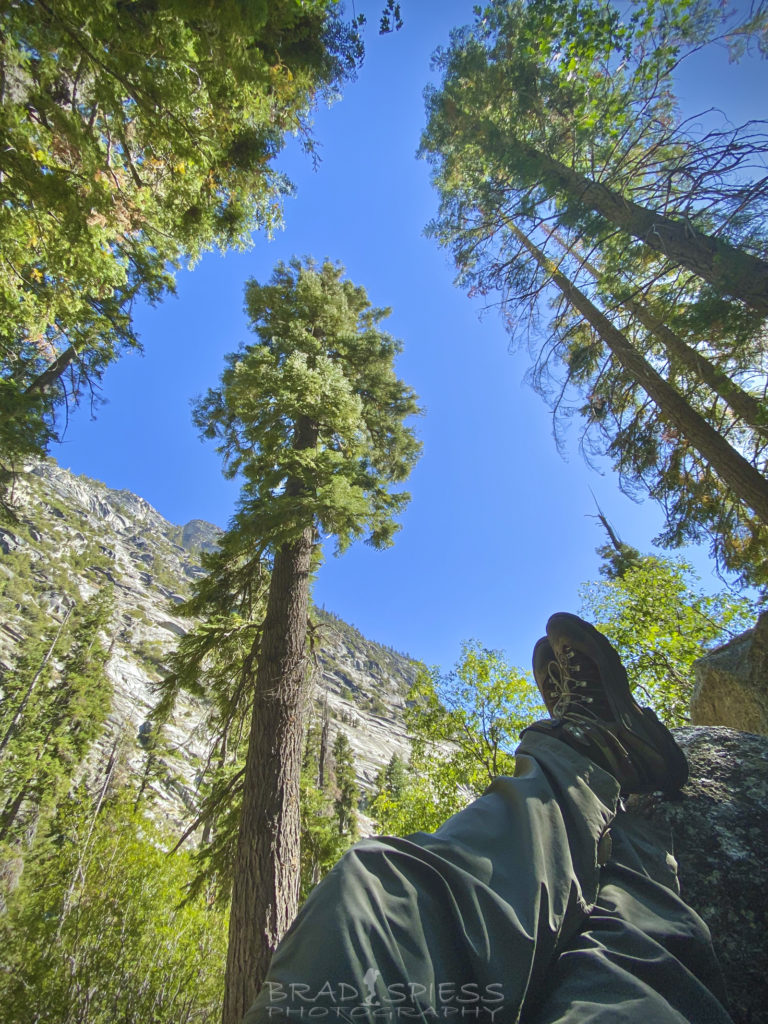
Taking a break at 11,000 feet about a mile up towards Glenn Pass and about the last point to fill up on water for the next 5 miles
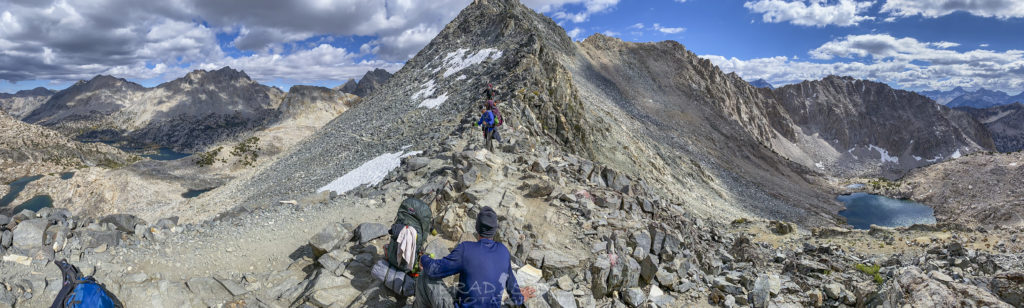
After our little break at the 1/2 way point on the way up Glen Pass we shouldered our packs back on and started back up ( not realizing that we should have filled up our water at this spot ). What I have come to realize after looking at my GPS tracks recorded on my Garmin Fenix 5x is that somtimes when I paused recording our route and then restarted it ( so I could keep an accurate record without any extra movement adding to the milage and saving the battery ) it would bounce around the area until it found a signal and somtimes add more mileage recorded onto the route. So as we made our way up the mountain we saw what to me looked like the top of the ridge line and the milage on my watch added up to the 2 miles I expected to hike to the top, we crested the ridge line and we came back down a little in elevation and as I was looking for where the trail would take us my buddy took this picture of me in front of this mountain joking “look at that beast”, not knowing that was the beast we were going to have to climb to get to the top of the pass. This realization came as we keep following the trail and found that it started climbing this mountain, ugh !!! We climbed another 600 feet of elevation in the next 1/2 mile to reach to the top of Glen Pass. At this point we took another 20 min break to catch our breath, we took in the scenery and watched as another couple of hikers made their way up the pass, one couple turned out to be the two hikers we ran into ealier who where hiking the JMT and on their way to Kearsarge Pass.
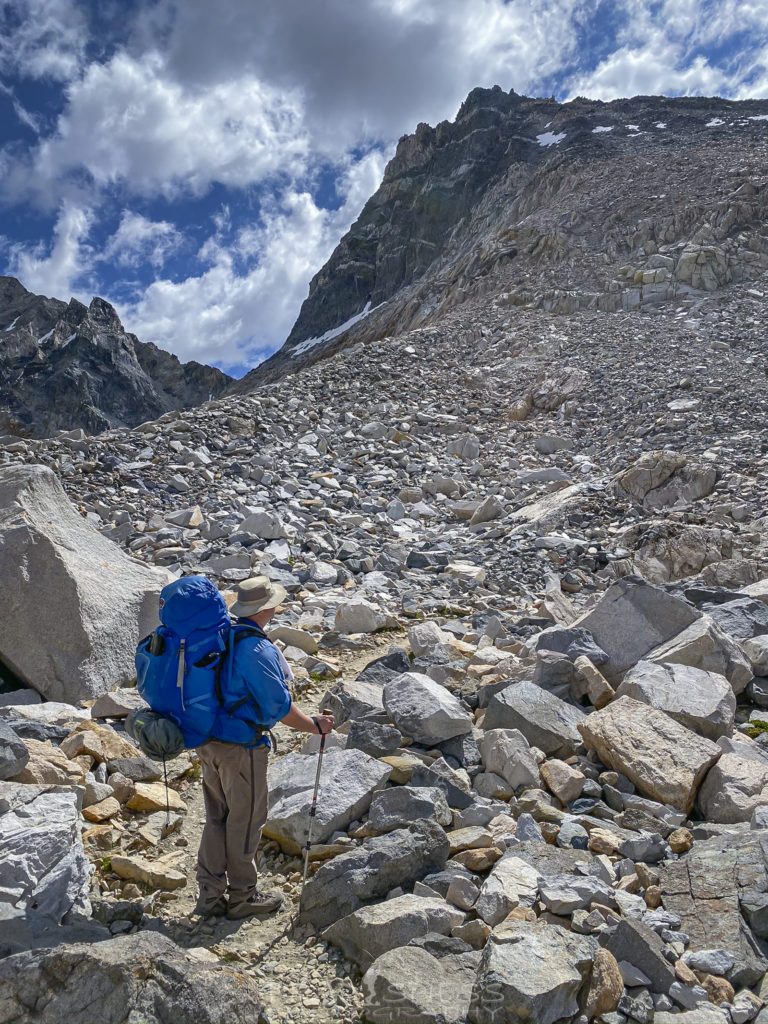
“Look at that beast”, my buddy joked not realizing that we were looking at the last 1/2 mile of hiking we had in front of us to get to the top of Glen Pass
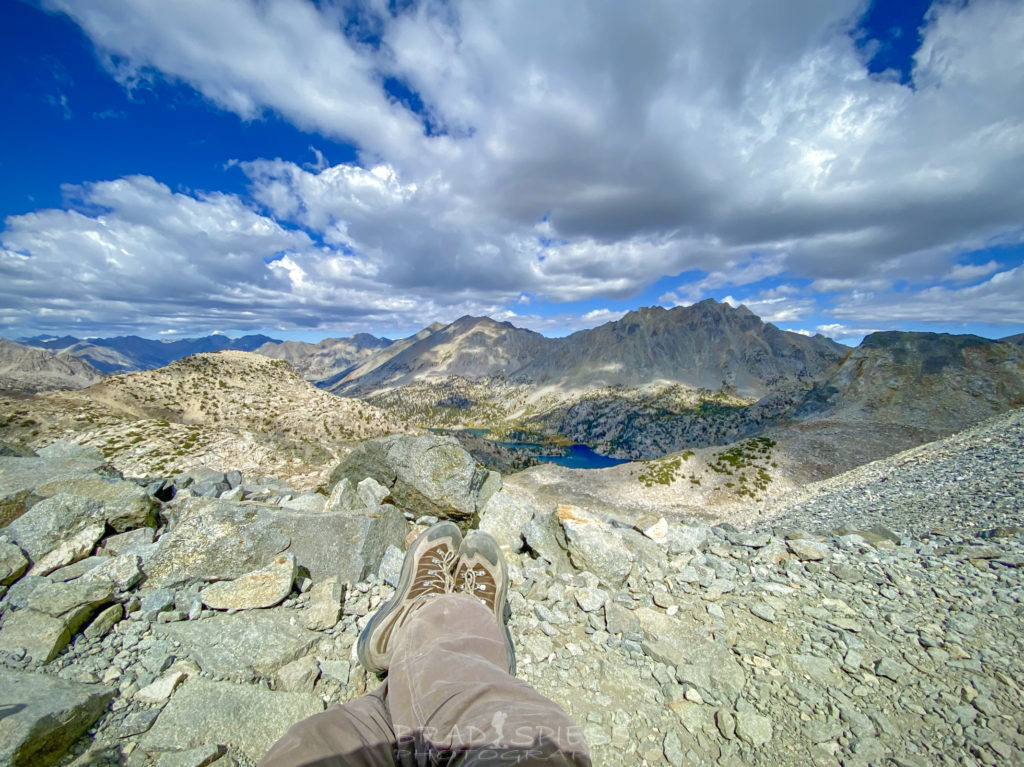
Taking advantage of a small area of space to lay across the trail and relax at the top of Glen Pass, checking out Rae Lakes far below.
A Pano of the top of Glen Pass with Rae Lake to the left and the way down on the right.
Watching the JMT couple we keep running into make their way down from Glen Pass
After relaxing at the top of Glen Pass and having a snack we got back onto the trail and made our way down from the pass, again not realizing that I should have taken advantage of the water source in front of us on the way down. Its funny that at this point we started running into a number of people making their way counterclockwise on the Rae Lakes Loop and making their way up Glen Pass. My buddy and I keep commenting to each other that we were so glad we did not come up this way and felt sorry for the people who were coming up this way, from the top of Glen Pass its basically downhill all the way until you hit Junction Meadows. About 1/2 way down to Vidette Meadows I realized I ran out of water ( I hate being out of water on the trail ), luckily it didnt take to long to get to a water source, but as we came across the junction to Kearsarge Pass we ran into the couple who were doing the JMT who were in a mild panic because they thought they would come across an area for water around that spot ( like we did ) after finding none, they where thinking about backtracking to Charlette Lake to camp for the night and get a reliable water source. We continued down and finally ran into a fresh water source below Bull Frog Lake, and after looking at my map I wish I had realized that the same JMT couple we ran into could have continued down with us for water and then used the other trail at Bull Frog Lake to connect up with Kearsage Pass. After filling up my bottle with some water near Bull Frog Lake and quenching my thirst we continued our slog down towards Vidette Meadows, at this point we had decided that was what we were shooting for rather then Junction Meadows. As we continued down my mind keep mulling over the fact that we didnt know what the water situation would be like at Vidette Meadows or what the camping situation would be like. As we got closer I started to notice some scattered camp sites, the first one my buddy dismissed when I brought it to his attention, but the second one which I noticed shortly after crossing a stream of water looked promissing and we decided to set up camp there, about 0.6 miles from Vidette Meadows. We were pretty tired and just sat there with our backs up against some rocks and the wieght of our packs off of our backs taking in what a great site we found for a little while before getting our butts in gear and setting up camp. It was the perfect camp, with enough space between tent sites that we didnt feel like we were right on top of each other, we were just below the 10,000 foot limit so their was a fire ring built up against a large boulder that looked like it had plenty of use. There where plenty of rock ledges for us to use as seats and ledges for our stuff and best of all their was a bubbling brook 20 feet away from easy access to water. We couldnt ask for a better site, we were kind of sorry to leave it the next day.
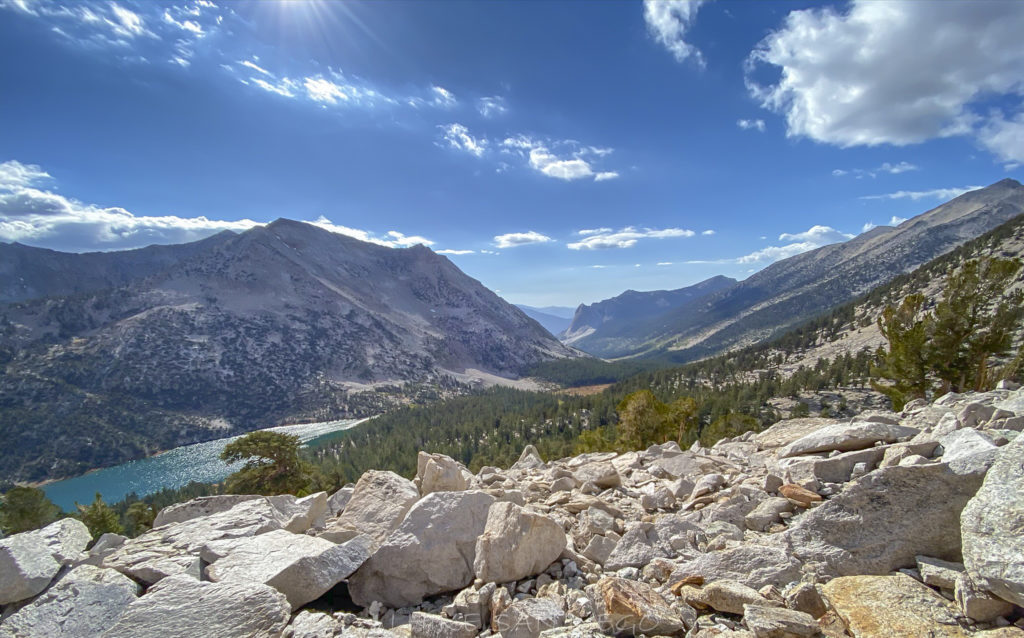
Looking down at Charlotte Lake from the trail

The sign at the Kearsarge Pass junction with the trail
Looking down into the valley as we made our way down to Vidette Meadows
Sunset lighting up the mountain tops behind our camping spot
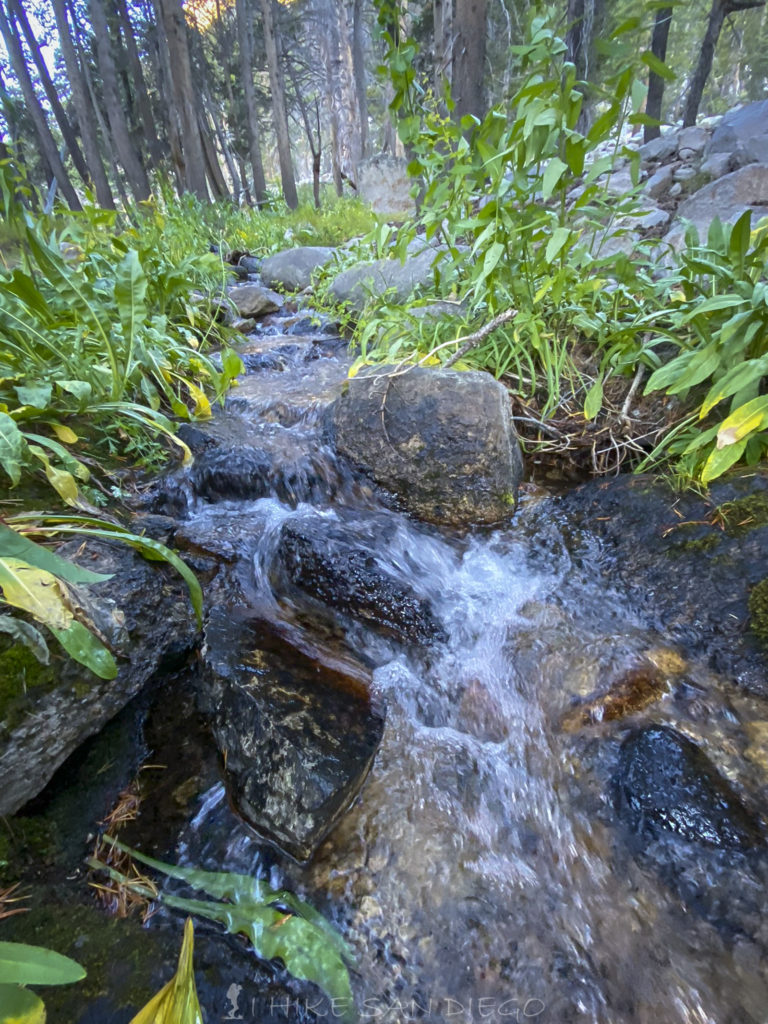
The babbling broke right next to our campsite
Day 4 Hiking from Vidette Meadow to Roads End
Day 4 Vidette Meadows ( 0.6 miles from it ) to Roads End. 13 Miles (13.6 from our campsite ) Close to 5000 feet of elevation loss.
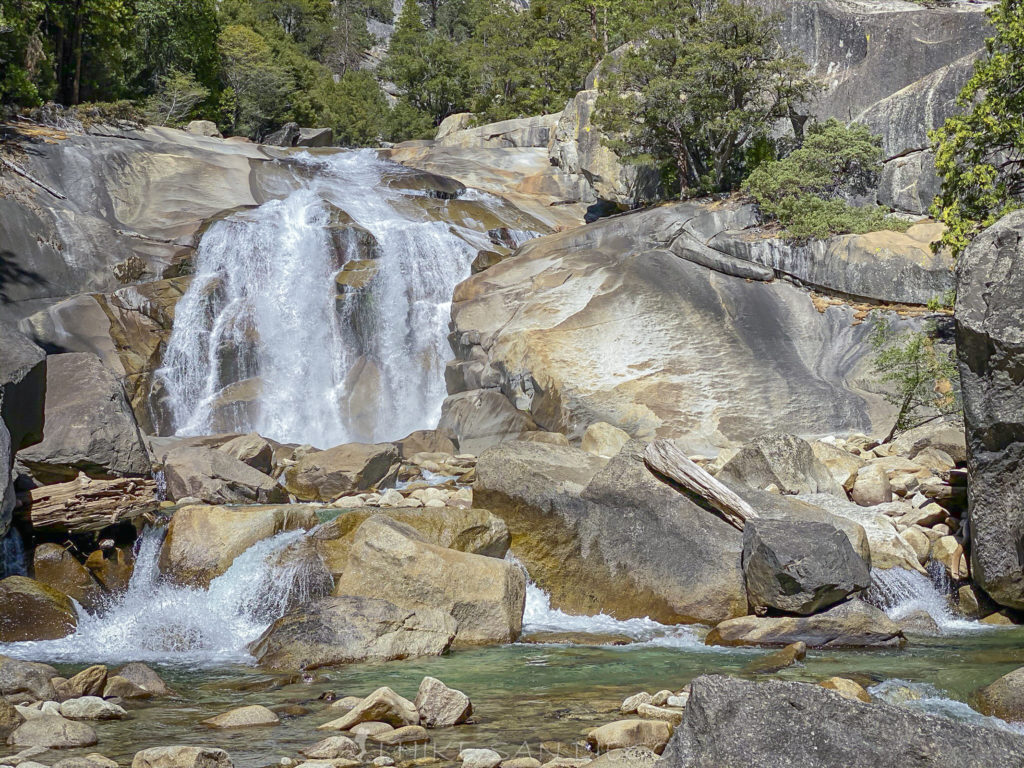
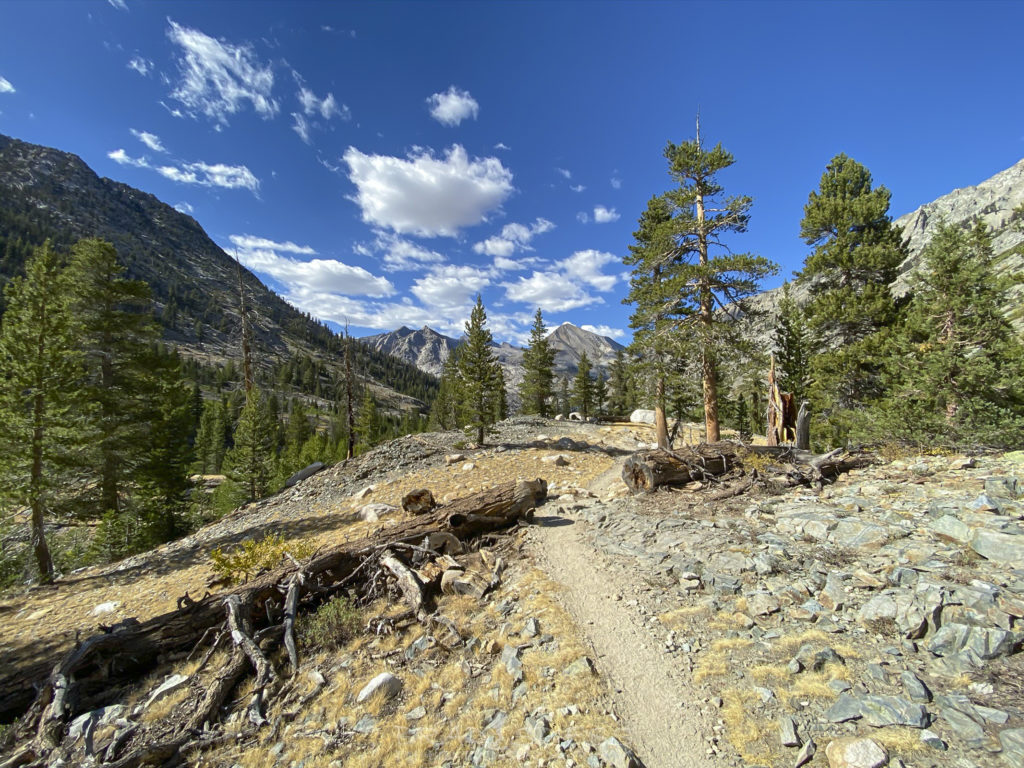
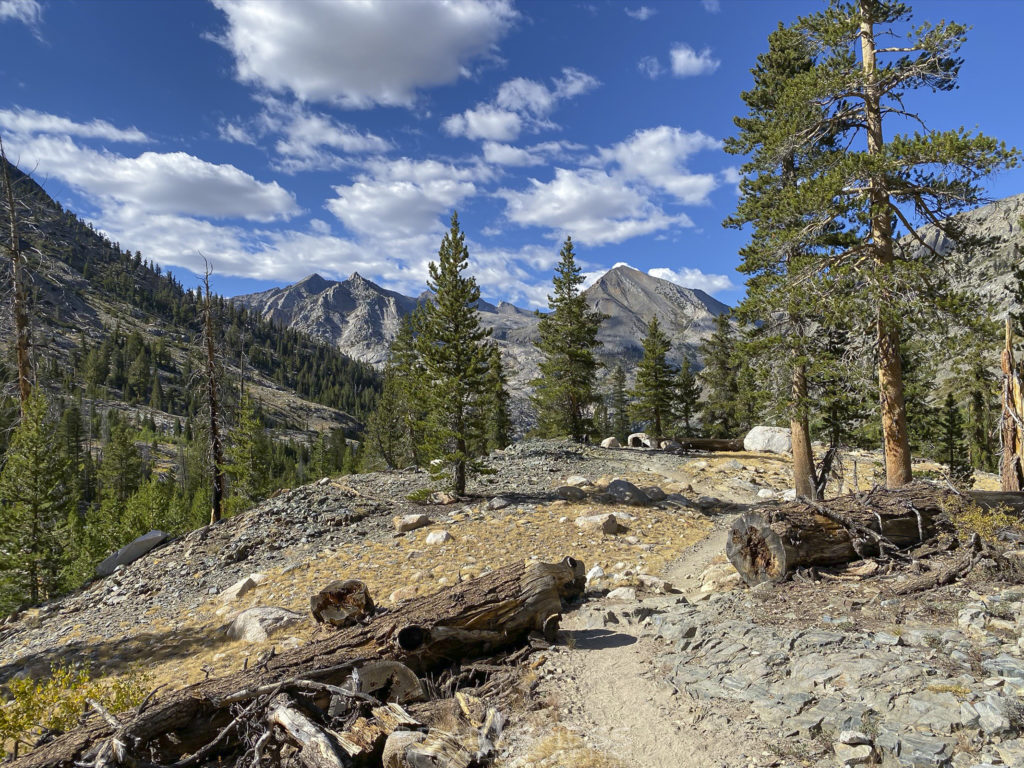
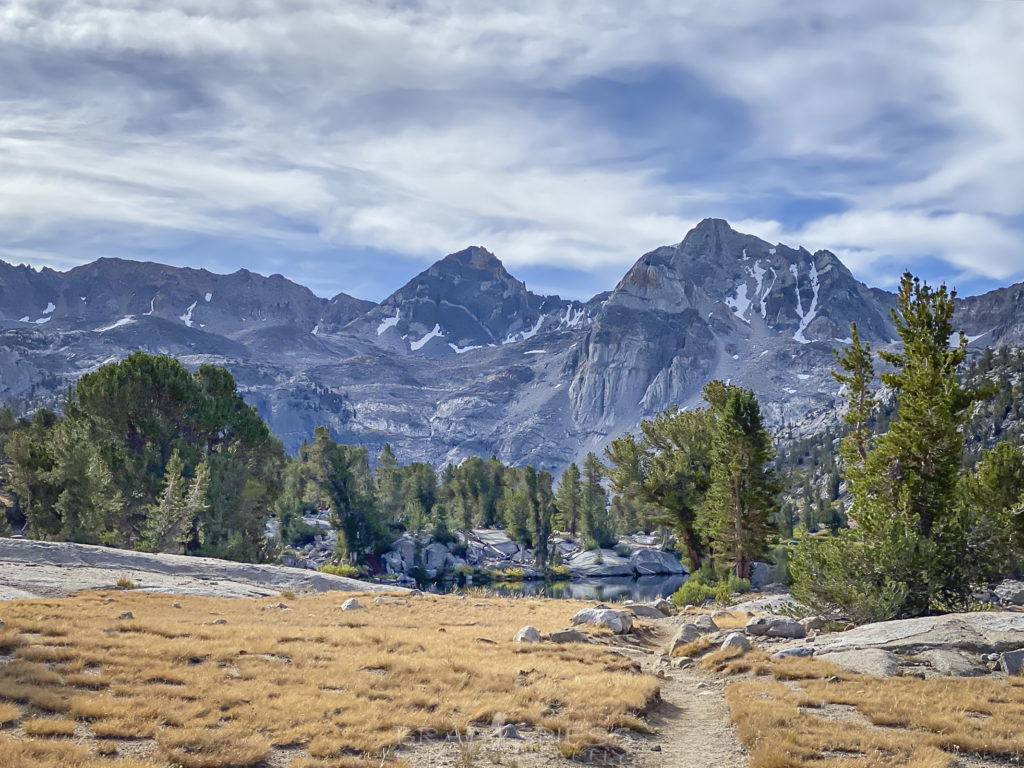
The next morning we took our time getting ready, we knew it was all down hill from here but it was still going to be a long day with over 13 miles of trail in front us. Within a short distance we reached Vidette Meadows and the sign there comfirmed our next 13 miles. We didnt spend to much time around the area but it looked like there were plenty of campsites around there and a good source of water not to far behind the campsites. The sign at Junction Meadows is a little confusing as it lists the distance to Roads End as 12 miles but the distance between Vidette Meadows and Junction Meadows is listed as 2.5 miles with Roads End listed as Cedar Grove back at Vidette Meadows at 13 miles away, so…a little disconnect with the signs. I loved this section of the trail, it seemed like we keep passing waterfall after waterfall on the way down the trail. It made me think about coming back up again to just hike this section of the trail and photograh the waterfalls.
Getting back on the trail as we make our way down to Vidette Meadows
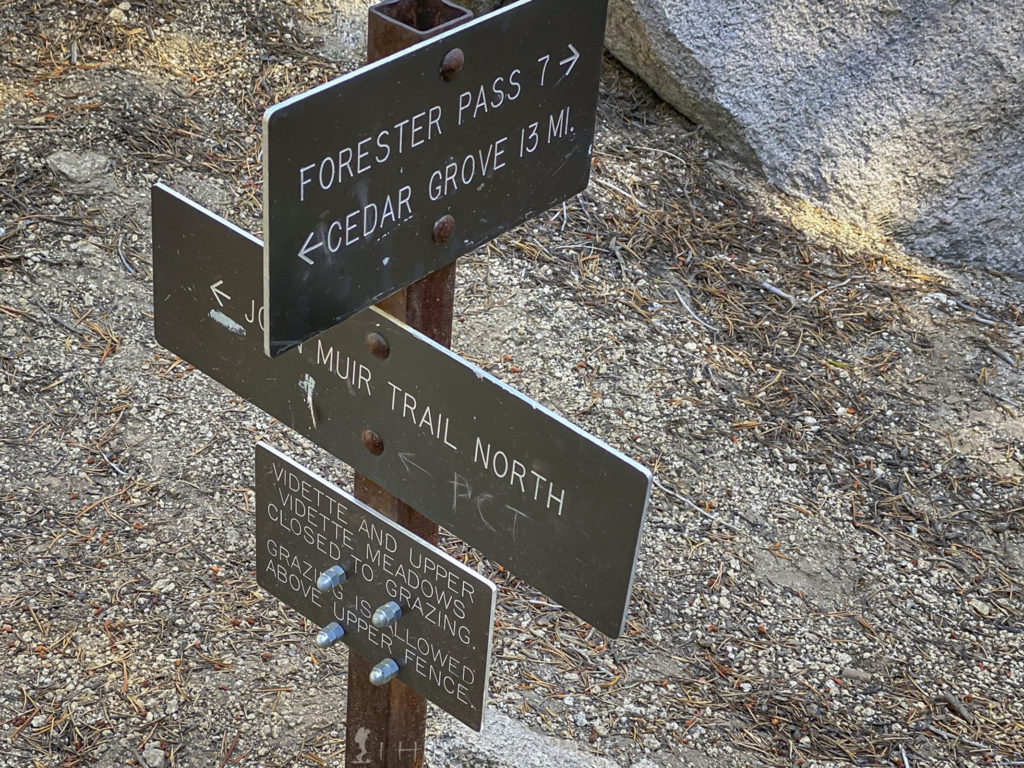
The trail sign at Vidette Meadows
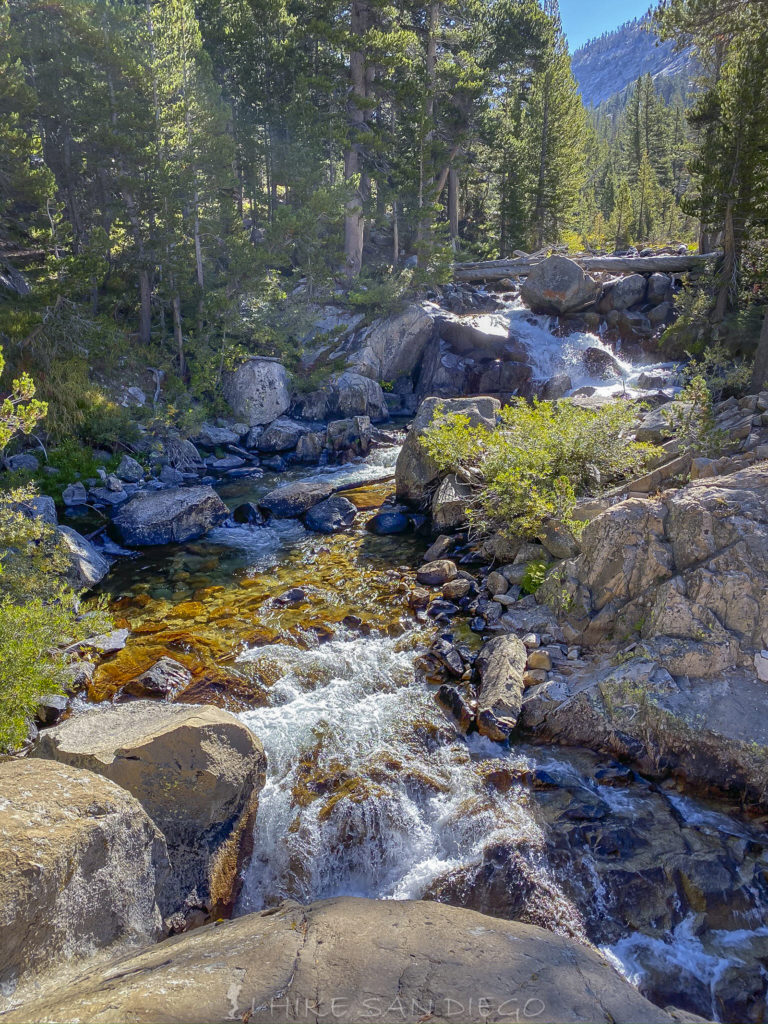
One of the many beautiful waterfalls on Bubbs Creek as we made our way down the Rae Lakes Trail
Landside area on the way down to Junction Meadows were you can see the river had worked its way between the rocks
Changing landscape on our way down to Junction Meadows, dropping from 10k to 8k feet of elevation.
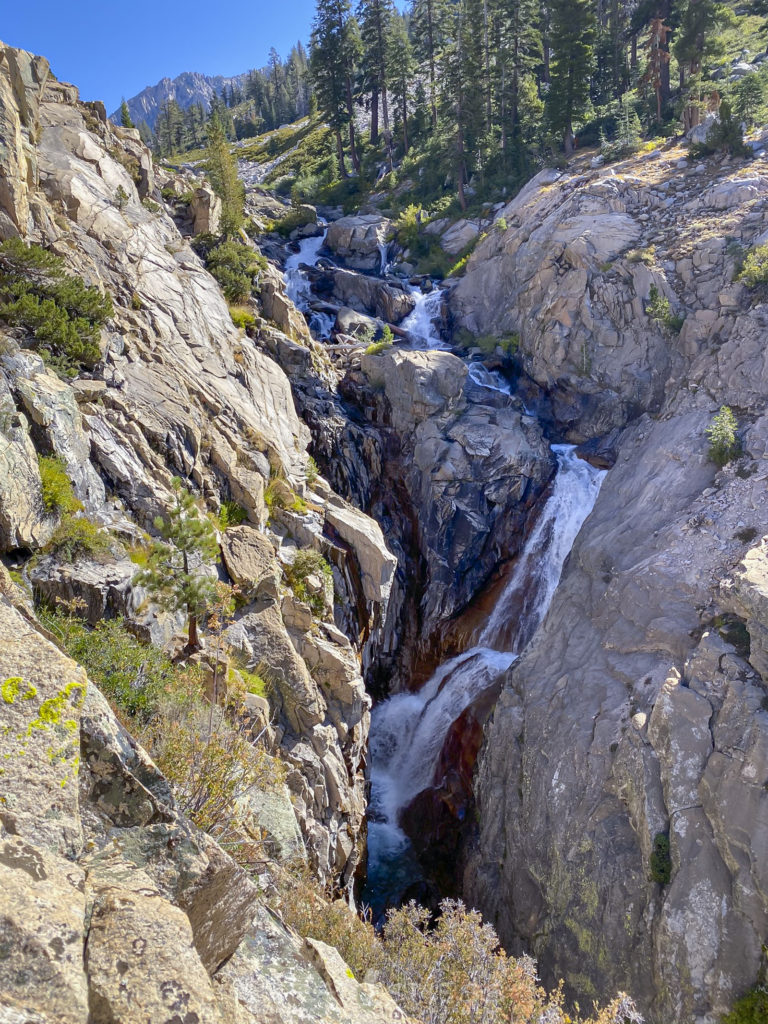
Another beautiful waterfall along Bubbs Creek, this one in a deep gorge.
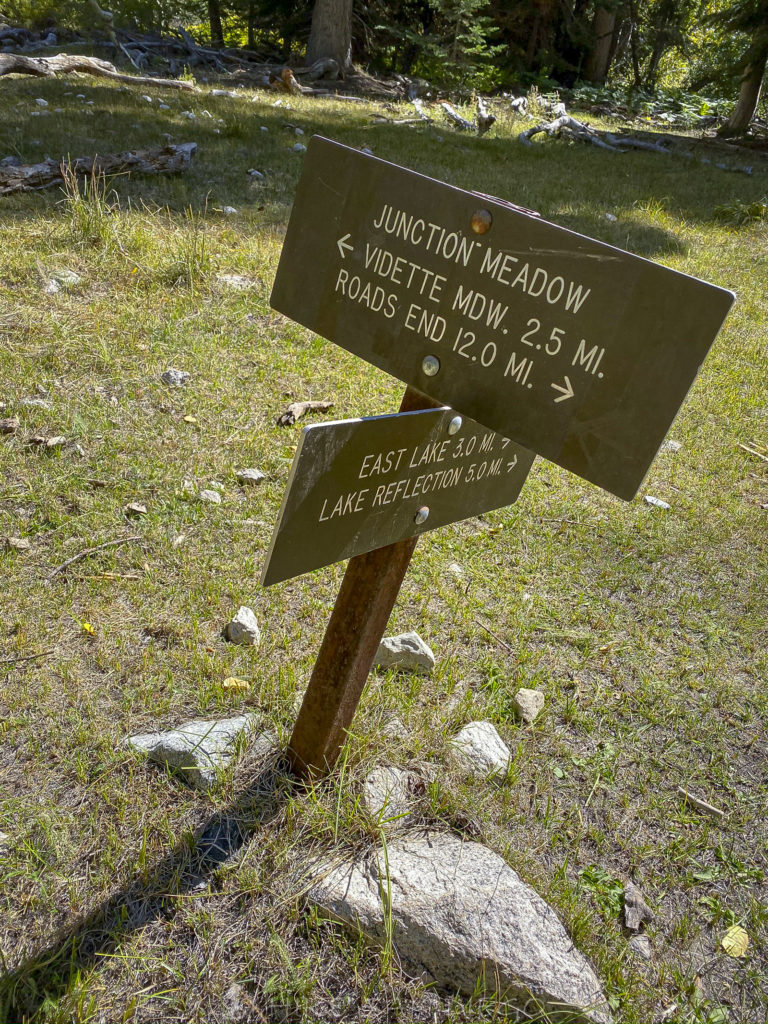
The confusing mileage at the Junction Meadows sign
Even though this was a long section of the trail, being that it was all down hill until you reached the valley floor were you started it went pretty quickly. It was interesting to see the change in enviroments as you made your way down from 10,ooo feet to 5,000. It was great to have the roar of the river as your constant companion as you made your way down the trail. Every time I came acros a waterfall I had to tear myself away in order to get back on the trail. The only other animals we saw on this whole trail ( other then deer and marmots ) were the mule train being lead up the trail that we passed at one point and the rattlesnake that let us know his dissatisfaction with us not long after. The last campsite we came across was at the Sphinx Junction, it looked like a nice area to camp. Before you know it we came into site of the valley were we started the hike and continued heading down the switchbacks until we were on the valley floor. We took a small break just before the last bridge and last 2 miles of the hike to grab a bite to eat, take some weight off our backs and soak our feet in the ice cold river, it helped to numb our feet for the last two miles of the hike. We made it back to our car and drove back to the Cedar Valley Lodge for burgers and beer before we found a campsite for the night.
Another change in the landscape as we make our way down the Rae Lakes Loop along Bubbs Creek

A rattle snake letting us know he was not happy with us
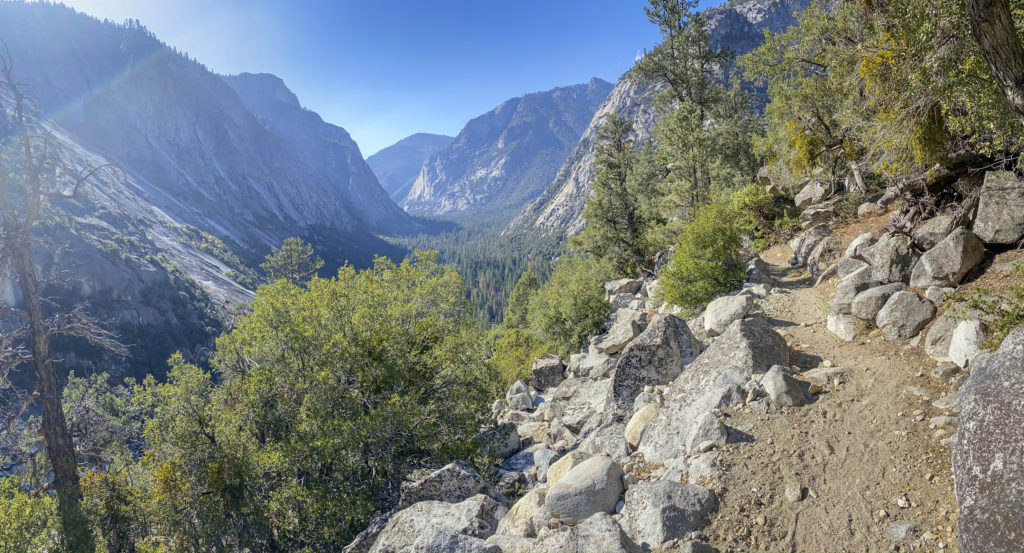
Finally seeing the valley below us
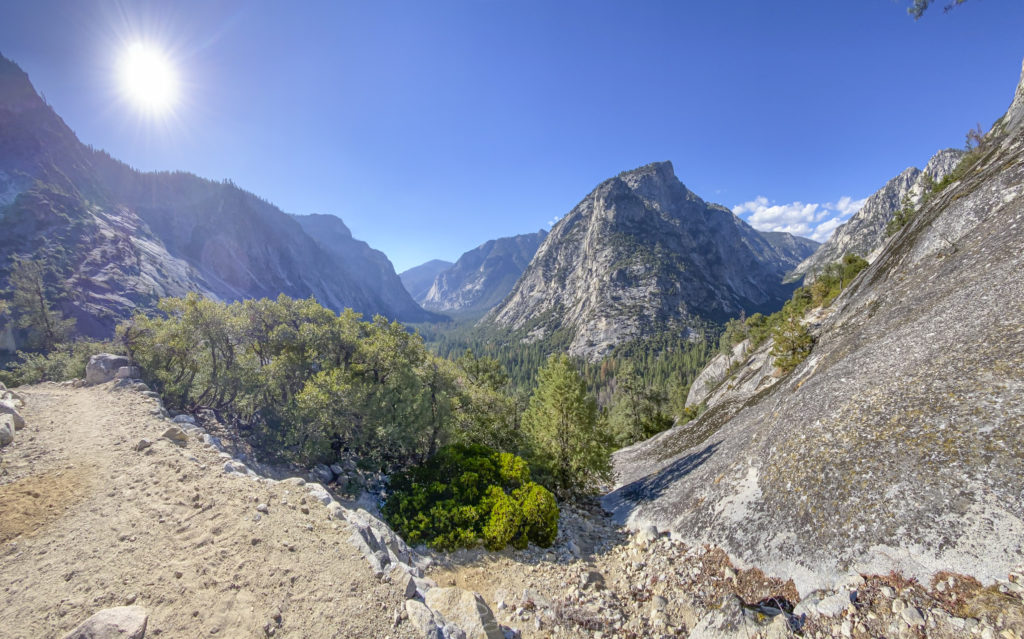
The view of the valley we started the hike in with a view up another valley towards Paradise Valley on the right