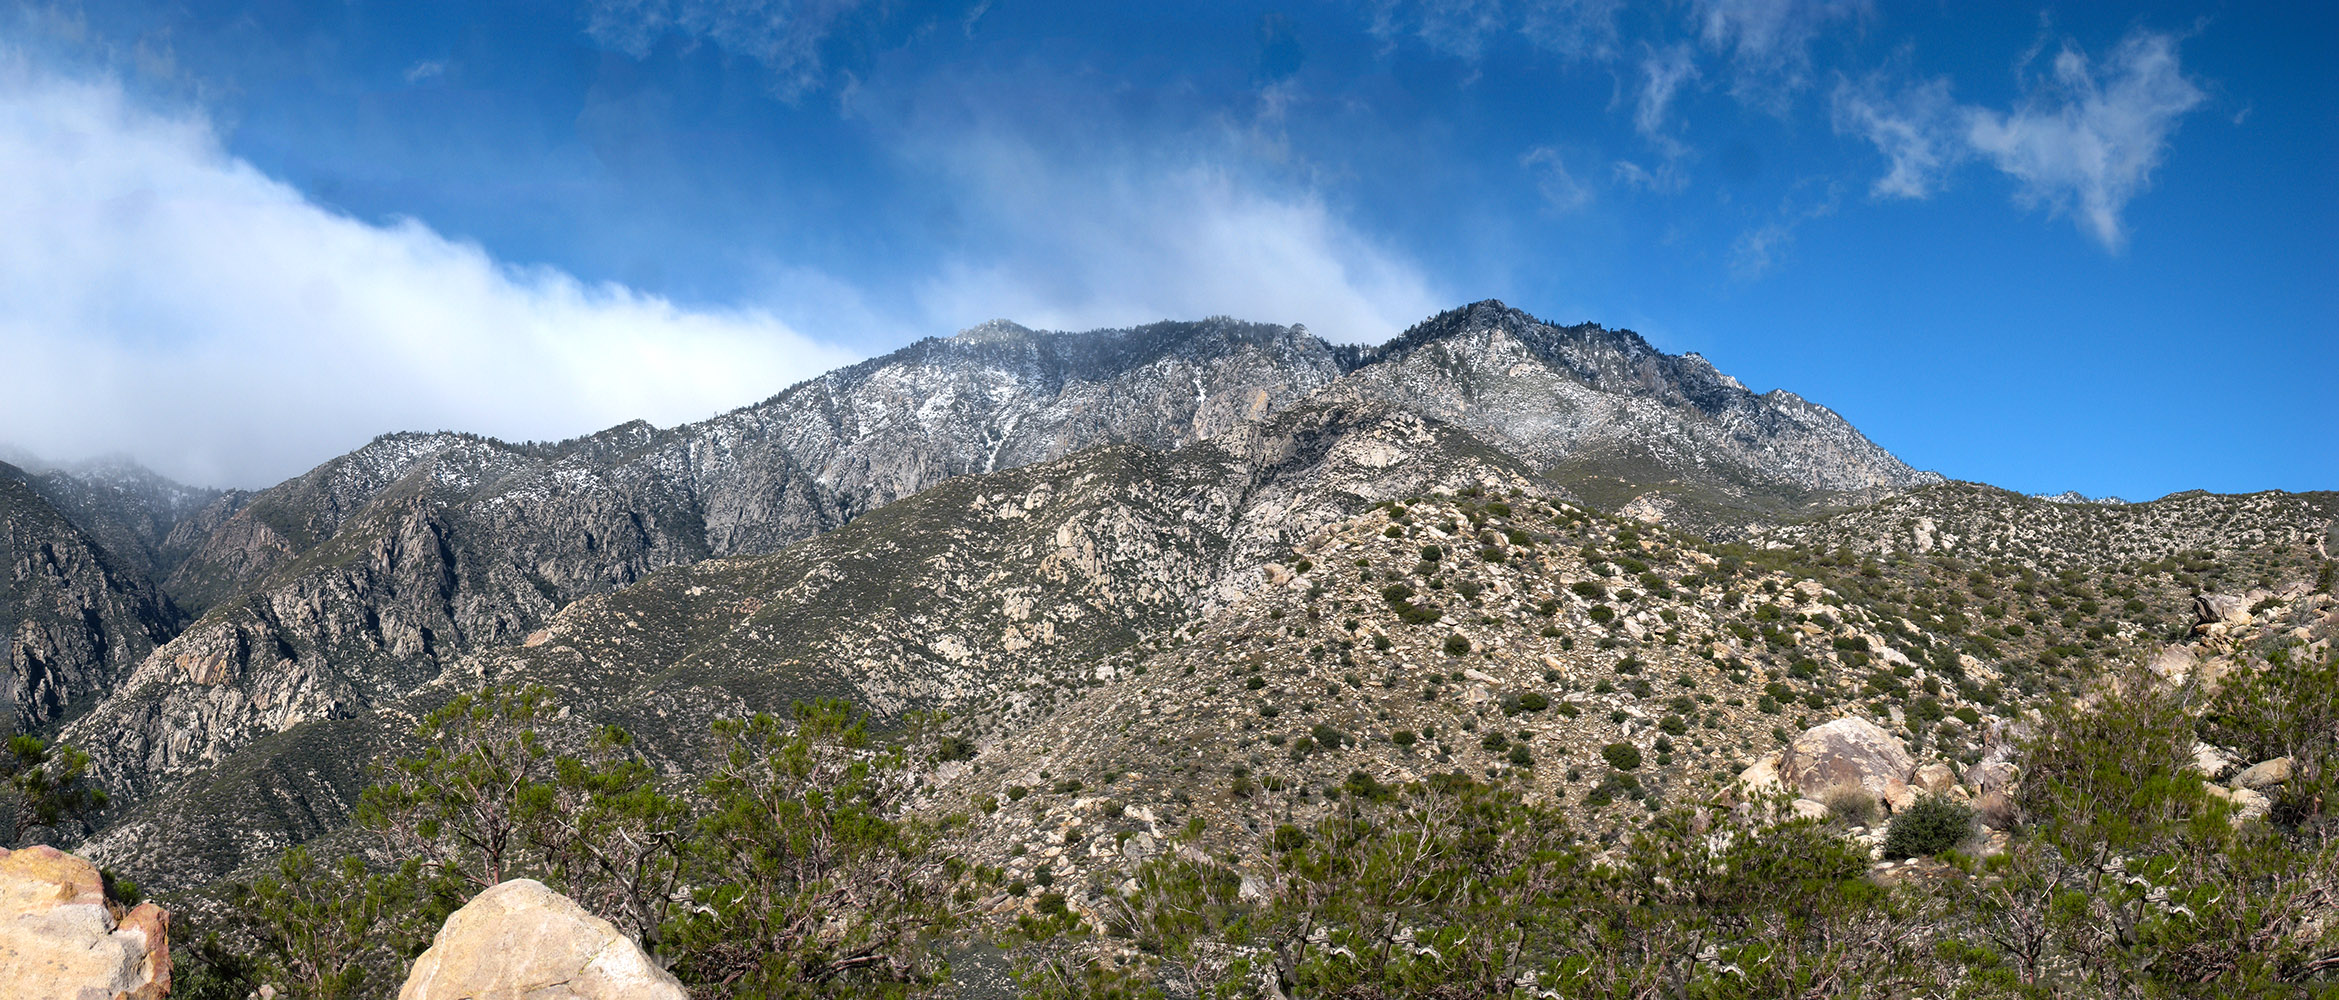
Looking towards the top of the ridge covered in snow
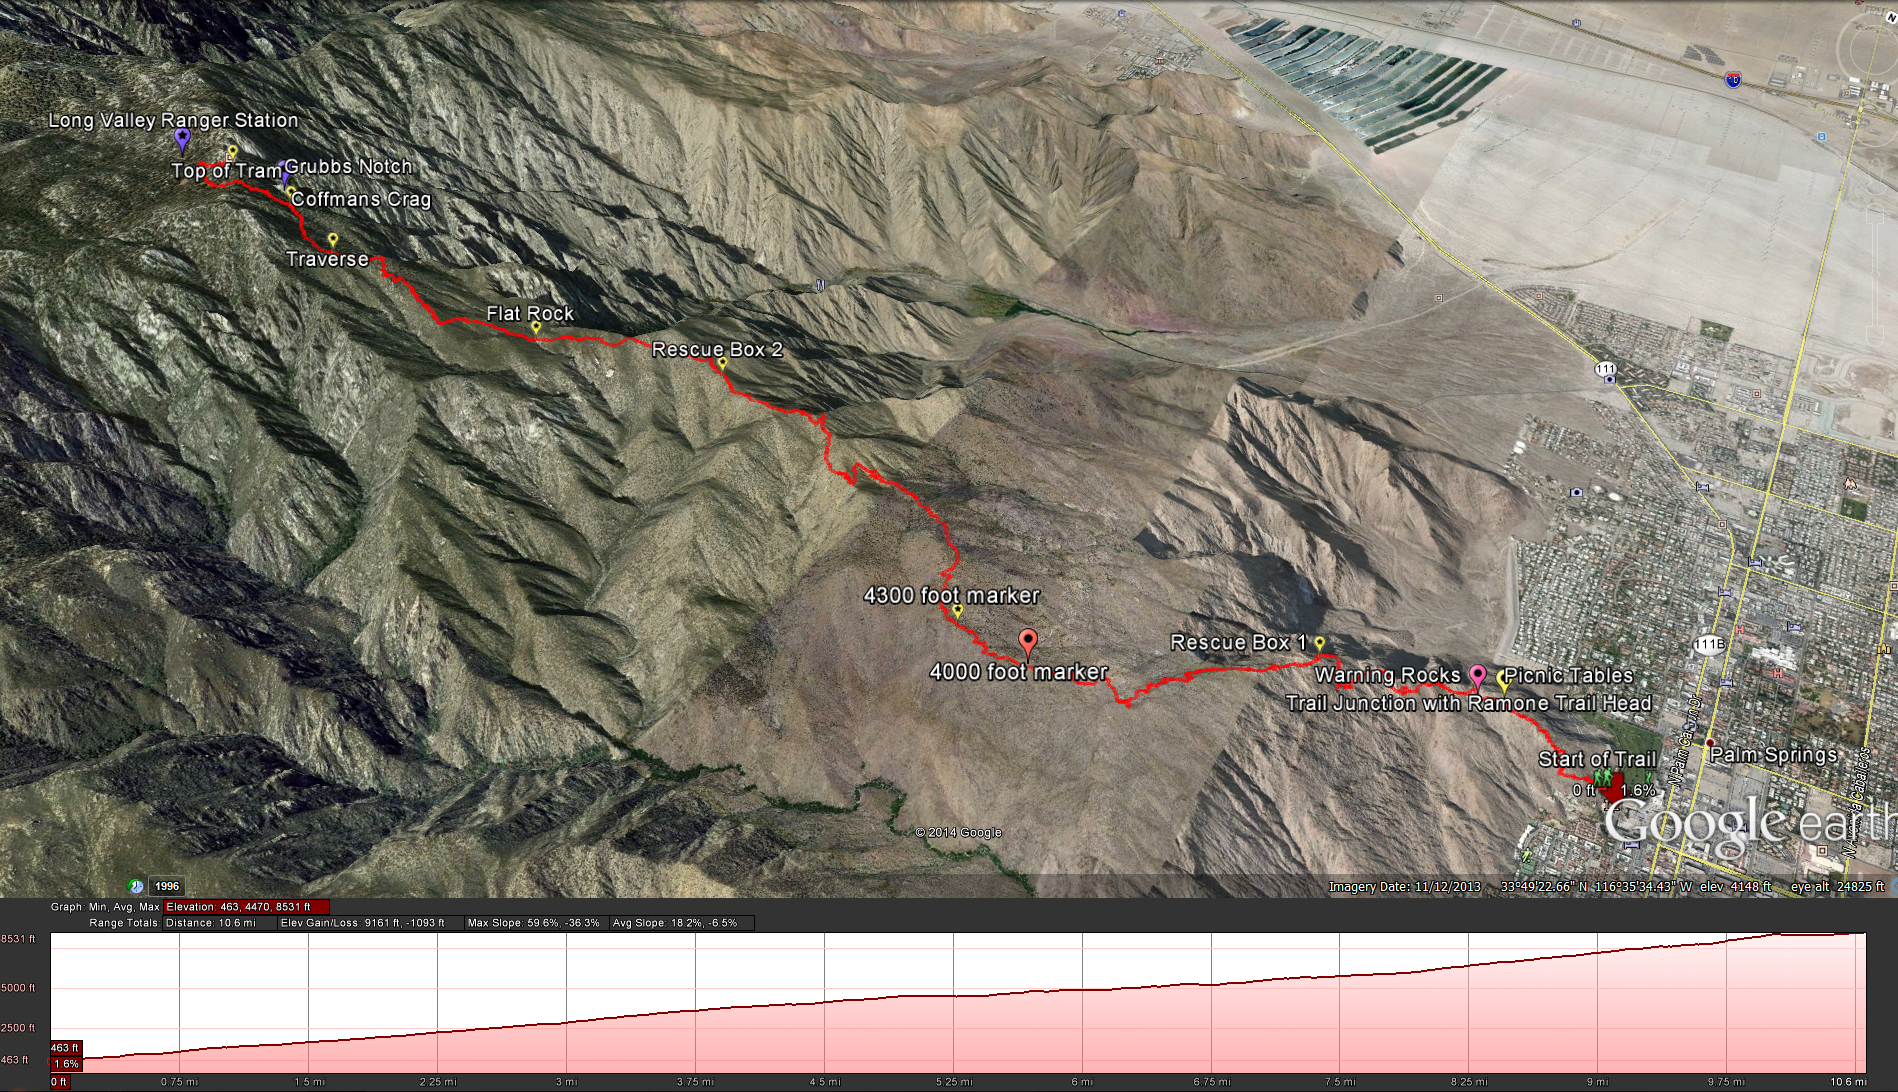
Map of Syline Trail
WARNING: This hike is no joke. Make sure you do your research, know what to expect, the weather forecast, and be properly equipped and in proper shape before attempting this trail. AND FOR GODS SAKE, DON’T TRY THIS HIKE IN THE SUMMER TIME !
Distance: 11 Miles. Elevation Gain: 8,000 feet. Top Elevation of 8,500 Feet. Time to Complete: 6-10 Hours – Depending on fitness levels and environmental conditions.
To Start this hike use one of the following trailheads:
Trailhead #1. Museum Trailhead:
Trailhead #2. Ramon Trailhead:
Cellphone reception: I was using my cellphone to map out the route and take pictures so I was constantly seeing it on the way up and had decent reception all the way to the top, but once you hit the Grubbs Notch forget about it, zero reception. I was able to get reception at the top of the tram, but that was a little spotty as well, good enough for me to call and get a cab to come meet us as the bottom.
Tram: The tram ride down is $12. You can pick up a ticket in the gift shop and they will tell you when the next tram arrives. The last tram leaves the station at 9:45pm. I wouldn’t imagine that most hikers are going to be showing up that late, but if you plan on going on to the top of San Jacinto and completing the Cactus to Clouds hike with the extra 12 miles and 2600 feet of elevation gain, you may want to plan accordingly. When you go into the tram, don’t worry about getting up front, the whole thing rotates as you descend, so that everyone shares in the great views as your legs enjoy the easy ride back to the desert floor. For more information on the tram go to their web site here.
Water: You are going to need a lot of water. I took along 5 liters of water and drank 3.5 liters, I’m a big guy carrying my own 230 lbs up that mountain. My buddy who is probably 40 lbs lighter carried 3-4 liters of water but only consumed about 2.5, but it had just snowed up top and then temperatures where in our favor, we keep on thanking the hiking gods for giving us such a great day to go up, but normally you are going to need all the water you can carry once that heat starts to beat down on you, you won’t start seeing any shade until around 7,000 feet.
Food: Bring food that is going to give you quick sustained energy, and then more importantly make sure you eat it once in a while. The bars and trail mix may help fill you up a little and the are easy to digest, you may want to take some fatty and protein rich foods with you but remember those take time for the body to digest and convert to sugar that you body need right away, so I would limit the amount you eat. Conversely items like energy gu’s may give you some quick energy that you can put to use but if you have a sensitive stomach realize that these items can play havoc on your system not to mention the people hiking behind you ( major gas).
These web sites have some good breakdowns of the hike, what it takes, and other useful information.
Hiking Geek.com This guy has taken the time to really layout this trail with mileage, grades, and average time based on 6, 7, 8, 9, and 10 hour paces. He is a great source of information on this hike.
Hikin Jim’s Blog This guy has a nice write up of starting from the Ramon Road Trailhead, along with some great pictures of the trail on the way up.
Cactus to Clouds Hiking Guide. This web site gives you a great deal of information about everything you need to know about this hike.
To Start this hike from the Museum, park along the street in front of the museum and then head towards the back right parking lot of the museum, you should find the beginning of the trail cut into the back wall with a plaque for the Santa Rosa and San Jacinto National Monument.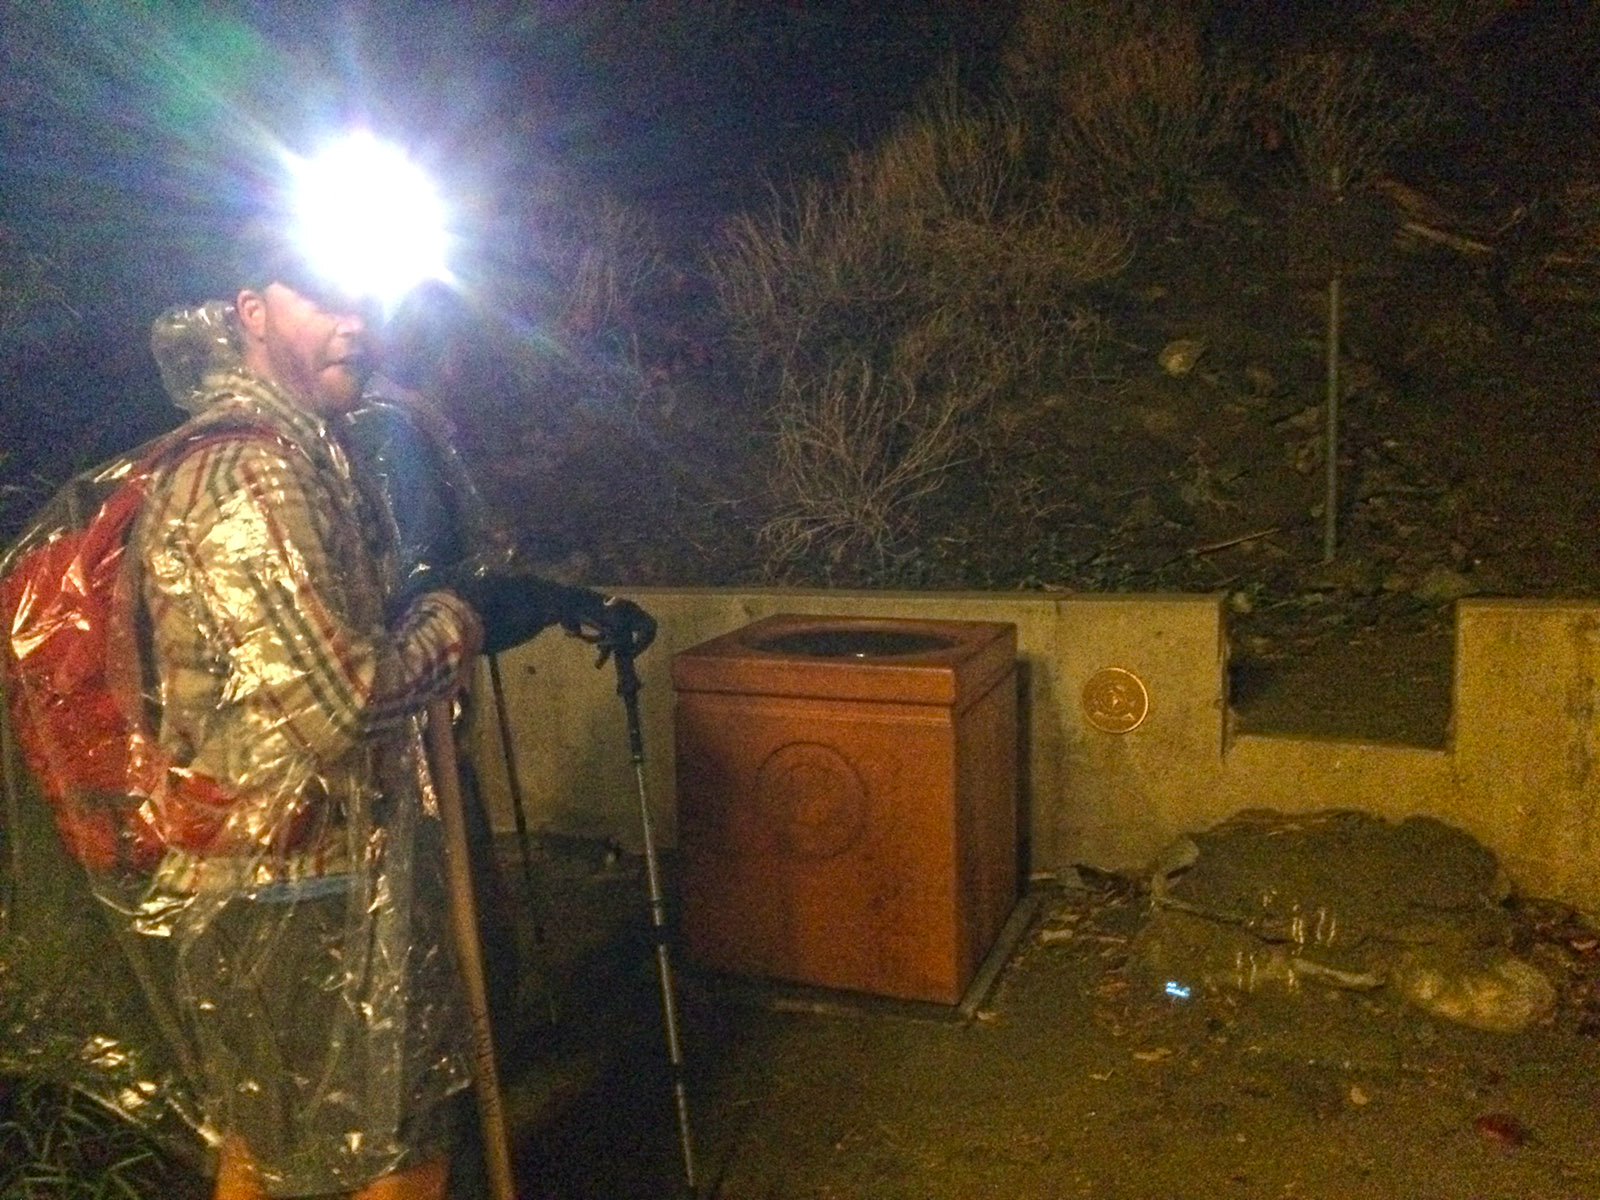 Go though the opening and follow it up the hill past a gate for a private residence. The trail starts off with a nice little grade and every few yards or so you should find a rock somewhere painted with a little white dot to help you keep on the trail, but make sure to really look at the dot and make sure its not bird poop ( that happened a couple of times) and if you lose your way, stop and make sure you are still on the trail, there are a few other trails around this area and you may find yourself on one of the other trails, but rest assured they all end up in the same area. Within about a mile you should see the picnic tables, not to long after that, about .15 miles you should come to the cairn marking the junction of the Ramon Road trail and the Museum Trail with the Skyline Trail, keep heading up hill and you should be fine, just after the junction you should see the warning rock, warning you how long of a journey it is before you can see another supply point for water.
 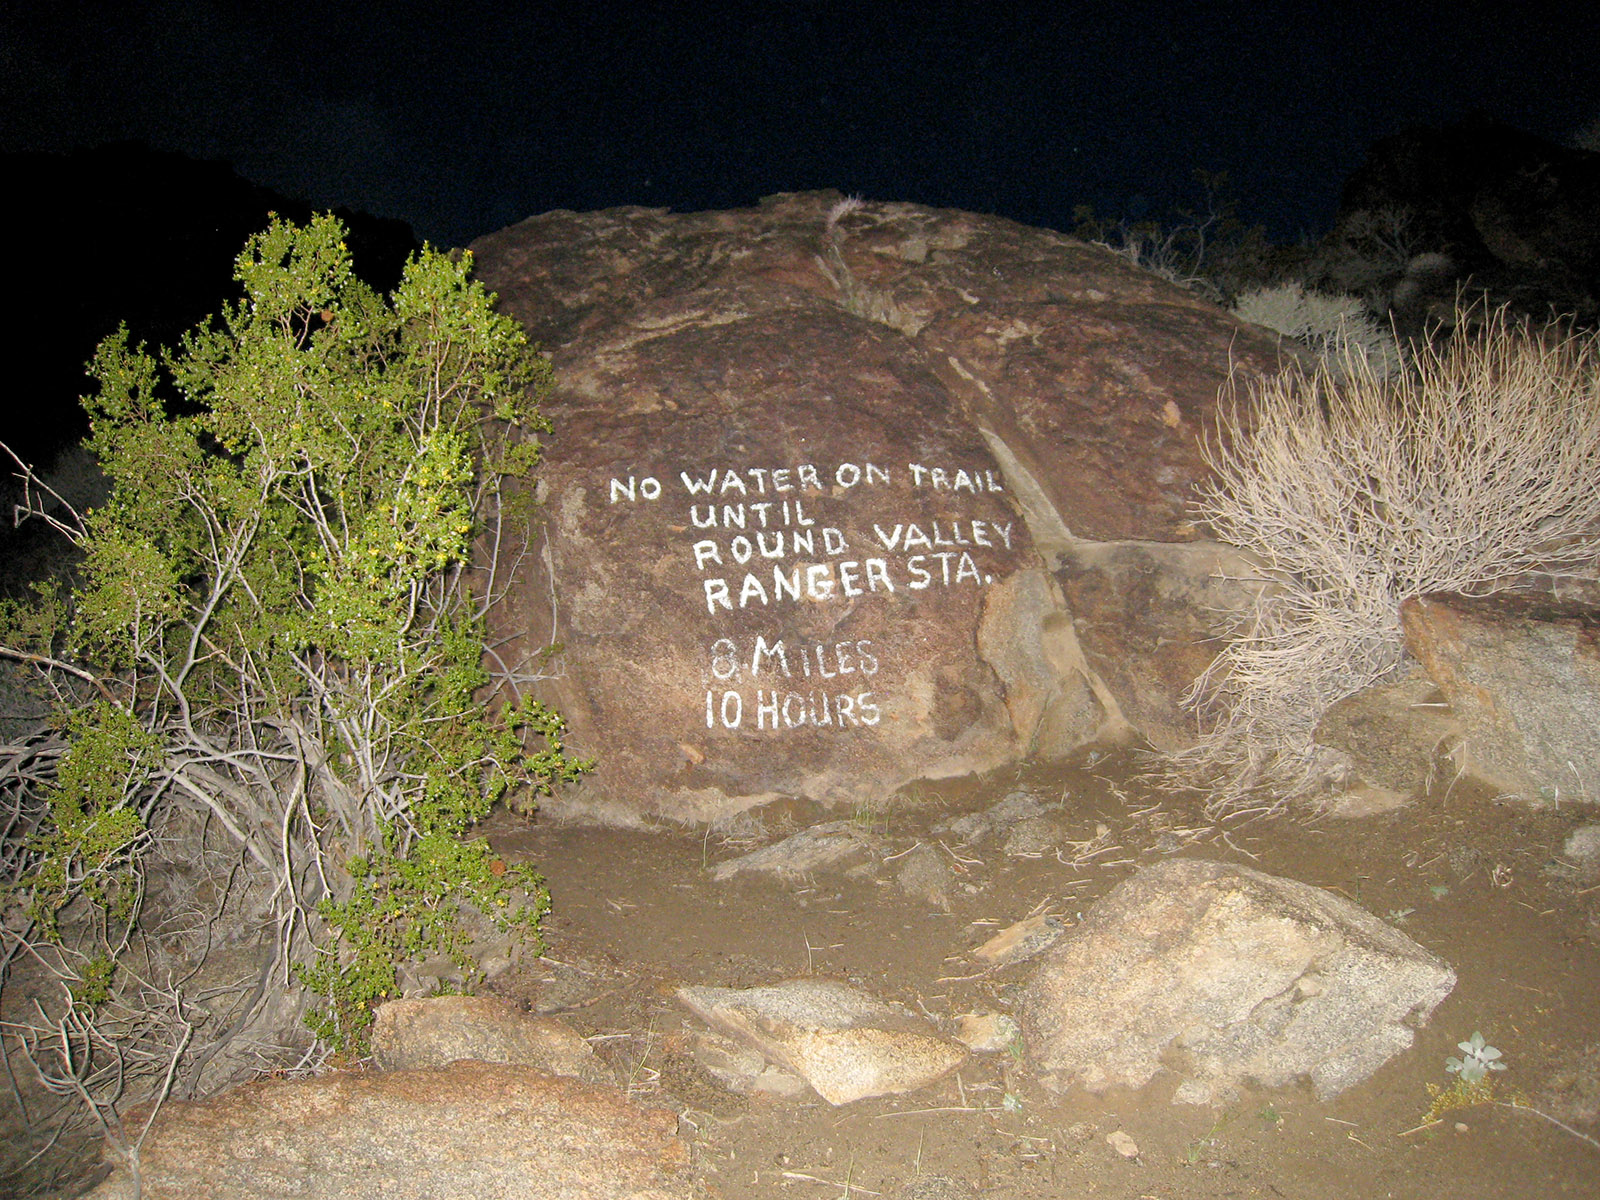 Enjoy the view off the city of Palm Spring below you as the sun rises ( depending on when you start your hike). Around 2500 feet you should see Rescue Box 1,
 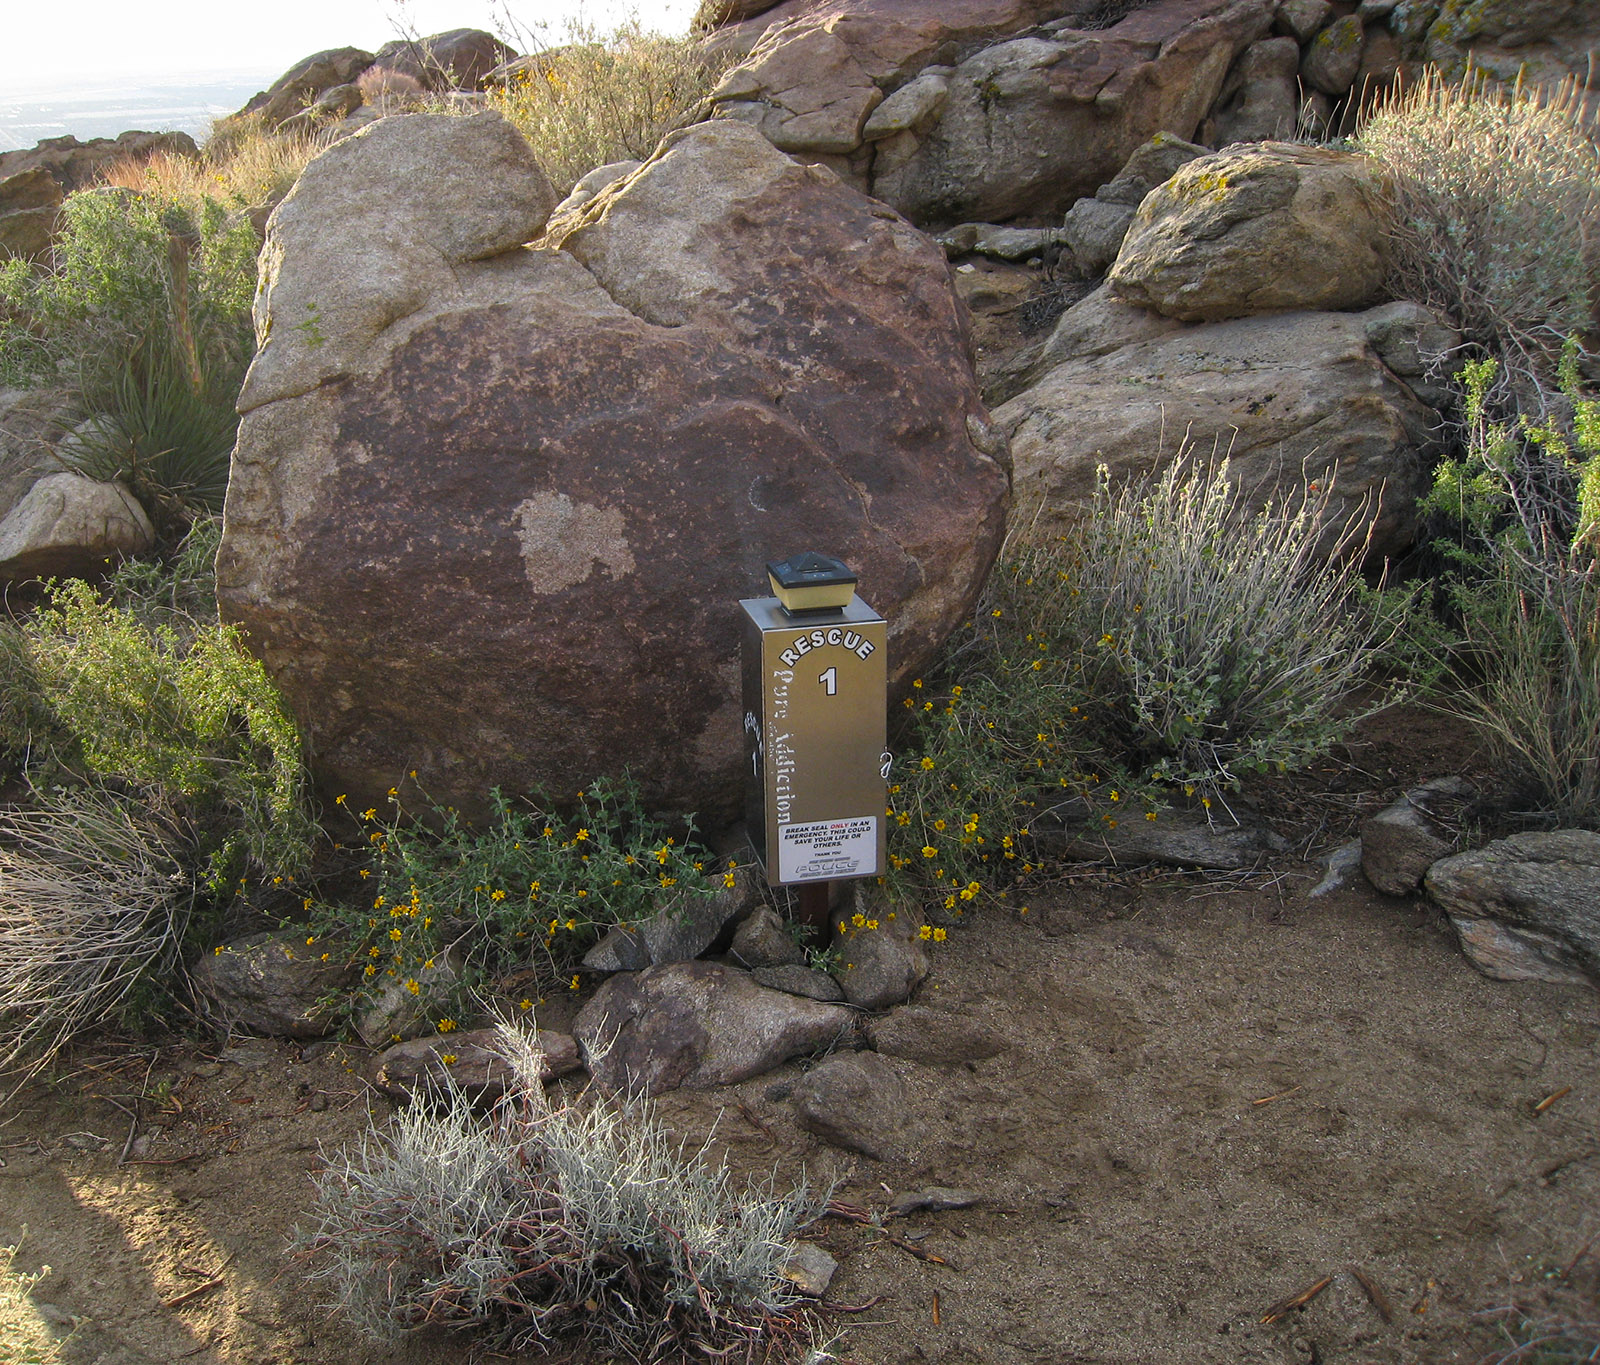 just to assure yourself that your on the right trail. In another 2.2 miles and 1,800 of elevation gain you should come across the 4,300 foot marker made from stones. After that in another 2.25 miles or so and 1,100 feet of elevation gain you should come across the Rescue Box 2. In another .75 miles and 500 feet of elevation gain you should come across Flat Rock. After Flat Rock the terrain starts to climb a little more steeply, you will feel it and won’t get a reprieve for another 1.25 miles until you get to the start of the Traverse. The Traverse last’s for only about .75 miles. While the grade is not as severe as what you just came up, it can be very dangerous in the winter time. We were lucky enough to hit it when there was fresh snow and no ice, this is a good point to put on some microspikes or crampons if the ice is severe enough. After .75 miles you should hit a small clearing before the trail takes a 90 degree turn and heads straight up the hill, this will give you a great view of Coffman’s Crag. Enjoy the view while you can, after Coffman’s Crag, the uphill climb is relentless, it may be only .35 miles more but this last part of the climb takes it out of you. You know that salvation is within your grasp when you can start seeing blue sky through the trees above you, then you finally come out onto the top. Follow the trail to the right and head over to the tram, grab a beer, lick your wounds, and tell war stories with your buddies about the trail. When you are finally ready to head down , buy a 1 way ticket from the gift shop, and either call a cab to come meet you at the bottom ( our arrived within 10 minutes of us getting to the bottom, even though the dispatcher said it would be over an hour wait) or ask the attendant if he or she could call you a cab ( they will do this for you, unfortunately their phones where down so I ended up using the number she was trying to call and calling on my cell phone). Make sure you call from the top, your phone will not get any reception in the valley once you go down the tram.
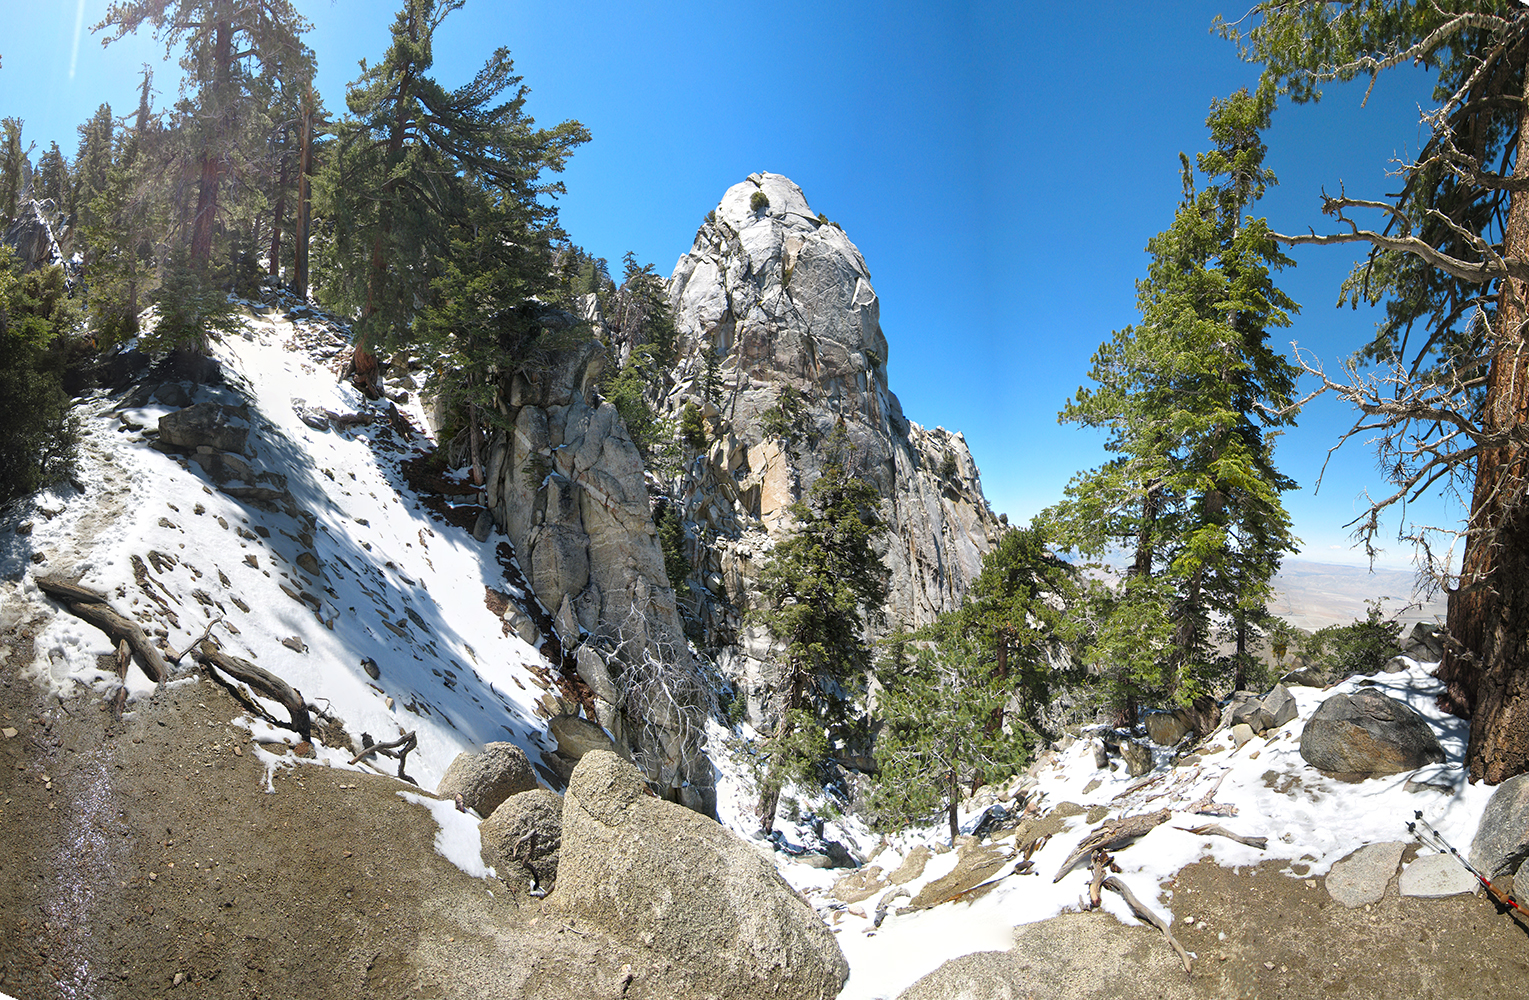
Weather forecast for the hike:
National Weather Service for The Base of the Hike: Palm Springs
National Weather Service for The top of the Tram, around 8500 feet.


